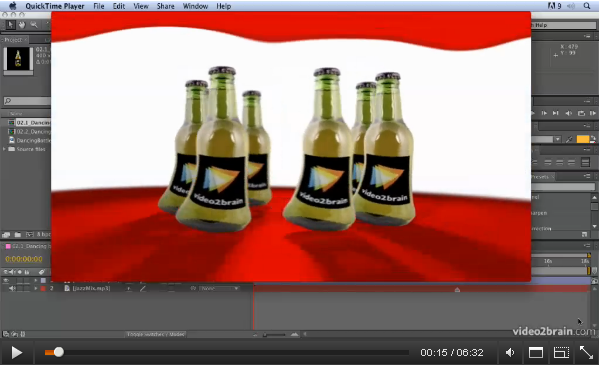
Welcome to this week’s Tip of the Week feature in a brand new video format. After Effects has great tools for character animation called the Puppet tool. The Puppet Pin tool places a mesh over your footage using the alpha channel. You can add points to this mesh that allow to distort it and animate it, using gestural animation with your pen or mouse. This provides some really natural movement for your animations and motion graphics projects. You’ll see an example of what can be done with the Puppet tools in this video.
Access the entire library of video2brain training via this amazing Training via Subscription Promo and you can have all the video training you’ll ever need for as little as 35 cents a day – that’s even cheaper than a bottle of water!
Before now if you wanted to access my training, you could buy individual workshops from my store or the video2brain store. You can still do that but if you prefer you can subscribe to video2brain for as little as $10.75 per month (Annual Subscription).
As you may know I create all my video training workshops with video2brain. In my previous post I talked a bit about why I work with them, here I’d like to explain a bit about the brand new subscription options for accessing the training.
With a video2brain training subscription, not only will you get access to all of my workshops but also all the other titles, by other authors that video2brain has to offer. Here are a few more compelling reasons:
Get complete access to an extensive training library: video2brain training subscriptions give you easy, affordable, unrestricted access to the full range of video2brain courses – a library with more than 130 courses, and nearly 500 hours of training, and over 5,600 lessons. With access to the entire library, you can watch lessons from dozens of trainers and get a wide variety of perspectives and approaches to rich topics.
Stay up to date: Today’s knowledge may be outdated tomorrow. The video2brain library will be updated several times a month, and all new courses will be included in our subscriptions as they’re released. In addition to covering current technologies,the video2brain library will offer courses on some upcoming software releases and technologies, helping you stay ahead of the curve.
Enjoy an exceptional value: As individual products, the courses in the video2brain training library have a value of well over $4,000. With a video2brain training subscription, you get unlimited access to all the videos in the library for the duration of your subscription at a fraction of the cost.
Benefit from introductory pricing: We’re launching the library with low, introductory pricing, and we’re thanking early adopters with a three-year price guarantee, to ensure that you can enjoy that benefit in the years ahead.
Experience world-class training: video2brain has been creating video training for nearly 10 years. Our library offers world-class training from a team of some of the best trainers in the business. Our authors are not only top experts in their fields and working artists, photographers, designers, and programmers, but just as importantly, they’re skilled and passionate instructors. All video2brain courses undergo rigorous quality assurance, and are presented in our easy-to-use, feature-rich interface. And we’re committed to continuously improving your learning experience by adding new features throughout the year.
Learn anywhere, anytime you want: Your video2brain subscription lets you access the library anytime you’re online, and even from different computers. Our unique Platinum subscription includes the option to download courses for offline use. It makes no difference whether you’re at work, at home, or traveling. And all titles in our library work equally well on your Mac, Windows, or even Linux computer, as well as on popular tablets, including the iPad and iPad 2.
Go at your own pace: One of the fundamental advantages of video training over other approaches to learning is its flexibility. You can watch a whole course or just the lessons that interest you. And when you need a break, just click Pause and come back when you’re ready.
Scale our training to suit your needs: video2brain subscriptions are available in multiuser licenses too, making it easy for your organization to find the solution that fits your needs and budget.
Invest your technology budget wisely: The comprehensive video2brain training library lets you learn about new applications and new releases before you invest in expensive software. Our authors give you concrete advice on what these programs can and can’t do and how they might fit into your workflow, so you can make informed decisions and invest where it counts.
Explore new areas: Even if you sign up to enjoy our courses on topics like digital imaging, design and video editing, your learning doesn’t have to stop there. The video2brain library includes workshops on making eBooks, mastering green screen techniques, the art of craft photography, kinetic typography, and Facebook, iOS, and Android application development, and more! And your subscription gives you the freedom to explore any areas that interest you, grow in new directions, and reap the benefits of new and upgraded skills – without spending another penny!
Learning is a lifelong adventure. I and the team at video2brain would love to help you make the most of it.
There was a a question today on Creative Cow about how to create a light wipe effect in After Effects. I wanted to help so I decided to put together a quick After Effects Light Wipe tutorial. This tutorial includes an After Effects project and an eight-minute video tutorial where I explain techniques used.
Here’s the original question from Danielle Masek;
Q: I have a vector object (some wings) which is black right now, and I would like a light ray to start bursting through the center, change to a vertical line “ray” and move both right and left concurrently, revealing the wings; however, the wings won’t now be all made up of light, instead the light rays will reveal the wings’ outline, which will now be outlined in a backlit glow. I hope I’m explaining this clearly.Will I need trapcode for this? Something else?
A: Here’s a little movie that will help you and others I hope. You’ll also find the project files to follow along Wings reveal.aep.
– a typography video-training workshop on the principles of designing text.
I’ve just finished recording my latest workshop with the fantastic team at video2brain. It’s a workshop with a difference.
If you want the salient points delivered to you quickly so you can get on with your work, this product is perfect for you. It’s a series of short videos that form an educational and enjoyable workshop that you can sit back and enjoy – imbibing my knowledge as you go!
It’s based upon the Typography chapter from my book, Design Essentials for the Motion Media Artist. Not everyone likes to read books or needs the level of detail covered in Design Essentials so this provides an alternative.
It provides a quick-reference guide in the format of a video presentation. All the essential key principles of Typography that every designer needs are covered. And it won’t bog you down with too much detail (that’s what the book is for right?) it’s fast-paced and illustrated throughout with helpful animated diagrams and examples of work.
Learn about the history and anatomy of type as well as the terminology used to describe the components of text. Discover the difference between typefaces and fonts, glyphs and characters, serifs and sans serifs, kerning and tracking, leading and baseline shift. Find out when and why you would use specific fonts based on aesthetics, cultural associations and characteristics.
This workshop expands on the content of the book with additional software exercises to improve your typographic software skills. You’ll learn how to apply the principles of typography in practical ways to graphic design projects. Software exercises will show you how Adobe’s Character and Paragraph panels can help make the most of your text, creating unique and exciting effects.
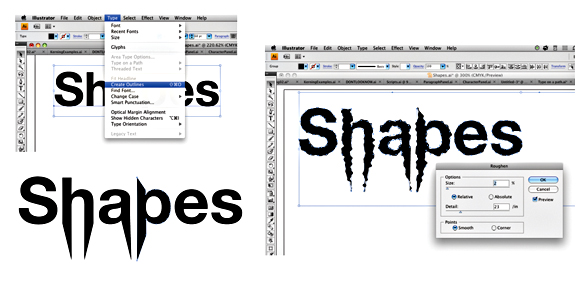
I’ll also teach you lots of neat tricks like animating text along paths in After Effects and making text write on the screen. In Illustrator we’ll use operators to customize lettering, giving it a hand drawn look,. We’ll create 3D Text in Photoshop and add Layer Styles to brighten up our graphic designs. In InDesign you’ll make the most of its powerful Open Type features such as ligatures, glyphs and other special characters.
With this comprehensive typography video training workshop you can simply sit back and watch as I present the principles for you. If you feel like following along, all the exercise files are provided. The videos are short and easily digested and you won’t get bogged down with technical jargon as I explain difficult concepts using easy-to-understand, real-world terminology.
If you’d like to be notifies when this title becomes available please click on this link.
I’m pleased to announce the release last week of the new Wacom Masterclass series of workshops. I’ve worked with Wacom tablets for years and love the creative flexibility they provide to my work. In these tutorials I share some of the techniques I’ve learned over the years.
If you want to check out some free lessons from these workshops please use the highlighted links listed below. Subscribers to my newsletter qualify for a 20% discount on this course through to the end of December. You can sign up for my newsletter here.
Join Angie Taylor and Steve Caplin for this multifaceted collection that includes a basic course covering the tablet’s tools and settings as well as lessons on beauty retouching, optimizing your architectural and landscape images, and image retouching with Photoshop’s healing and cloning tools. You’ll also get crash courses on Adobe Photoshop Lightroom and Apple Aperture, designed to get you working right away. Each class features lessons with picture-in-picture live footage of the artist working with their pen and tablet, enabling you to see and learn from their techniques up close.
Join Angie Taylor, Daniel Lieske, and Uli Staiger for this information-rich collection that includes a basic course covering the tablet’s tools and settings as well as lessons on drawing and painting in Photoshop, photo illustration, and drawing in Illustrator. You’ll also get a crash course on Painter, designed to get you working right away. Each class features lessons with picture-in-picture live footage of the artist working with their pen and tablet, enabling you to see and learn from their techniques up close.
Join Angie Taylor, Uli Staiger, and Daniel Lieske for this unique collection that includes a basic course covering the tablet’s tools and settings, an extensive video tutorial on motion design with After Effects, and crash courses on 3D with Photoshop, SketchBook Pro, and ZBrush, designed to get you working right away. Each class features lessons with picture-in-picture live footage of the artist working with their pen and tablet, enabling you to see and learn from their techniques up close.
This exceptional value includes all of Volumes 1–3 of the Wacom MasterClass collection, including lessons from artists Angie Taylor, Steve Caplin, Daniel Lieske, and Uli Staiger. In addition to a basic course covering the tablet’s tools and settings, you get training on everything from beauty retouching and painting in Photoshop to drawing in Illustrator and motion design with After Effects. The package also includes crash courses on Adobe Photoshop Lightroom, Aperture, Painter, SketchBook Pro, ZBrush, and 3D with Photoshop, all designed to get you working right away. Each class features lessons with picture-in-picture live footage of the artist working with their pen and tablet, enabling you to see and learn from their techniques up close.
I’ve created some special little Halloween Software Tricks and Treats for you to use in your work. This download contains an After Effects CS5 project and artwork needed to create some spooky Halloween graphics for your projects.
Pumpkin Particles falling
I love creating ideas and techniques for the community. In fact I’d love to dedicate more time to creating ideas, tips and tricks for you and make it a full-time venture. However these things take quite a long time to produce so I’m currently trying to fit these in-between paid freelance jobs.
I’ve been trying to figure out ways to make this pay without having to charge people a fixed price for these. I’d also like to avoid having advertising on my site to earn income. So, as an experiment, I’ve included a free download link to the project files and a Donate button. I’d dearly love to prove that a business model, where people volunteer to pay what they think something is worth can work.
If you find these presets useful and would like to support this risky venture please donate what you can afford, even $1 would make a difference and would be gratefully appreciated. This will help me dedicate more time to this project and continue to improve the website’s offerings. Thank you!
These designs use the Trapcode Suite of plug-ins and Magic Bullet Looks. If you don’t own these plugins you can download free trials here from the Red Giant website
In the future I intend to provide privileges and special offers to those who contribute to this project.
Thanks so much for your support!
I’ve just uploaded a new preset to Red Giant People. It’s my first foray into creating presets and projects as opposed to tutorials. If they prove popular I’ll create more for Halloween! I’m also going to be creating some presets for Genarts FX Central so keep and eye out for those before Christmas! I love coming up with ideas so if you have anything you’d like to see please feel free to contact me via the comments page.
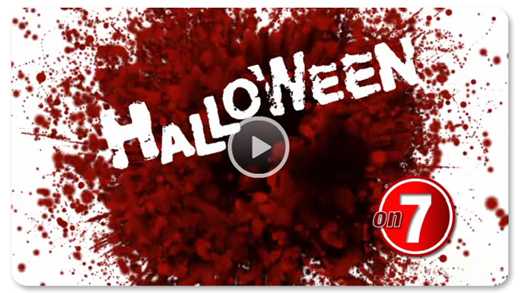
This preset features a complete After Effects Project containing a graphic design idea for a TV Ident. It features a graphic, stylised blood splat made with Trapcode Particular. The blood particles use a light emmitter and bounce against a layer used as a Wall. The blood “bleeds” around the text to reveal it and then another text layer animated on along a lower third strip with Logo.
I recently published my Kinetic Typography Techniques for After Effects course. In it I used a wide selection of fonts that are freely downloadable from various websites, just to make sure everyone following the tutorial could get access to the same fonts.
Unfortunately one of the websites I recommended is no longer in operation. Below I’ve providing alternative links to all of the fonts used in these workshops. I cannot guarantee that these links will always be maintained as they are from third-party sites so I’ve also included the font names so that you can search for them using your favourite search engine, should the links expire.
When downloading these shareware fonts please take a few minutes to click on the Donate button for each of them. Even if you only donate $5 it will help make sure that these hard-working font designers get rewarded for providing us all with very low priced fonts to experiment with. This is particularly important if you are going to be using any of the fonts in paid work. It’s good karma and will make you feel good that you’re helping out a fellow designer!
If you’re interested in understanding more about the financial struggles that all designers are facing, please check out this entertaining graph by Jessica Hische which determines whether a designer should work for free! Jessica is a font designer and letterer who campaigns for fair pricing for fonts and other design work.
The fonts presented here are their authors’ property. They are either freeware, shareware, demo versions or public domain. The licence is usually positioned near the download button but please check the readme-files in the zipped packages or check the author’s website for details. You can contact him/her if in doubt. If no author/licence is indicated it means that information is not available. It doesn’t mean it’s free, it is your own responsibility to find out more if you want to use it commercially.
I was asked to create a workshop on Kinetic Typography techniques for Adobe After Effects by several people including the lovely people from video2brain who produced this epic workshop for me. I’d like to thank them all for their patience and professionalism throughout this long project!
I’m pleased to say that I have finally finished this epic workshop. It was originally planned as a one-hour tutorial but has developed into a full-on, eight-hour workshop covering all sorts of weird and wonderful techniques.
I started off by covering essential kinetic typography techniques such as automatically creating text layers by importing content from a text file – using Variables and Data Sets in Photoshop and Scripts in After Effects. I demonstrated how to format text, making use of typographic controls like Kerning and Baseline Shift to get creative with negative space. In the latter stages I applied some of the free Animation Presets, created and adapted complex text animators to help you understand how to control them.
"That Day" Music by Richard Walker
While creating this piece I just couldn’t help but get creative and I slightly strayed away from the task in hand. As a result this workshop also includes techniques you may not immediately associate with traditional kinetic typography. In the included lessons we have fun animating and lighting layers in 3D space. We recreate an animated version of the Sgt. Pepper album cover using After Effects’ vector Shape Layers.
Welcome VideoIntroduction to Kinetic Typography
We even recreate an ancient stone circle from 3D text layers! You’ll also learn techniques for creating your own backgrounds, aged-film and dust and scratches effects by combining some of the built-in After Effects filters. Of course I also cover popular, requested techniques like animating handwriting on screen.
I use typography in my every-day work as a motion graphic designer but the artform of kinetic typography is different. The purpose of text in motion graphic design is to deliver a message. Generally, the text needs to be legible and on screen for long enough for the viewer to read and there are several other “rules” that are sensible to apply to motion graphic design. Kinetic typography as an artform kicks those rules into touch.
Editing and Looping AudioVariables and Data Sets in Photoshop
My understanding of kinetic typography is that the words should be used to convey moods or feelings, they don’t need to be the message, they are just there to support it. My feeling is that the words should echo the spoken words rather than simply repeat what’s being said.
In my interpretation of Richard Walkers “That Day” (a poem set to music) I wanted to portray what I took personally from the piece. I understood it to be about the dissatisfaction we have with the present moment and how we avoid enjoying it by always thinking about the past or the future. This avoidance leads to confusion, frustration and general unsettled feelings.
In this workshop you get all my project files along with my creative musings about how these ideas developed. I hope that you can enjoy working on some of my own files and diving into my own personal creative project. Here are some sample movies from the workshop to give you an idea about what you can learn.
In this week’s newsletter I’ll be giving away a complete workshop about using the Stereoscopic 3D workflow in After Effects CS5.5 (offer ends 26/09/11). That’s four chapters – a total of 16 training movies absolutely free to subscribers of my software tips and tricks newsletter. Sign up today to make sure you don’t miss out. The lovely people at video2brain have created this workshop for me if full, fabulous HD quality for your viewing pleasure. You can find out more about their high quality productions here. Any the wonderful team at Artbeats have donated some fantastic Stereo 3D footage absolutely free so you can build this opening title graphic sequence is glorious Stereoscopic 3D.
In the “Introducing Stero 3D” chapter you’ll find out what stereoscopy is, why those funny glasses are used to view S3D and how After Effects re-creates the illusion of depth for 3D broadcasts.
In the “Faking 3D tracking” chapter you’ll discover how to combine 3d animated elements with Stereo 3D video footage from Artbeats.com. I’ll show you how to track the footage in 2D and then “fake” 3D tracking by cleverly combining the tracking data with additional 3D animation. Once the shot is designed you’ll add 3D cameras and lights that will help the text combine well within the shot and and add effects to bring it all together.
In Effects, Transparency and Style chapter we’ll add effects, blend modes, and layer styles to the graphic elements so that they appear to blend into the shot.
Finally in the Stereoscopic 3D workflow chapter you’ll build a Stereo 3D rig that automates the comp structure required to create an anaglyphic image for 3D broadcast. We’ll look at the effects you can use to adjust the settings so that they are just right for your individual needs. We’ll also look at ways of adding even more depth and realism to the scene with Depth of Field and Motion Blur effects.
Artbeats, your source for royalty-free stock footage, is offering everyone a free HD clip from their new Stereoscopic 3D (S3D) library. If you’ve been wanting to try your hand at working in 3D motion, this free download is the perfect opportunity to test it out.
For those of you who are not ready for 3D, you can download the same clip in 2D for use in your everyday high def projects.
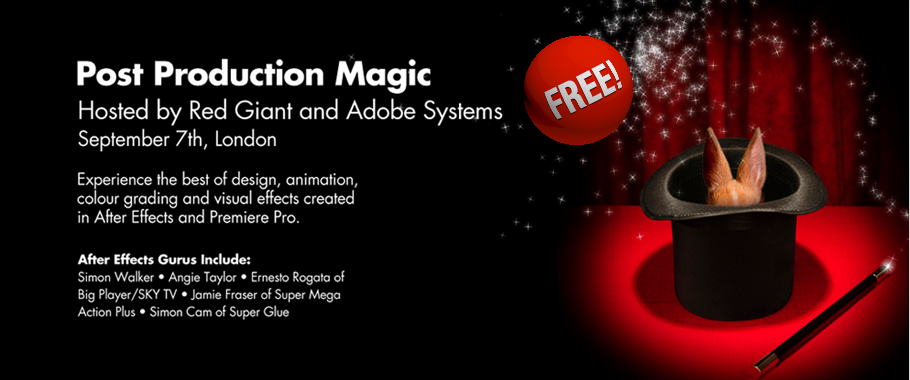
When a group of amazing animators get hold of a projection system, you’re either going to get an evening of inspiration or a cheeky light bulb joke. Post Production Magic is your event for awe-inspiring work by After Effects gurus Angie Taylor, Simon Cam of SuperGlue, Ernesto Rogata of BSkyB and colourist and trainer Simon Walker.
These artists show you how popular Red Giant tools like Magic Bullet Suite and Trapcode Particular and Trapcode Form open up big creativity on a small budget. Experience the best of design, animation, colour grading and visual effects created in After Effects and Premiere Pro, along with a networking and cocktail hour. Hosted by Red Giant and co-hosted by Adobe Systems, the event will be streamed live by Adobe and held at state-of-the-art Ravensbourne University in London (www.rave.ac.uk).
In her session Angie will share tips and tricks for creating cool and quirky motion graphics in Adobe After Effects and will show how she uses Red Giant Looks, Particular, and other Red Giant effects to give her animations a more distinctive style and pull her compositions together.
Angie Taylor is an art director, motion graphic designer and author. She enjoyed a fourteen year career producing animation, visual effects and motion graphics for television, film, video and the web. During her career Angie worked with D-Fuse designing animation for cutting-edge Beck DVD ‘Guero’ and provided animation for the controversial Aphex Twin / Chris Cunningham collaboration ‘Rubber Johnny’. She also provided visual effects on the John Williams-directed “Hibernation”, winner of six awards at international film festivals, including ‘best short’ award at the 2005 Manhattan, Rhode Island, Edinburgh and Zagreb Film festivals. Examples of her work were regularly broadcast on the BBC and Channel 4 in the UK and across Europe.Angie also works in the software industry as a software specialist, regularly touring with companies including Adobe and Apple. Angie delivers software demonstrations and seminars on digital filmmaking and animation processes at international trade shows and conferences including NAB, IBC and Macworld. She also provides bespoke training and consultancy to a wide range companies including; BBC; Channel 4; Channel 5; Carlton; HTV; B Sky B; MTV.The author of three successful books. The “Creative After Effects” books (version 5 and 7), published by Focal Press, and a third book, “Design Essentials for the motion media artist” which is also published by Focal Press. Angie is also co-author of “After Effects CS5 Learn by Video”, published by Peachpitt in association with Adobe Press. Angie also produces high quality online training workshops with video2brain, Europe’s premier source for video training since 2002.
Superglue’s projection mapping project for Toyota’s “Get Your Energy Back” campaign (http://www.vimeo.com/16466136) was a highly creative and technical challenge, utilising numerous different production techniques. The animation featured 2D, 3D, keyframed animation, dynamics, particle systems and more. Compositing, VFX and general pipeline management was performed in After Effects, whilst 3D work was created using Autodesk Maya and Maxon Cinema 4D. The team made extensive use of both Trapcode Form and Trapcode Particular in bringing to life the ‘hybrid energy’ that was the key part of the campaign’s message.
Superglue is an award winning, London-based production company specialising in innovative digital projects. The team comprises a dynamic mix of production, post and digital brains working across live action, visual effects, 3D and motion graphics. Superglue operates across the modern media spectrum, creating moving image for everything from banners to broadcast.
Ernesto Rogata, BSkyB
Ernesto will talk about the daily challenge of integrating text and other graphic elements in exciting and innovative ways in sport pieces, stings and short title sequences – usually with little time to complete the job. He will share some simple techniques to create motion graphics using After Effects and Red Giant plug-ins.
Ernesto Rogata is an award-winning senior video editor at BSkyB in London and has worked in post-production for 20 years. His professional role covers four areas: editing, grading, creating motion graphics and training.
Simon will show the grading secrets of Plot Device, a new short film produced by Red Giant, and will demonstrate how Red Giant’s Magic Bullet Suite brought to life a varied series of genres… as well as a hoard of zombies!
Simon is creative director of WiltshireVideo.com, makes online grading and editing tutorials at www.simonwalkerfreelance.com, and is an instructor for the International Colorist Academy, iColorist.com. He is an Adobe Certified Premiere Pro Instructor and trains industry professionals in editing, motion graphics, colour grading, audio sweetening, and (excitingly!) video compression.


")
")
_1")


