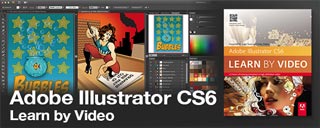
Review of After Effects CS6: Learn by Video

Review of After Effects CS6: Learn by Video

I was very excited to read this very in-depth review of After Effects CS6: Learn by Video on Amazon today;

5.0 out of 5 stars | August 20, 2012

A good solid base upon which to build

Diane Cipollo (Editor at BellaOnline.com) – See all my reviews
This review is from: Adobe After Effects CS6: Learn by Video (Paperback)

I get many emails asking for the best way to begin learning a new software such as After Effects. My first suggestion is to start with a training video for the software of your choice. This is especially true for a robust and complex software such as After Effects CS6.

I found After Effects to be intimidating in spite of my strong Adobe Flash background but the Adobe After Effects CS6 Learn by Video training course from video2brain gave me a good solid base upon which to build. The authors Todd Kopriva and Angie Taylor share the instruction with Kopriva covering the technical aspects of the software and Taylor covering the creative.

The authors start with a short history of the After Effects software leading to what’s new in version CS6. With a panel-by-panel tour of the user interface, you are introduced to the basic project workflow and terminology.

Next, you learn what makes up a basic composition and how to build your own comps from scratch. You first learn how to create a line of text with the Character panel and a block of text with the Paragraph panel and then move on to using shape layers for creating simple and complex vector shapes.

The fun really starts with the Effects and Presets panel. You will learn how to apply a Keylight effect to turn the original background transparent. Then you create a new solid which will be your new background to which you can add effects such as the CC Mr. Mercury effect.

Not all comps are built from scratch. You learn how to import assets such as movies, stills, image sequences and audio. Also introduced is how to manage and organize the various assets for your comp. Of course, you will need to know the options for importing Photoshop, Illustrator, After Effects, Premiere Pro and Final Cut Pro files. You will also learn about interlacing, pixel aspect ratio, and trimming basics.

Halfway through the course, we get to the part I enjoy the most which is animation. First, you cover the basics including how to use keyframes and tweens to control the transformation of various properties. Next, you cover motion paths and how to use Motion Sketch to draw freehand paths. Delving deeper into animation, you learn about the various types of keyframes in After Effects and how to use the Keyframe Assistants and Graph Editor to refine your animations.

The next section covers text animations. Taylor covers options for importing text created in Photoshop and how to edit the text in After Effects. She then demonstrates an easy and fast way to animate each letter individually with the Text Animators. She shows you how to combine animators to create more complex animations and how to save your custom animators as presets. Next we see how shape layers can be used to create many effects, as well as using the Repeater to emulate a particle-like effect.

Switching back to Kopriva, we learn the basics of compositing and how many effects can be created using Blending Modes, Alpha Channels and Masks. Next he discusses common problems and how to correct them with Color Keying, Motion Tracking and Rotoscoping.

The next section concentrates more closely on how to create custom effects. Beginning with a discussion of the Effect Controls panel and categories. Taylor also covers how to use keyframes to animate properties and how to apply easing. One nice feature is the Brainstorm viewer that lets you preview variations of effects and save them as presets. She also discusses what she calls fixer effects for solving common problems such as rolling shutter. She ends this section by covering how to edit layer styles and adjustment layers imported from Photoshop to create effects.

When working with video, you can manipulate the frame rate to achieve various effects. Kopriva first discusses frame rate in general and then covers common retiming tasks such as Time Stretching, Time Remapping, Freeze Frame, Slow Motion and Reverse Frame.

The next section concentrates on your workflow and ways to use grouped and linked layers as well as nesting and pre-composing. One example of character animation demonstrates parenting hierarchy and IK. You also learn about expressions and how easy it is to write your own for complex animation.

Animating 3D effects can add realism to your projects and this section of the course begins by discussing how to use the 3D wireframe and other views needed to work in 3d space. Once you are familiar with working in 3d space, Taylor moves on to how to animate by bending layers. She also covers the basics of using camera presets and controls for depth of field and point of interest. Next, she adds lighting to the 3D scene and walks you through the various types of lighting such as Environmental, Point and Spotlight and how to work with cast shadows and reflections. Reflections can be very important to the realism of your scene and Taylor discusses the various controls such as Reflection Intensity, Sharpness and RollOff, as well as Specular Intensity and Shininess and Environmental Layer maps.

Switching back to Kopriva, we discuss optimizing software performance by adjusting the default preferences and taking advantage of Ram and Disk Catching. Next, he covers After Effects default render order and how this order determines the final render, much like the hierarchy in Cascading Style Sheets determines the final HTML document.

After Effects has several options for exporting your projects and in this section Kopriva discusses how to use the Render Queue. Much like other video exporting, he shows you how to set the various format options. He discusses how to use preset output templates and how to save your own custom settings as a template. He demonstrates how After Effects can save time by rendering several formats simultaneously. Next, he does a walk through of how to use the Adobe Media Encoder to choose output presets for Vimeo, Apple and Android.

The final section is a wrap up and final thoughts. It examines several projects and discusses how they were made. It also covers how to integrate After Effects with Cinema 4D.

The course includes 10+ hours of the video2brain Learn by Video series and supporting files for following along for a hands-on, watch-and-work teaching approach. Also included with the DVD is a small booklet with additional information. As with all the Learn by Video series, you have an easy-to-use control panel for viewing the videos.

Todd Kopriva has been with Adobe and After Effects since version 7.0. He creates Adobe documentation and training materials. Angie Taylor has worked 14 years in motion graphics and animation. Examples of her work have been featured on the BBC.

*Peachpit Press provided a copy to me for review purposes.

Life as a Motion Graphic Designer

Life as a Motion Graphic Designer

In my life as a motion graphic designer I’ve learned a few important lessons. In this interview with John Dickinson from Motionworks, I share my experiences in my career as an artist, author and motion graphic designer.

I really enjoyed this interview. John is excellent at getting the best from his interviewees. I just felt like we were having a chat. I hope that my ramblings help to inspire anyone thinking of following a career in motion graphic design.


Motion Graphics Webinar

Motion Graphics Webinar

Free Adobe CS6 WebinarCreative Motion Graphics Webinar with Adobe Production Premium CS6
Friday 31st August 2012, 11.00 BST – Presented by: Angie Taylor

Join Angie for an engaging Motion Graphics Webinar packed full of the best tips and tricks for Production Premium CS6. Production Premium CS6 offers a sleek, fresh editing environment in Adobe Premiere Pro; 3D tracking and extruded text and shapes in Adobe After Effects; new Content-Aware tools in Adobe Photoshop Extended; and faster editing in Adobe Audition. Learn all about the new features of CS6 as well as new additions, Adobe Prelude for logging and ingest and Adobe SpeedGrade for color grading and finishing.

Click to register for this Complimentary WebinarRegister


Vibrant Vignette Presets for Sapphire

My Vibrant Vignette Presets for Sapphire were released this week. This collection features a weird and wonderful collection of vignettes in an attempt to prove that vignettes don’t always need to be black and circular.

These vignettes which will give your footage extra atmosphere, extra mood, extra pop. Use them as they are or adapt them to fit your own designs.

These are free too all FX Central users. If you own Sapphire for any of the following hosts you can open the preset browser, login to FX Central and get working with them right away, on your own footage.

If you don’t own Sapphire you can find out more information and download a free trial here.

As Sun Goes Down clip
Azure Father clip
Black is Black clip
Blue Rondo clip
Bonded Circle clip
Burning Man clip
Cool Bright Spot clip
Dark Entries clip
Diagonal Accent clip
Golden Moment clip
Green Green Grass of Home clip
Heart of Gold clip
Purple Haze clip
Red Sky at Night clip
Sublime Concentration clip
Blackout Curtains clip
Blood Red Sky clip
Cinemapeture clip
Focus Spot clip
Inverted Subtraction clip
Loch Ness Mystery clip
Teal Accent clip
Tequila Sunrise clip
Dungeness Darkness clip
Cool Accent clip
Wild West Hero clip
Rose-tinted Spectacle clip
Warming Centre clip
Wedding Ring clip
White Heat clip