I’m excited to be able to offer a free top-up course on my website to all my lovely visitors. In this free course, Adobe Technical Support Lead Todd Kopriva offers dozens of tips for optimizing Premiere Pro, After Effects, your operating system, your computer, and your workflow for maximum speed and performance.
He makes recommendations for RAM, CPUs, graphics cards, and hard disks – both what to buy and how to set up your applications to make optimal use of these resources – and for setting preferences and other options in After Effects and Premiere Pro to minimize the amount of processing needed at each step of your workflow.
You’ll also learn what CUDA, OpenGL, and the Mercury Playback Engine are, and what each means to you in practical terms. After completing this workshop you’ll get more done in less time, both by making things work faster and by avoiding common causes of wasted time.
This week I’m giving a 20% discount to anyone who wants to buy the fantastic new workshop on Motion Tracking & Stabilisation by Todd Kopriva which is now available to buy from my video training store. Just enter MOTION into the Coupon Code box when buying from my shop. It’s valid till July 15th 2011.
This workshop covers all the tools and techniques used for motion tracking and image stabilization in After Effects, including the point tracker, the Warp Stabilizer Effects, and mocha-AE. The contents of this course include:
Introduction
This chapter introduces you to motion tracking and shows you frame-by-frame how manual motion tracking works.
Motion Tracking with the Point Tracker
Once you determine what kind of motion you want to track, you’ll need to decide what you will apply the tracking data to. This chapter explains your options and shows you how to remove tracking markers when you’re done.
Motion Tracking with mocha-AE
This chapter walks you through using mocha-AE, a standalone application that can export tracking data for use in After Effects.
Stabilizing Motion
Ever been frustrated working with shaky footage? This chapter shows you how to add stability to your projects by using the new Warp Stabilizer effect.
The lessons are wrapped in a feature-rich interface that lets you jump to any topic and bookmark individual sections for later review. Full-Screen mode provides a hi-def, immersive experience, and Watch-and-Work mode shrinks the video into a small window so you can play the videos alongside your application. This course also includes project files so you can follow along and try out new techniques as you learn them.
After Effects can be a difficult application to learn simply because it offers you so may options. Many of these options are not immediately apparent to users so they muddle through using default settings when a better solution may be available to them. My job is to point you in the direction of these hidden helpers!
When working in 3D, have you ever experienced difficulty when positioning or rotating layers, cameras or lights within 3D space? If the answer is yes, then understanding the 3D axis modes may help to you.
Click on this image to enlarge it
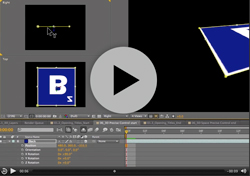
In this example (taken from my After Effects CS5 Learn by Video DVD) you can see a Square layer inside a 3D comp. Notice in the Active camera view (top left) you can see the three-way-axes attached to the layer. It consists of three arrows, each representing one of the three dimensions of 3D space. The red axis (representing the horizontal ‘left-to-right’ X axis) is an arrow facing left to right. The green axis is pointing upwards and represents the vertical ‘top-to-bottom’ Y axis. Finally, it’s a bit tricky to see in this view but the blue arrow, representing the ‘near-to-far’ Z axis is pointing towards the viewer.
It’s a bit easier to see this if you look at the layer in the Right view. Notice in this view that we see the axes (and the layer) from a different angle. We can imagine that we are now standing to the left of the layer, looking towards the right. therefore, the blue arrow, representing the Z axis is pointing to our right, towards our imaginary viewer, who is standing in front of the layer.
Local Axis Mod is the default behavior for these axes in After Effects. In this mode the axes are attached to the layer. So, wherever the layer moves, the axes will follow as if attached to it. Let’s see what happens if I rotate the layer.
Click on this image to enlarge it
In this second example I’ve rotated the layer by 90 degrees on the X axis. When I rotate the layer, its 3D axes rotates with it. Notice in the Right view, the Green Y axis is now pointing towards the viewer.
Local Axis Mode may seem logical, when you rotate a layer, the axes rotate with it. But confusion occurs when you then start using the axes to move or rotate the layer in the Composition panel as the axes may not actually affect the values you think you’re adjusting.
Notice in this movie, if I grab the Y axis to move the layer in Right view, I’m actually adjusting the Z value of the layer. axismodesThis can be seen refelcted in Z position value in the timeline, notice it changing as I drag. If I adjust the position by dragging on the Z axis, I’m actually adjusting the Y value in the Timeline. At times this can be very confusing!
The good news is, if this causes you difficulty, there are two other axis modes to choose from. You can change the Axis mode by clicking on the Axis Mode buttons in the Tools panel that runs along the top of the application.
If I switch to World Axis Mode notice what happens to the axes on the layer as I do so, it changes so that the axes is fixed to the coordinates of the Composition (or world) rather than to the layer itself. If I rotate the layer again on the X axis, the axes do not move with the layer, they remain relative to the composition.
For new users to After Effects, this mode is perhaps more logical as dragging on the individual axes in the Comp panel will always adjust the corresponding values in the Timeline as they would expect. Adjusting the position by dragging on the Y axis will always adjust the Y value, adjusting X axis always affects X and adjusting the Z axis always affects the Z value. Regardless which view I select, or how much I rotate my view or my layers the axes will always be aligned to the edges of the Comp.
The final axis mode, View Axis Mode can be a little tricky to get your head round so beware! View Axis mode will align the axes to whatever view you are in. It allows you to rotate around the geometric center of your scene as it is currently being viewed as opposed to the comp itself.
I hope this has helped you understand the different axis modes available in After Effects and how they can help you when moving or rotating layers within 3D space. If you want to learn more about 3D in After Effects why not pop along to my session, ‘Introduction to 3D in After Effects’ at the NAB 2011 Post Production World Conference. Please say hello if you do! Happy Keyframing!
I’m giving away lots of goodies this week. In this blog I’m offering you some free sample movies from my ‘2D Character Animation in After Effects’ workshop from video2brain. I’m also pleased to announce some fantastic discounts on my training courses in London in March.
A one-off funding offer means that there’s currently a massive 80% off my Photoshop and After Effects courses at the Bridge Training. You can find out about these offers here. Just to give you an idea of the sort of savings on offer, my After Effects training 2 day training courses (Fundamentals, Intermediate and Advanced) have been discounted from the usual price of £504 to the incredible price of £108 for anyone based in the London Westminster area. Please contact The Bridge Training here to book a place.
I’m so excited to be able to introduce a set of video training products specifically aimed at character animation in Adobe After Effects CS5. I’ve included a link to a free sample from this workshop here, just click on this link to watch it in HD. There are also some other free videos available here.
As a freelance illustrator and motion graphics designer, I use After Effects every day to create artwork and animations of various styles. As a result, I’ve developed some powerful techniques for creating quick but compelling 2D animation, and in this workshop I share them with you. You’ll learn how to import layered files and paths from Illustrator into After Effects and how to animate flat vector artwork in both 2D and 3D space.
Topics covered include:
Setting up After Effects for creating 2D character animation
Using input devices to capture motion and apply it to your characters
Creating animation and lip-syncing with audio files, using expressions and scripting to make the process easier
Applying grouping techniques and using parenting to create hierarchical animations
Following the best working practices for outputting your animations for the web, TV, and mobile devices
All this is presented in a series of short, focused, and solution-oriented videos that steer clear of technical jargon. Whether you’re a motion graphic designer, animator, storyboard artist, video editor, or illustrator, if you want to create 2D animation from flat, vector-based artwork, this is the workshop for you.
The lessons are wrapped in a feature-rich interface that lets you jump to any topic and bookmark individual sections for later review. Full-Screen mode provides a hi-def, immersive experience, and Watch-and-Work mode shrinks the video into a small window so you can play the videos alongside your application. This course also includes project files so you can follow along and try out new techniques as you learn them.
A question appeared on the Video Copilot website today about uprezzing old projects which can be a bit of a nightmare in AE. You can often find that layers positions get messed up and effects change appearance when you scale your comp.
Incidentally, making projects bigger is a massive headache so always good (if you have the opportunity of course) to create your projects at the biggest size you think may be required. If there’s ANY chance of HD requirements then use HD, even if the immediate requirement is only for SD.
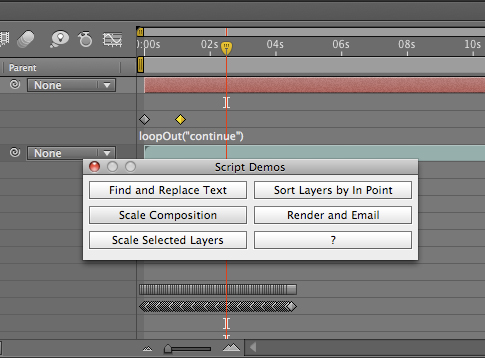
Having said all that, there are always times when you need to up-rez. Updating old projects for showreels; adapating other old projects for new jobs etc. So, if you simply HAVE to do it, there’s a couple of scipts that will work. In the Demo Palette (can be opened by going to File > Scripts > Demo Palette) there are two gems, one is called ‘Scale Comp’ and can be used to scale your entire composition, keeping all layers in the correct position. The other is called ‘Scale Selected Layers’ which will work on a selection within a comp, again, maintaining their position relative to each other.
You need to make sure your preferences are setup correctly to use scripts in order to use these. to do so, go to Preferences >General > Allow Scripts to Write Files and Access Network.
You will still need to go through the somewhat painful process of editing effects but this will save you a lot of work with layers etc.
To find out more about After Effects and download some FREE movies, check out my After Effects CS5 Learn by Video page where you can watch excerpts and learn more tips.
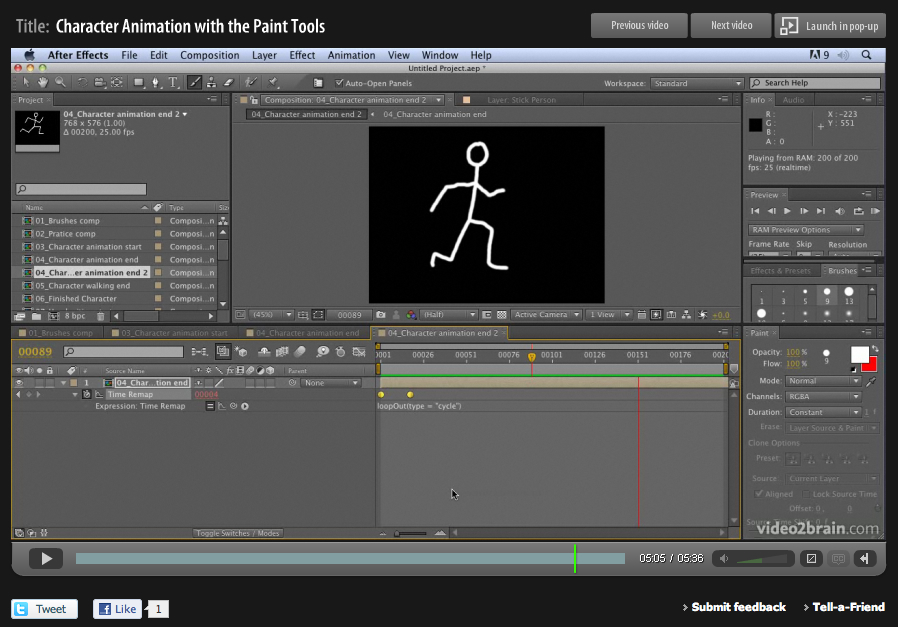
The paint tools in After Effects are usually used for cloning or filling in mattes, but they can also be used to create stop-motion-style animation. In this movie you’ll see how they can be used to create a stop-motion style without the need for painful frame-by-frame tweaking of keyframes or drawings.
In this Jumpstart tutorial I’ll show you how to create a little animated stickman, creating a looping walk cycle. I hope you can use the tips and tricks from this tutorial to create your own unique twist on my idea. If you do please come back here and post a link to your creation, I’d love to see it!
There are a few Jumpstart tutorials included with the Learn by Video DVD. These are designed to give you a quick overview of a particular technique. The DVD also contains many more detailed tutorials, designed to take you through techniques and tech you After Effects using a more detailed step-by-step approach. I hope you enjoy watching them as much as I enjoyed making them.
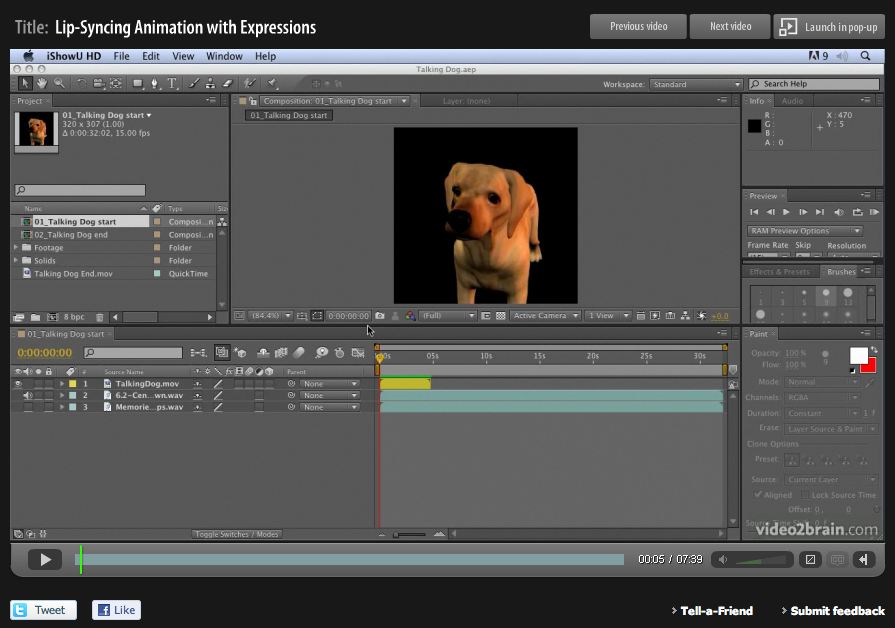
Lip-syncing is something that all animators will be asked to do at some point in their career. The following technique automates the process of lip sync in After Effects and uses only built-in features of Adobe After Effects – no extra software is required! This video tutorial is an updated version for Adobe CS5. Tutorial files and a text-based version of the tutorial for older versions of After Effects are available here if you want to follow along.
This project was a test project for a job for the BBC. They contacted me and asked if it was possible to create a minute of lip-synced animation on a cartoon character. The budget was really tight, as was the deadline, so I had only one day to create a character that lip-synced to a provided sound track for a full minute.
Of course it was the BBC so I could hardly say no! So I said “Yes, no problem, I’ll take the job!” The minute I put the phone down I thought, “Oh Blimey! What have I got myself into?” I went to bed that night worrying about how I’d manage to get the job done. I tossed and turned, having nightmares about failing in my first job with the BBC. Then suddenly I sat bolt upright in bed and thought, “hang on a minute, what if I use Time Remapping with the Convert Audio To Keyframes Assistant, I’m sure that’ll work!” (That’s the kind of sad geek I really am!) 😉
Anyway, I leapt out of bed, ran over to my computer and put together a test project to see if it would work. This is the very project I put together as a test to see if the technique would work. Luckily, it did and I got the job done on time!
These Creative After Effects Bonus Tutorials are ones created specifically for readers of my “Creative After Effects”books but are also freely available to everyone who visits my website.They were designed for previous versions of After Effects but still contain useful tips, tricks and techniques. These books contain many more in depth tutorials on Adobe After Effects and related topics. It also includes a free CD full of goodies and training materials for your delectation!I welcome feedback from readers as it is essential to the growth and development of the book and website. If you have any comments or feedback please feel free to leave comments.
Keylight Training movie This is a sample movie from my book “Creative After Effects 7″. The tutorial focusses on how to use The Foundry’s Keylight in After Effects to key out really badly shot DV footage. Angie shares tips and tricks on how to avoid problems and to fix them once they occur.
Character Animation tutorial I’ve done a fair bit of character animation using After Effects, mainly cut-out animation, similar to the style Terry Gilliam used in the Monty Python animations and not too dissimilar to South Park’s style of animation.Till Parenting was introduced, I always used complex nesting procedures to link the individual parts of my characters together. I would draw them in Illustrator with each part on a separate layer, bring it in as a Comp and then Pre-comp the body parts together as needed.Parenting gets rid of the need for complex nesting hierarchies, I can now link the body parts together in one composition. This tutorial simplifies and demystifies the processes, making them less intimidating to those who have never used Parenting.
The Talking Dog Lip syncing Tutorial for After Effects 6 is based on the After Effects 5.5 Production Bundle but can also be followed using the version 5.0 PB. If you want to get hold of an updated After Effects CS5 version of this tutorial, complete with new footage, it’s available as part of my After Effects CS5 Learn by Video DVD in association with Adobe’s Todd Kopriva.
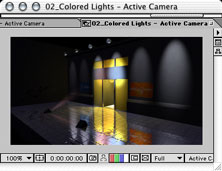
This tutorial shows you how to use Motion Math scripts and Time Remapping on a 3D – rendered character to automate the process of lip-synching. I used this technique in an animated program which was broadcast on a major UK TV network.
Multipass for After Effects 5.5 and Cinema 4DXL These comprehensive tutorials cover techniques for creating multipass renders as well as importing and manipulating the multiple passes in After Effects 5.5.Using a whole host of old and new features to bring your 3D scene to life you will learn the basic principles and discover the power and flexibility that can be achieved by rendering out your 3D scene in passes.
I’m busy preparing to leave on a mammoth journey to San Fransisco to speak at the Macworld 2010 conference for the first time.
I’ll be talking about production workflow, specifically broadcast production as that’s where I spent 12 years of my life freelancing as a motion graphic designer/ animator.
I’ll also share some of the challenges I’ve faced in the transition from designer to creative director, and my methods for overcoming those hurdles.
Of course I’ll be talking about the software I use in my everday work, and will share some top tips and tricks. But my main focus will be on my creative processes. How do I come up with ideas? What do I do to make sure my skills are up to date? How to I collaborate with others and manage remote working?
If you’re interested in finding out more use the priority code TWEETMW when you register to get a $15 Expo pass or 15% off of any conference package. Onsite expo passes are $45, so it’s a great deal!
I’m interested in the trend of decoupling going on in the world of TV and film production companies. It’s the world that I used to live in so it’s close to my heart. Decoupling refers to the process of reducing costs to the client by outsourcing some of the work to freelancers or external services, rather than providing them in house. Decoupling offers big opportunities to everyone in our industry from company directors to freelancers and runners, if we can be brave enough to embrace it.
Increasingly, over the past 20 years, production companies have been expected to be flexible, pressurised to increase their skills, enabling them to deliver every possible service and format to their clients. This entails increasing staff to cover all areas of production, extending the capabilities of the company so they can also generate content for new and emerging mediums (web, mobile devices, games etc). The result is increased costs due to wages and also investment in bigger studio spaces.
The inevitable has happened, the work that was plentiful during these times of development has somewhat dried up. Production companies are competing even harder for the same jobs and clients find it harder to differentiate between companies as they all offer essentially the same services. Frustrated freelancers who weren’t finding the right amount of work (or satisfaction from it) started to create their own collectives which for a while injected some new life into the industry but they too have suffered from what I call the “jack of all trades syndrome”. Feeling that they must offer all services in-house, often stretching the capabilities of their employees and making the work suffer as a result.
Of course there are pros and cons with everything in life, this is no exception. On a positive note, decoupling could provide the opportunity to return to an industry where craft specialization matters. Instead of all production companies offering essentially the same services and competing for every scrap of work, each could become king of a particular area, passing work onto other companies when the work is more suited to their specific skill-field. A certain amount of this already goes on within Soho but I really believe this could be extended. It would improve the quality of work, employee morale and confidence within individual companies.
By letting some of their in house designers go and instead using freelancers, companies could open up to diversity, calling on different specialist skills appropriate for each job. It could create healthy competition between freelance creatives but also opportunity to create alliances and a network for swapping skills. In house designers can sometimes find it hard to maintain focus and motivation, so those more suited to a freelance lifestyle could benefit greatly here.
However, I worked as a freelancer in the industry for over 12 years so I know, only too well the challenges that can be faced. Remote working is not easy, you need to be motivated, focused, pro-active and willing to network. Ideas can be harder to develop on your own, it’s amazing how much creative development goes on during breaks around the coffee machine or meetings in the pub after work for production companies. Get rid of your in house team and you risk losing the teamwork that’s so valuable for the development of ideas and a sense of company identity. It can also be hard to find the right people at the right time to work on a production, they may be busy with another company.
On the whole though I see decoupling as an exciting prospect. It increases the unknown to the equation. Risk and uncertainty can be scary but embrace them and you often find new exciting challenges that, combined with a bit of initiative, can be the impetus to creativity in it’s truest sense. I’d love to hear the thoughts of other design professionals about the whole debate associated with decoupling, and also any stories about the challenges associated with remote working. What are these difficulties and how can we find ways of making it work?
I’m hoping to see a few of you at MacWorld 2010 where I’ll be speaking next year. I love San Fransisco so will be taking a little extra time out to hang out with my old friends, Amacker and Nina at the Lucky 13 bar on Castro. I also hope to catch up with all my other SF buddies, it’s always hard to fit everything in as there are so many people I love in the bay area!
If you’d like to attend you can click on the banner to the left to get a discount. Click on the Register button and then just use my personal priority code, ATAYLOR when you register.
Below are details about the talk I’ll be delivering;
Users Conference US964: Creative Video Workflow – From Storyboard to Completion – Feb. 12, 2010 3:00 PM – 4:15 PM
Angie Taylor will take you on a journey through a typical video project, showing the entire process including the creation of sketches, brainstorms and storyboards, audio production and clean up, editing, and producing the final project. Angie will also discuss how creative professionals can bring unity and clarity to complex creative projects. Aspects of automating time sheets, liaising with clients, auditing jobs and packaging final files for delivery will be explored within this session.
Anyone with personal or professional interests in creating digital videos and working with tools such as After Effects, Flash, Flow, CS4, Illustrator, Photoshop, Premiere Pro, Final Cut Pro and Soundbooth, will benefit from this session.
If you are interested in a streamlined way to look at the digital video process including tips and tricks using various software tools that will help maximize the creative input and minimize the project complexities, then this session is for you!


 Tutorial for Adobe After Effects")


