
Red Giant are having their biggest sale ever. Grab a bargain now and get up to 52% off all products for a limited time. Coupon code: Summer40
Red Giant are having their biggest sale ever. Grab a bargain now and get up to 52% off all products for a limited time. Coupon code: Summer40


There was a a question today on Creative Cow about how to create a light wipe effect in After Effects. I wanted to help so I decided to put together a quick After Effects Light Wipe tutorial. This tutorial includes an After Effects project and an eight-minute video tutorial where I explain techniques used.
Here’s the original question from Danielle Masek;
Q: I have a vector object (some wings) which is black right now, and I would like a light ray to start bursting through the center, change to a vertical line “ray” and move both right and left concurrently, revealing the wings; however, the wings won’t now be all made up of light, instead the light rays will reveal the wings’ outline, which will now be outlined in a backlit glow. I hope I’m explaining this clearly. Will I need trapcode for this? Something else?
A: Here’s a little movie that will help you and others I hope. You’ll also find the project files to follow along Wings reveal.aep.
 After Effects CS5 Presets for Halloween
")
I’ve created some special little Halloween Software Tricks and Treats for you to use in your work. This download contains an After Effects CS5 project and artwork needed to create some spooky Halloween graphics for your projects.
")
I love creating ideas and techniques for the community. In fact I’d love to dedicate more time to creating ideas, tips and tricks for you and make it a full-time venture. However these things take quite a long time to produce so I’m currently trying to fit these in-between paid freelance jobs.
_1")
I’ve been trying to figure out ways to make this pay without having to charge people a fixed price for these. I’d also like to avoid having advertising on my site to earn income. So, as an experiment, I’ve included a free download link to the project files and a Donate button. I’d dearly love to prove that a business model, where people volunteer to pay what they think something is worth can work.
If you find these presets useful and would like to support this risky venture please donate what you can afford, even $1 would make a difference and would be gratefully appreciated. This will help me dedicate more time to this project and continue to improve the website’s offerings. Thank you!
Angie_Taylor_Halloween_Presets folder
These designs use the Trapcode Suite of plug-ins and Magic Bullet Looks. If you don’t own these plugins you can download free trials here from the Red Giant website
In the future I intend to provide privileges and special offers to those who contribute to this project.
Thanks so much for your support!
| These Creative After Effects Bonus Tutorials are ones created specifically for readers of my “Creative After Effects”books but are also freely available to everyone who visits my website.They were designed for previous versions of After Effects but still contain useful tips, tricks and techniques. These books contain many more in depth tutorials on Adobe After Effects and related topics. It also includes a free CD full of goodies and training materials for your delectation!I welcome feedback from readers as it is essential to the growth and development of the book and website. If you have any comments or feedback please feel free to leave comments. | ||
 Keylight Training movie This is a sample movie from my book “Creative After Effects 7″. The tutorial focusses on how to use The Foundry’s Keylight in After Effects to key out really badly shot DV footage. Angie shares tips and tricks on how to avoid problems and to fix them once they occur. Keylight Training movie This is a sample movie from my book “Creative After Effects 7″. The tutorial focusses on how to use The Foundry’s Keylight in After Effects to key out really badly shot DV footage. Angie shares tips and tricks on how to avoid problems and to fix them once they occur. |
||
 Tutorial for Adobe After Effects") Character Animation tutorial I’ve done a fair bit of character animation using After Effects, mainly cut-out animation, similar to the style Terry Gilliam used in the Monty Python animations and not too dissimilar to South Park’s style of animation.Till Parenting was introduced, I always used complex nesting procedures to link the individual parts of my characters together. I would draw them in Illustrator with each part on a separate layer, bring it in as a Comp and then Pre-comp the body parts together as needed.Parenting gets rid of the need for complex nesting hierarchies, I can now link the body parts together in one composition. This tutorial simplifies and demystifies the processes, making them less intimidating to those who have never used Parenting. Character Animation tutorial I’ve done a fair bit of character animation using After Effects, mainly cut-out animation, similar to the style Terry Gilliam used in the Monty Python animations and not too dissimilar to South Park’s style of animation.Till Parenting was introduced, I always used complex nesting procedures to link the individual parts of my characters together. I would draw them in Illustrator with each part on a separate layer, bring it in as a Comp and then Pre-comp the body parts together as needed.Parenting gets rid of the need for complex nesting hierarchies, I can now link the body parts together in one composition. This tutorial simplifies and demystifies the processes, making them less intimidating to those who have never used Parenting. |
||
 The Talking Dog Lip syncing Tutorial for After Effects 6 is based on the After Effects 5.5 Production Bundle but can also be followed using the version 5.0 PB. If you want to get hold of an updated After Effects CS5 version of this tutorial, complete with new footage, it’s available as part of my After Effects CS5 Learn by Video DVD in association with Adobe’s Todd Kopriva. The Talking Dog Lip syncing Tutorial for After Effects 6 is based on the After Effects 5.5 Production Bundle but can also be followed using the version 5.0 PB. If you want to get hold of an updated After Effects CS5 version of this tutorial, complete with new footage, it’s available as part of my After Effects CS5 Learn by Video DVD in association with Adobe’s Todd Kopriva.This tutorial shows you how to use Motion Math scripts and Time Remapping on a 3D – rendered character to automate the process of lip-synching. I used this technique in an animated program which was broadcast on a major UK TV network. |
||
 Multipass for After Effects 5.5 and Cinema 4DXL These comprehensive tutorials cover techniques for creating multipass renders as well as importing and manipulating the multiple passes in After Effects 5.5.Using a whole host of old and new features to bring your 3D scene to life you will learn the basic principles and discover the power and flexibility that can be achieved by rendering out your 3D scene in passes. Multipass for After Effects 5.5 and Cinema 4DXL These comprehensive tutorials cover techniques for creating multipass renders as well as importing and manipulating the multiple passes in After Effects 5.5.Using a whole host of old and new features to bring your 3D scene to life you will learn the basic principles and discover the power and flexibility that can be achieved by rendering out your 3D scene in passes. |
Download files:Cinema 4DXL (Version 7.303)Multipass tutorialsTutorial notes: Cinema 4D Multipass Project files: Cinema 4D project files After Effects 5.5Multipass tutorialsTutorial notes: After Effects Multipass Tutorial Notes Project files: After Effects project files Footage files: Movies, Lights, Footage files |
|
| The Cinema 4D tutorial was co-written by myself and Tim Clapham of HelloLux. Find out more about Tim and HelloLux by here. | ||
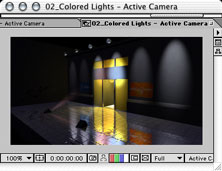
 I’ve just watched a great After Effects tutorial, made by my good friend, the great Peder Norby of Trapcode fame. He’s dome a wonderful job of teaching you how to get the best volumetric smoke effects using Particular.
I love this tutorial as it was totally improvised so it shows how he had to experiment to get the settings right. Check out his tutorial and if you don’t already own Particular, you can also download a free trial of Trapcode Particular from the Red Giant website so you can try it out.
I also stumbled upon a very kind and generous offer from Andrew Kramer at Video Copilot. Andrew is giving away 100 MB of stock footage free this month to say a big thanks to his followers. Nice one Andrew! 🙂
 My dear friend and esteemed and talented After Effects aficionado, Aharon Rabinowitz has posted my 1960’s retro “Pop-art” tutorial up on Red Giant TV. I actually recorded it in the 1960’s but it’s taken this long for technology to catch up to a stage where it can broadcast a whole hour (almost) of FREE After Effects video training online! Download and enjoy, it’s all free and includes tutorial files! You’ll love Aharon’s “authentic” Scottish accent at the end!
Shatter and Card Dance are two of After Effects CS4’s most underrated particle effects. Both were created by Brain Maffitt’s Atomic Power Corporation, before being bought by Adobe to include in After Effects. Both Card Dance and Shatter allow you to divide your layer into particles determined by layer map. They also allow you to animate pieces in 3D space, and interact with After Effects’ cameras and lights. This tutorial will help you understand how layers can be used as displacement maps or control layers for other layers in your compositions. This process is just as useful when controlling VFX as it is for motion graphics.
Make diagrams easier to understand – by animating them, with tips from motion-graphics and animation expert Angie Taylor. Infographics are hugely useful for explaining a complex or technical subject visually. A quick and easy way to create compelling animated infographics is to break down and reconstruct technical drawings or plans – we see them all the time on the TV news, where they’re popular for explaining abstract or tricky subjects to a broad audience. In this tutorial, Angie Taylor shows that going back to the basics of animating simple shapes and 2D graphics can be just what you need to provide you with a clean and simple design.
If your budget doesn’t stretch to pricey plug-in particle filters, use After Effects’ internal tools. After Effects CS3 includes built-in particle filters you can use in your projects. Although they are not as powerful as some of the specialist 3D particle filters (like Trapcode’s amazing Particular plug-in), you can use them to achieve fairly convincing animations of natural phenomena such as fire, smoke, rain and dust. All you need is patience and a natural affinity for tweaking sliders. In this tutorial, Angie Taylor shows you how to create fire, smoke effects and 3D rocks, all using After Effects’ built-in 3D particle filters, to create part of the title sequence for Taylor’s forthcoming animation Hellwoman, a spoof of the movie Hellboy.
Make your message stand out by transforming text with 3D extrusions in After Effects. After Effects CS3 includes fabulous 3D, per-character text animators, but the ability to actually extrude text into solid 3D objects usually requires third-party plug-ins. Unless, of course, you use the trick shared here by animator, designer and After Effects expert Angie Taylor, which permits you to extrude the text with no extra software. There are other ways of creating true 3D text in After Effects, using filters like the Shatter filter. However, the trouble with Shatter is that it’s quite difficult to get the edges of the text looking decent and crisp. The following technique is great as it’s fairly straightforward and quick to carry out. It also allows you to use 3D animators with your extruded text.
Creating multi-dimensional, interactive menus from pen-and-paper sketches is simple – we show you how. In this tutorial, Angie Taylor shows how to put Adobe After Effects and Photoshop to work to create a DVD menu design. The example she uses here was originally created for a DVD of the pioneering all-girl punk bank The Slits, who are currently touring the US. Tessa Pollitt, the band’s bassist, drew the sketch that the menu is based on, and the band felt that it represented The Slits’ overall aesthetic so neatly that they asked Taylor to use it in the menu. This is a particularly good tutorial if you’re already familiar with the basics of After Effects but need a little practice. You’ll learn how to add motion to static images without animating the images themselves – a neat trick to master – by separating different elements or layers of the drawing into a multi-dimensional format, and then guiding the camera through them.
Visual-effects and motion-graphics specialist Angie Taylor shows how to use After Effects’ Clone Stamp tool to convincingly add to moving footage.