Category: Tutorials

Video Tutorials by designer Angie Taylor

  • Kinetic Typography Techniques with After Effects

    Kinetic Typography Techniques with After Effects

    Kinetic Typography

    Kinetic typography is an art form that combines text and motion to express ideas in the form of animation designed to accompany spoken word or music. Join author, and motion graphic designer Angie Taylor as she shares her considerable knowledge of this form.

    Work along with her in this unique course as she builds a complete kinetic typography project from start to finish. Along the way, discover how to create and animate text layers directly within Adobe After Effects using animators and 3D features, set up Photoshop files for animating in After Effects, and use a variety of effects and techniques to create numerous text animation styles within a single project. The course also offers lots of tips and tricks for animating 3D cameras and lights and using expressions and scripts to simplify the processes involved.

    Topics include:

    • Working with audio
    • Preparing source files
    • Structuring your After Effects project
    • Working with shapes and effects
    • Optimizing performance
    • Animating text
    • Creating 3D animation
    • Using expressions to create motion
    • Rendering your final movie
  • Getting Started with After Effects Expressions

    Getting Started with After Effects Expressions

    ae_expressionsI’m so excited to announce my new course, Getting started with After Effects Expressions which came out on the 20th of February. Even if you’re not comfortable with scripting or coding, you may still want to take a look at After Effects expressions.

    About The Course

    Expressions are like little scripts that trigger changes to layer properties, and they can save you time, make your work more flexible, and open up new creative possibilities. In this course, motion graphic designer Angie Taylor shows you how to make Adobe After Effects expressions work for you, starting with building expressions with the pick whip. Then she introduces JavaScript-based math expressions, which allow you to adjust timing and movement, and her favorite “no brainer” expressions, such as property linking and connecting camera focus to layers. Plus, discover how to react to sound, play with color, format text, and link 2D and 3D properties.

    Topics include:

    • What are expressions?
    • Creating and applying expressions
    • Linking expressions to layers with the pick whip
    • Simplifying expressions with variables
    • Working with JavaScript math functions
    • Creating looping animations
    • Randomizing values
    • Converting expressions to keyframes
    • Creating keyframes from audio with expressions
    • Controlling 2D effects in 3D space
    • Converting color from RGB to HLS
    • Formatting strings and text


    Free Trial Subscription

    For those of you who have never tried out lynda.com training here’s access to a 7 day trial subscription. With this you can watch my entire training course as well as any other  lynda.com titles by me and other authors, completely free of charge!

    7-day free trial

  • Software Training Courses with Lynda.com

    You can now access most of my software training courses with Lynda.com. This link will take you to my author page where you can find out more about the courses I have on offer. Here’s a free taster of the kind of things I teach in my tutorials.

    Using the Stroke effect

    View this entire Kinetic Typography Techniques with After Effects course and more in the lynda.com library.

    I recorded these courses with video2brain and they are now part of the Lynda.com library. If you prefer to buy individual courses then you still can for a limited time in my tutorials store.

    Of course a Lynda.com subscription gives you access to the entire library of training by me and other authors including Trish and Chris Meyer, Rob Garrott, Deke McKlelland and more.

    Free seven-day trial

    lynda.com online training tutorials

    I’m giving away a free 7-day trial subscription. If you have a quiet week, sign up here and pack as much training in as you can to get real value from this offer. Once you’ve benefitted from a week’s training I’m sure you’ll see the benefit of a full-time, no-holes-barred subscription!

    If you subscribe now you’ll soon get access to my latest course which is coming soon. “Up and Running with Cinema 4D Lite” is a complete 2-day course in Cinema 4D Lite, aimed at After Effects users who have little knowledge of 3D applications. It will help you make the most of this free software that was bundled as part of After Effects CC.

  • After Effects Twitter Tips

    Here’s my latest collection of After Effects Twitter Tips from my archive. Learn all sorts of useful tips and tricks in bite sized portions. Make sure to Follow me on Twitter to get these tips regularly as well as other goodies I like to share.

    Twitter Tips

    After Effects tip – To make a one node camera point at a layer, select the layer, then with the unified camera tool selected, hit the F key
    AFTER EFFECTS TIP | Copy & Paste any mask shape into a position property to make layer move along the path. Click on property name to select
    AFTER EFFECTS TIP | Give Adobe your feedback | Report Feature Requests & bugs here; http://t.co/s7f1NOPs @AdobeAE #AfterEffects
    AFTER EFFECTS TIP | To stretch or squash an animation – select all keyframes – hold Alt key & drag first or last Keyframe in selected group
    After Effects Tip | Video tutorial – Use the Stroke effect on Illustrator paths to make handwriting animate on screen http://t.co/0E6UHcKOsr
    After Effects Tip of the day! How to make a layer follow a path copied from Adobe Illustrator artwork. http://fb.me/CEapjgCw
    After Effects tip; add new Refine Matte effect to ANY matte in AE to refine edges or add motion blur. Not just for Rotobrush! Fabulous tool!
    After Effects tip; Animating characters, use expression pickwhip 2 link body parts 2 cntrl layer. Expression control effect 4 each movement.
    After Effects Tip; How to make a layer follow a path copied from Adobe Illustrator artwork; http://bit.ly/f8tP4w
    After Effects tip; Lay down markers in time with audio by previewing the audio and hitting * on number pad when you want markers to appear.
    After Effects tip; to edit the path of an effect’s positional property (e.g. Particles) got to Layer panel & choose effect in target menu.
    After Effects tip; To use more than one layer as matte without precomping. Add multiple copies of Sett Matte effect to layer needing matted.
    After Effects Tip: @butlerm_com Try combining transfer modes, use more than one layer with a different mode and opacity value on each! 🙂
    After Effects tip: Add keyframes for hidden Transform properties by selecting layers & hitting alt & property letter (eg alt-p for position)
    After Effects tip: Applied a preset & wanna find out how it’s made? Select layers then double-hit the U key to expose adjusted properties.
    After Effects tip: Make 3D layers turn to face camera as it moves. Select layers, go to Layer>Transform>Auto Orient. choose Towards Camera
    AFTER EFFECTS TIP: Right-click on a property value to open Edit Value dialog. Here u can access different measurement units & adjust ranges.
    AFTER EFFECTS TIP: Rotate , scale, skew or move all layers by adding the Transform effect to Adjustment layer – keyframe to animate them
    After Effects tip: Scaled a layer down, nested the comp, then scaled it up? Click Collapse Transformations switch to fix resolution issues.
    AFTER EFFECTS TIP: Travis Wade presents his After Effects: Copy and Paste Shortcuts on Motionworks; http://t.co/nP2yA1nJ
    After Effects tip! Make layer automatically turn to follow direction of path – select layer, go to Layer > Auto Orient. Choose ‘Along Path’

    AfterEffects Tip | Isolate a property group from the Effect Control Panel in Timeline by double-clicking Property Group name in ECW

    #AfterEffects TINY TIPS: Do you have trouble with slow render speeds? Here’s a video workshop by Todd Kopriva to help: http://t.co/Y45ucGEl
    #AfterEffects TINY TIPS: Do you have trouble with slow render speeds? Here’s a video workshop by Todd Kopriva to… http://t.co/2fL7wE8l
    #AfterEffects Tip – Scale layers in comp without messing up composition – Select layers – Go to File > Scripts > Scale Selected Layers
    #AfterEffects Tip | @Doguib7 Create a Shape Layer, use Offset Paths & Trim Paths from Shape Layer ‘s “Add” menu to animate paths – lotsofun!
    #AfterEffects Tip | Animate property randomly – Alt-click Stopwatch to add expression. Type Wiggle(10,50) to change value 10 p/sec within 50
    #AfterEffects Tip | Audio file plays at different speed than recorded? Check that RAM preview settings match the frame rate of the audio.
    #AfterEffects TIP | Custom Shape layers – 1 Layer > New Shape Layer 2 Draw path with pen 3 Select path property – paste custom path @Doguib7
    #AfterEffects Tip | Drag comps directly to Adobe Media Encoder to render in background. Allows you to continue working on other comps in AE
    #AfterEffects Tip | Loop Footage – select clip, go to Interpret Footage > Main > Other Options > Choose how many time you want to loop 🙂
    #AfterEffects Tip | Quickly deselect selected items by hitting F2. On Mac make sure to use Fn key to override system shortcuts.
    #AfterEffects Tip | Replace layer in Timeline with footage from Project panel (retaining fx + KFs) – Select both, hit Cmmd+Alt+/ Ctrl+Alt+/
    #AFTEREFFECTS TIP | Rubbish at animating? Don’t worry! Use the Motion Sketch panel to record mouse or pen motion & apply it to your layer 🙂
    #AfterEffects Tip | Video Tutorial – how to make your own “Old Film” effect using Turbulent Noise; http://t.co/IOn0bHVPuU @AdobeAE #Mograph
    #AfterEffects Tip | Video tutorial – Use the Stroke effect on Illustrator paths to make handwriting animate on screen http://t.co/APabrfE9FT
    #AFTEREFFECTS Tip 41: RT @i2cblog: In Project panel, search ‘unused’ or ‘missing’ to see what’s not used in any comp or source is missing
    #AfterEffects tip; Moving project to other machine or archiving? File > Collect Files gathers all source footage & project maintaining links
    #AfterEffects tip; Scale layers or comps without messing up composition. Go to File > Scripts > Demo palette. Use Scale Layers
    #AfterEffects Tip; Use Premiere Pro to cut footage, add simple animation to layers in real time. Dynamic Link portions to AE for finessing
    #AfterEffects Tip: @Franckmax If you want to do that, just Toggle hold the keyframe first, then right-click and choose “Easy Ease Out/In” 🙂
    #AfterEffects tip: @jamesboorman To make the particles stay “alive” for longer, adjust the Lifespan property.
    #AfterEffects Tip: @MarkToddWagon No need for Alt,  Page Up & Down on their own works. Home & End key to move to 1st & last frames of comp.
    #AfterEffects Tip: 3D layers have Material Options to control shadows. Cast Shadows & Accept Shadows can be switched on or off per layer.
    #AFTEREFFECTS tip: Animate Source Text property 2 make words change over time in text layer. Font & character panel attributes also animated
    #AfterEffects tip: Convert Text to Shape layers (Layer > Create shapes from Text) – Add cool Shape properties to get creative! Endless Fun!
    #aftereffects tip: Create a keyframe for a property on selected layers by holding alt key & tapping property shortcut. P for Position etc
    #AfterEffects Tip: Even out animation speed – select Keyframes in timeline (except 1st & last KF). Right-click & choose “Rove Across Time”
    #AfterEffects Tip: Found a camera move or lighting setup you like? Remember you can save them as Animation Presets to use in other comps.
    #AfterEffects Tip: Give footage instant punch & contrast – duplicate layer – make top layer Overlay Blend mode – adjust Opacity to taste 🙂
    #AfterEffects Tip: Have layers in comp that you don’t want to render? Select Layer, go to Layer > Guide Layer to create non-rendering layer.
    #AfterEffects tip: Help with custom shatter maps. Re: Is this done with shatter effect? http://cr8v.co/wCe [Like it? http://bit.ly/lRPIGH ]
    #aftereffects tip: Huge files? Slow render times? Select layer in Project, go 2 File > Create Proxy. Makes linked  low res version of file!
    #AfterEffects tip: Jump back & forth between visible keyframes & layer markers by hitting J & K. Trouble remembering? Think JUMP KEYFRAMES!
    #AfterEffects Tip: Learn Cinema 4D – soon – you won’t regret it! 🙂 @maxon3d @AdobeAE #Mograph @c4dtips
    #AfterEffects Tip: Locate missing footage by typing ‘missing’ in2 search field in Project panel. Relink by double-clicking it & relocating
    #AfterEffects Tip: Metric Kerning looks good on well-designed, classic fonts for broadcast – it includes a little more space than Optical
    #AfterEffects tip: Painting in Layer panel. Go to View > New View. Place comp & layer panels side by side. Lock them for nice ETLAT workflow
    #AfterEffects Tip: Pt 2. Select Camera, double-hit U key to expose adjusted properties, drag select them, drop into Effects & Presets panel
    #aftereffects tip: Remember the shortcuts for properties with the word ‘STRAP’. (S)cale, Opaci(T)y, (R)otation, (A)nchor Point, (P)osition
    #AfterEffects tip: Rendering more than one format? Select Render Item, go to Composition > Add Output Module to render once & format twice
    #AfterEffects Tip: Rendering movie for web? Choose poster frame displayed in thumbnail – Go to Composition > Set Poster Time before render.
    #AFTEREFFECTS Tip: Retime animation – select keyframes – hold Alt key & drag 1st or last keyframe. Keeps relative timing intact.
    #AfterEffects Tip: RT @theangietaylor: Re: After Effects Key Light – Some Spilling Occuring – How Do I Get Rid of it? http://t.co/azVs5mxn
    #AfterEffects Tip: RT @theangietaylor: Re: Moving Layers by n Pixels http://t.co/qtde4cIk
    #AfterEffects Tip: Select a layer, double-hit U key to expose properties adjusted from default state. Great way to understand effect presets
    #aftereffects tip: To auto-animate brush strokes as they’re drawn. Choose Paint tool & select ‘Write On’ in Duration Menu in Paint panel.
    #AfterEffects Tip: To create a template project simply save the project with .aet instead of .aep. Prevents u from accidentally over-writing
    #AfterEffects tip: To reduce the amount of motion blur in a comp go 2 Composition Settings > Advanced Tab & reduce the Shutter Angle value.
    #AfterEffects tip: To use included scripts enable General > Preference to ‘Allow scripts . . .’ and then restart… http://fb.me/BQbXk95K
    #AfterEffects Tip: Use Motion Sketch panel to capture motion from Wacom tablet & apply it to layers. Good way to record gestural animation.
    #AfterEffects Tip: Use the  J & K keys to jump between visible keyframes
    #AfterEffects Tip: Use the “continue” Loop expression 2 continue an existing animation, maintaining speed &… http://t.co/u21TqofD
    #AfterEffects Tip: When overnight rendering, render out an image sequence, at least then if it crashes you can save frames already rendered.
    #AfterEffects tips from @AngieTaylor – Software Tips & Tricks Newsletter – http://t.co/kEF6ry0p [Like it? http://t.co/IzVYju0W ]
  • Halloween Video Tutorial

    Halloween Video Tutorial

    In this free Halloween Video Tutorial from the lovely, generous folks at video2brain, Angie Taylor shows how to use her Blob Brush Sculpture techniques to create a Skull in Adobe Illustrator. This movie is part of her Adobe Illustrator CS6: Learn by Video product, made for video2brain in partnership with co-author, Chad Chelius.

  • Creative Graphic Design: Essential Typography

    Find out more

    Buy Creative After Effects 7Creative Graphic Design: Essential Typography
    Principles and Techniques for Working with Text

    Making good decisions in typography — choosing the right typefaces, fonts, sizes, spacing and so on — can have a major impact on the quality of your designs. In this one-of-a-kind workshop, art director, illustrator, and motion graphic designer Angie Taylor introduces you to the essential principles of typography.

    After exploring the terminology, history, and anatomy of traditional and computer-based fonts, she brings you all the way up to the present day by looking at how text is formatted in today’s creative applications.

    You’ll also learn specific software techniques for creating your own lettering from hand-drawn text, animating text on a path, using operators and effects to customize existing fonts, working with 3D text, and more.

    Check out some free movies from this workshop here. Click on the unlocked links to watch a movie.

    Free Movies

  • Example of Angie’s Photoshop Tutorials

    Example of Angie’s Photoshop Tutorials

    I was very pleased to be invited by John Dickinson to create a Prosentials video tip for Motionworks. This tip is for Photoshop CS6 and demonstrates how to removing dust from video frames. I’d love to hear what you think of my first Prosentials tip so please add comments. I recorded this tutorial at my studio, Creative Cabin in Brighton.

    John Dickinson is a motion graphic designer who I admire greatly. His work as Senior Broadcast Designer at Foxtel in Australia is impressive enough but on top of that full-time role, he aslo manages to run one of the most inspiring and useful resource sites for other motion graphic designers. It’s called Motionworks. Here you can find all sorts of tips, tricks, tutorials, presets and templates designed by John and his contemporaries.

  • Adobe CS6 Software Training Videos

    Adobe CS6 Software Training Videos

    This week, to celebrate the launch of Adobe’s Creative Suite I’ve released a whole host of new Adobe CS6 software training videos from new and forthcoming workshops produced with video2brain. So now you know why I’ve been relatively quiet for the last couple of months!

    The workshops will be out very soon but meanwhile we thought it would be nice for you to get a sneak preview of what you can expect from the full workshops. Here’s a little bit about CS6, from the perspective of the video2brain authors. You can more free example movies from each of my new titles listed below.

    Adobe After Effects CS6: Learn by Video

    Master the Fundamentals

    Adobe After Effects is an incredibly deep and rich set of tools for creating motion graphics, manipulating movies, adding visual effects, and more. In this Learn by Video course, created in partnership with our friends at Peachpit Press, experts Todd Kopriva and Angie Taylor teach you how to make the most of this powerful software, including the new features in After Affects CS6.

    After getting an overview of the workflow and the user interface, you will learn how to bring assets into After Effects and configure the software for optimum performance. You’ll also learn a range of compositing features, including the new variable-width masks and 3D camera tracker features, as well as basic masking and color keying. Tips on everything from troubleshooting and avoiding common problems to creating finished movie files round out this comprehensive training.

    To be notified when this product is released, please visit this page and click on the Notify Me link.


    Adobe Illustrator CS6 workshops

    I’ve also finished working on two new titles for Adobe Illustrator CS6 which will be out really soon. Below are some taster movies from my Adobe Illustrator CS6 – Getting Started course and my Adobe Illustrator CS6 – Learn by Video course that I created with co-author Chad Chelius.

    If you’d like to be kept up to date as soon as new courses become available you can subscribe using your favourite browser or email client.

    video2brain Feeds

    New Courses: http://www.video2brain.com/en/rss-trainings.xml

    Free Lessons: http://www.video2brain.com/en/rss-videos.xml

    Upcoming Titles: http://www.video2brain.com/en/rss-preview.xml


  • Creative Graphic Design: Essential Typography

    Creative Graphic Design: Essential Typography

    Making good decisions is essential in typography — choosing the right typefaces, fonts, sizes, spacing and so on — can have a major impact on the quality of your designs. In this one-of-a-kind workshop, art director, illustrator, and motion graphic designer Angie Taylor introduces you to the essential principles of typography.

    After exploring the terminology, history, and anatomy of traditional and computer-based fonts, she brings you all the way up to the present day by looking at how text is formatted in today’s creative applications.

    You’ll also learn specific software techniques for creating your own lettering from hand-drawn text, animating text on a path, using operators and effects to customize existing fonts, working with 3D text, and more.

    This workshop covers many aspects of typography, from its history and terminology to how it is handled by modern software. The contents of this course include:

    Introduction
    The Introduction chapter sets the stage for the whole course. Your trainer, Angie Taylor, will introduce some of the typographic concepts that will be covered in the following lessons. She’ll also share the story of what inspired her to become a graphic designer.

    The Essence of Typography
    This chapter examines the fundamentals of typography, looking at the history of type and how it influences the terminology we use to describe the anatomy of type.

    Typefaces
    This chapter focuses on typefaces. It begins by examining the categories of typefaces and then compares some examples from each of the categories so that you are better able to recognize the differences between them. You’ll also discover how certain characteristics and cultural associations can influence the meaning of a particular typeface.

    Fonts
    Typefaces usually include several fonts with different weights and characteristics. In this chapter you’ll learn about these and the differences and similarities in size, weight, line, and detail that you should be aware of when choosing fonts. We’ll also look at special characters that are included in fonts, such as ligatures.

    Spacing
    The space between letters, words, and lines of text is just as important as the characters themselves. In this chapter we’ll start thinking of negative space as a shape and look at ways of adjusting this space to balance text correctly.

    Formatting Text in Adobe Applications
    Most Adobe design and video applications have similar typographic controls. In this chapter we’ll look at the different tools that are available for editing your text and apply some of the concepts we’ve discussed in earlier chapters.

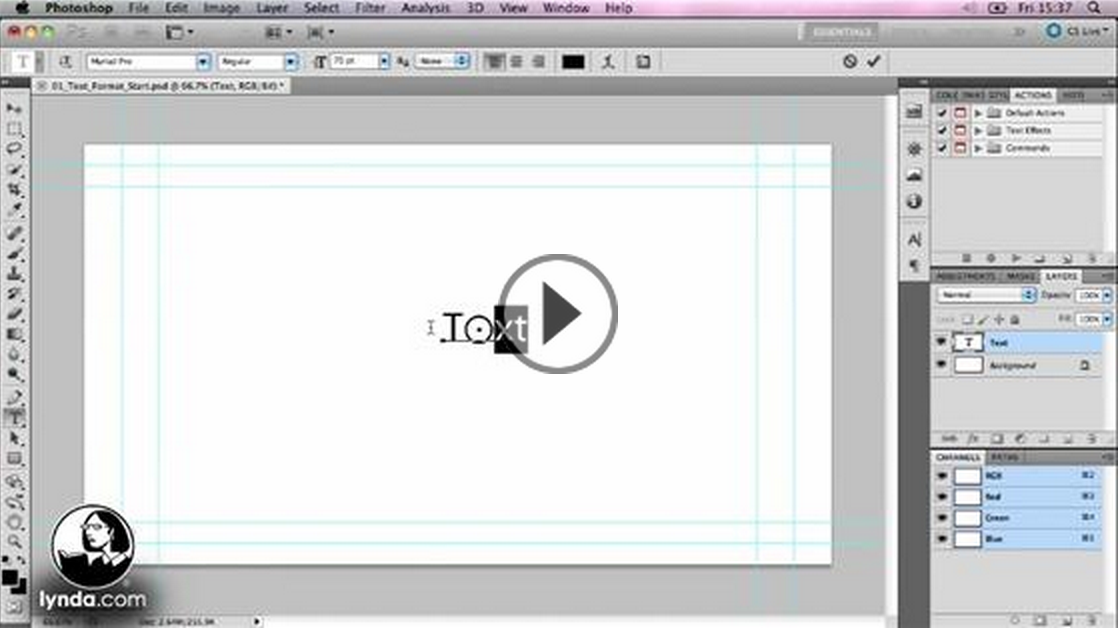
    Working with Type in Photoshop
    This chapter focuses on the (somewhat limited) text features available Adobe Photoshop. You’ll also learn about some complementary features like layer styles that you can use to personalize your design and add pizzazz to your text.

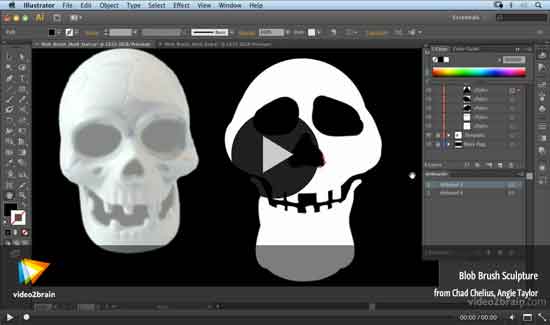
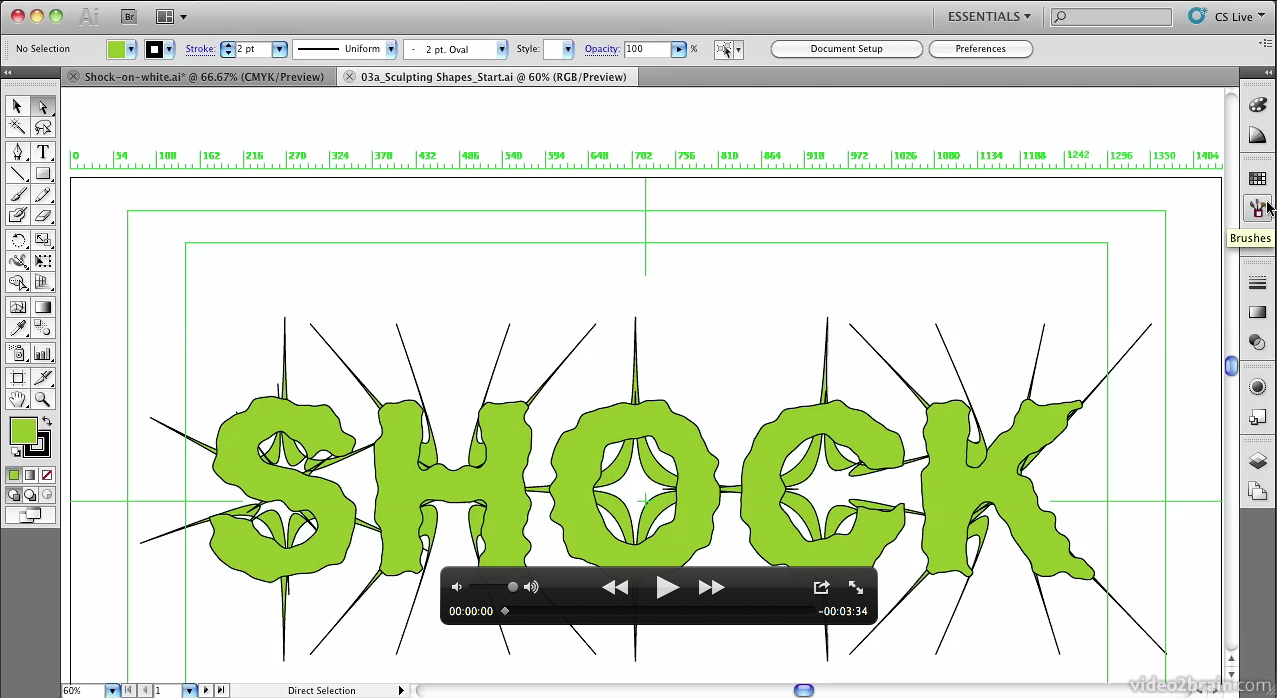
    Working with Type in Illustrator
    Illustrator is Angie’s favorite application for designing text, and here’s why. In this chapter you’ll get a ton of creative tips on ways to take a standard, classic font like Helvetica and customize it to get a variety of different looks.

    Motion Graphics in Adobe After Effects
    In this chapter we’ll focus on creating text for your motion graphic designs. You’ll see how After Effects handles text imported from Photoshop, how to make text move along a specified path, and how to apply effects. We’ll also look at the multitude of text animation presets that you can apply to your text.

    The lessons are wrapped in a feature-rich interface that lets you jump to any topic and bookmark individual sections for later review. Full-Screen mode provides a hi-def, immersive experience, and Watch-and-Work mode shrinks the video into a small window so you can play the videos alongside your application. Also included are exercise files that give you an easy way to try out the techniques you learn.

    Download a PDf description of this course


  • Creative Graphic Design: Essential Typography

    Creative Graphic Design: Essential Typography

    My new workshop, Creative Graphic Design: Essential Typography is due to be released next week, just in time for the festive season! The folks at video2brain have kindly allowed me to give my readers a sneak preview and access to one of the movies from this workshop so here it is.

    Master the Art of Arranging Text

    Typography, the art of arranging text, has a long and storied history. In this one-of-a-kind workshop, art director, illustrator, and motion graphic designer Angie Taylor introduces you to the essential principles of typography. After exploring the terminology, history, and anatomy of traditional and computer-based fonts, she brings you all the way up to the present day by looking at how text is formatted in today’s creative applications. You’ll also learn specific software techniques for creating your own lettering from hand-drawn text, animating text on a path, using operators and effects to customize existing fonts, working with 3D text, and more.
  • After Effects Light Wipe Tutorial

    After Effects Light Wipe Tutorial

    After Effects Light Wipe Tutorial

    There was a a question today on Creative Cow about how to create a light wipe effect in After Effects. I wanted to help so I decided to put together a quick After Effects Light Wipe tutorial. This tutorial includes an After Effects project and an eight-minute video tutorial where I explain techniques used.

    Here’s the original question from Danielle Masek;

    Q: I have a vector object (some wings) which is black right now, and I would like a light ray to start bursting through the center, change to a vertical line “ray” and move both right and left concurrently, revealing the wings; however, the wings won’t now be all made up of light, instead the light rays will reveal the wings’ outline, which will now be outlined in a backlit glow. I hope I’m explaining this clearly. Will I need trapcode for this? Something else?

    A: Here’s a little movie that will help you and others I hope. You’ll also find the project files to follow along Wings reveal.aep.

  • Font Links for Kinetic Typography

    Font Links for Kinetic Typography

    Kinetic Typography Techniques with After Effects

    I recently published my Kinetic Typography Techniques for After Effects course. In it I used a wide selection of fonts that are freely downloadable from various websites, just to make sure everyone following the tutorial could get access to the same fonts.

    Unfortunately one of the websites I recommended is no longer in operation. Below I’ve providing alternative links to all of the fonts used in these workshops. I cannot guarantee that these links will always be maintained as they are from third-party sites so I’ve also included the font names so that you can search for them using your favourite search engine, should the links expire.

    When downloading these shareware fonts please take a few minutes to click on the Donate button for each of them. Even if you only donate $5 it will help make sure that these hard-working font designers get rewarded for providing us all with very low priced fonts to experiment with. This is particularly important if you are going to be using any of the fonts in paid work. It’s good karma and will make you feel good that you’re helping out a fellow designer!

    If you’re interested in understanding more about the financial struggles that all designers are facing, please check out this entertaining graph by Jessica Hische which determines whether a designer should work for free! Jessica is a font designer and letterer who campaigns for fair pricing for fonts and other design work.

    Here are your font links;

    Usage Guidelines

    The fonts presented here are their authors’ property. They are either freeware, shareware, demo versions or public domain. The licence is usually positioned near the download button but please check the readme-files in the zipped packages or check the author’s website for details. You can contact him/her if in doubt. If no author/licence is indicated it means that information is not available. It doesn’t mean it’s free, it is your own responsibility to find out more if you want to use it commercially.