This course is an introduction to the history of film and video editing—including not only an in-depth look at more than a century of essential editing techniques, but also an interesting exploration of the tools and technology that have made editing possible.
Staff author Ashley Kennedy brings in real-world examples to explore each point in history—from the first unedited, rudimentary shots and the early days of shot combination to the birth of film language and the evolution of both mainstream and revolutionary film editing techniques through the 20th century and today. She uses this journey to demonstrate how techniques of the past have shaped cinema today.
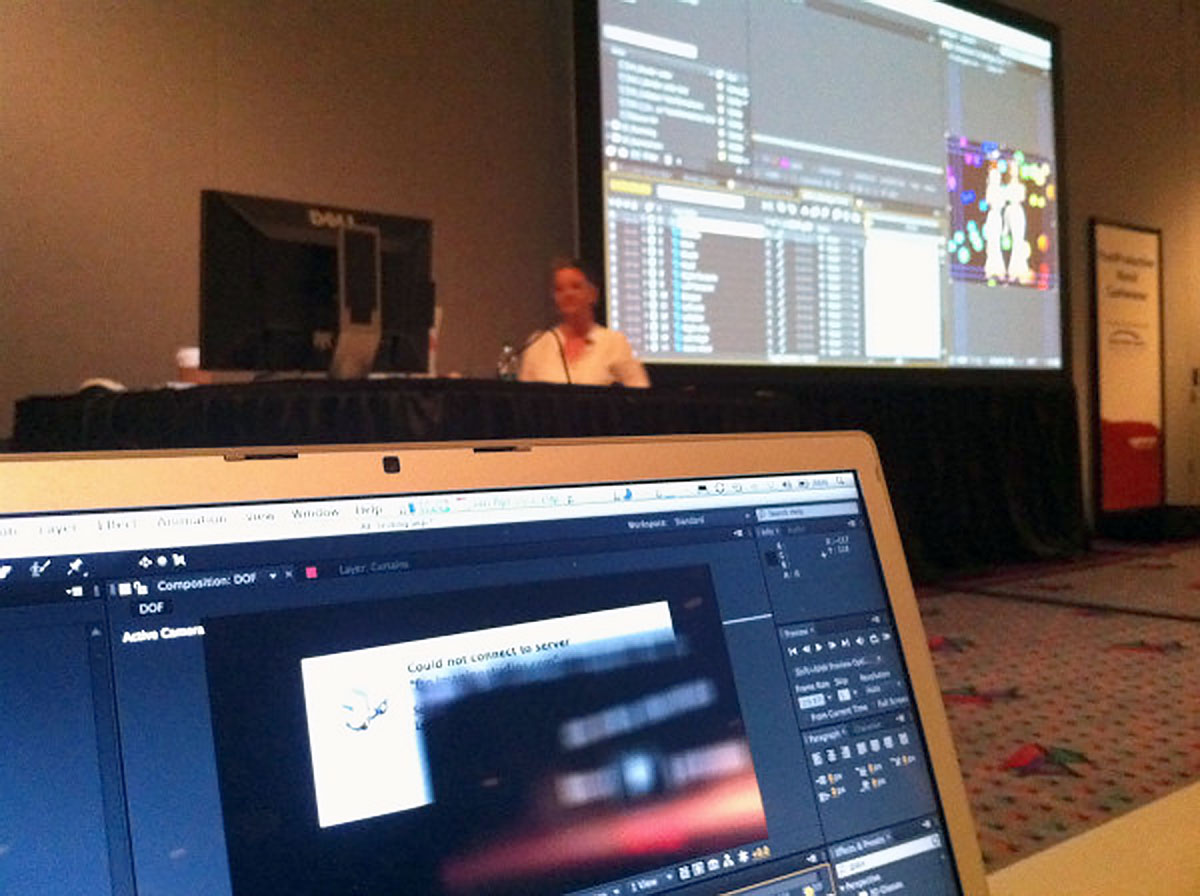
Well, it’s that time of year again, NAB 2015 is just round the corner. It’s the event of the year for our industry. The who’s-who of the broadcast industry gather together in Las Vegas for this massive trade show, conference and countless parties. It’s a great opportunity to meet old friends, make new contacts, learn new techniques and see new products and technologies on show.
Interview with That Studio
Come to the That Studio booth, in the Plugin Pavillion at 1.15 on Wednesday to partake in the audience. I’ll be interviewed by the lovely Kanen Flowers about my relatively new venture The Creative Cabin. I’ll also be giving away some free Creative Cabin products!
Sessions and Demo’s
This year I’ll have a varied schedule – speaking at the Post Production World Conference and also doing software demo’s on the trade show floor. If you want to learn my latest tips and techniques and see new content from up and coming video tutorials, there’s plenty to see.
RE:Vision Effects Inc.
Booth SL5807
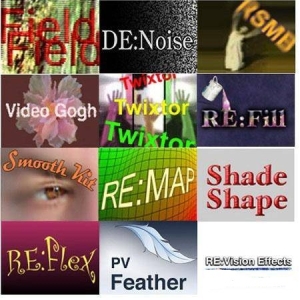
I’m proud to say I’ll be working the trade show floor on behalf of RE:Vision Effects Inc. Who make Academy Award winning Plugins for After Effects, Autodesk Systems, Avid Systems, Final Cut Pro, Fusion, genQ, HitFilm, Natron, Nucoda, Nuke, Premiere Pro, Resolve, Scratch and Vegas Pro.
I’ll be showcasing all of their plugins, in particular my personal favourite RE:Flex that I used on the Chris Cunningham’s Rubber Johnny music video. You can find us at booth SL5807. I’ll be there Monday from 2-6, Tuesday from 3.30-6 and Wednesday from 9-1.
This year Boris FX will be teaming up with their friends at Imagineer Systemsto present awesome new time-saving technologies and vfx tools jointly developed for the first-time by the Boris FX and the Imagineer teams. Swing by thebooth SL4225 on Tuesday the 14th April at 12pm midday to see my talk about creating 3D titles right inside After Effects. See how to us Boris FX 3D plug-ins with the built in 3D Camera Tracker inside After Effects to mimic famous movie titles.
Post Production World Conference
South Upper Hall
I’ll also be speaking at the Post Production World conference during the week. This premiere technical training program is produced by Future Media Concepts. Click here to review the full schedule of this year’s Post|Production World offerings.
Designers can make extra income by designing templates for other designers. Websites like Adobe Exchange and VideoHive make it easy to market and sell them. In this session Angie Taylor will share tips and techniques for building solid templates and source elements for After Effects and Premiere Pro. She’ll also share information about how to protect your content legally and make money from it online.
This session will feature workflows in After Effects, Premiere Pro and Illustrator.
By the end of this session, attendees will know how to….
• Design templates that are useful and practical
• Organize template projects so they are easy to use
• Create expression controllers for adjusting template elements
• Lock and hide and add notes to project elements
• Create accounts to market and sell templates
• Make additional income by selling products
The Cineware plugin allows users to integrate Cinema 4D, 3D objects and scenes into your After Effects projects. Angie will look at the many creative ways this powerful software combination can work. You’ll pick up all the skills you need to feel confident with Cinema 4D Lite as well as see some inspiring ideas to drive you forward. The session will finish with Angie showing you how you can use classic camera moves from famous movies in your 3D scenes.
By the end of this session, attendees will know how too…
• Build models from primitive objects Cinema 4D Lite
• Apply and modify materials in Cinema 4D Lite
• Animate properties in Cinema 4D Lite
• Make use of free content in Cinema 4D Lite
• Incorporate your 3D objects into After Effects
• Recreate classic camera moves with the After Effects 3D Camera Tracker
Conference: Post|Production World
Registration Package: A Post|Production World registration or SMART Pass will get you into these sessions. Please check here for registration prices.
I hope to see some of you there. I am quite short-sighted so often don’t recognise people from a distance so please make sure to come and say hello if you see me.
[et_pb_section][et_pb_row][et_pb_column type=”4_4″][et_pb_text]The Elgato Thunderbolt Dock really is a desk-changer! It’s not often I write blog posts about hardware but this little gadget has eased my worklife considerably over the past few weeks and I’d like to sing it’s praises, perhaps it can help ease yours too.
It’s a simple, elegant little box that allows you to connect multiple devices to your laptop or desktop computer via one Thunderbolt cable. Simply connect your chosen machine to the back of the box using the supplied Thunderbolt cable.
The back has HDMI for connecting your external monitor. I use this to connect my NEC MultiSync PA271WB 27 inch LCD and get the full 2560 x 1440 resolution display fed from my humble 15″ Macbook Pro.
It also adds an extremely useful Gigabit ethernet port to my MBP so I don’t have to rely on wireless for networking – this is invaluable for me as I live in an area where we still have ADSL broadband – frustratingly slow and unreliable.
There are also other thunderbolt ports and a couplf of USB ports on the back fro connecting other devices. The box has power too so can be used to charge up your iPod or iPhone as well as powering bus-powered devices such as hard drives. There’s also a free utility that, when installed, provides your Mac support for high-powered USB.
At the front end is another USB port and Stereo audio in and out ports. These are useful for conference calls but I can alos use these to do some quick screen captures for my tutorials. Just attach a decent pair of headphones and my Countryman mic and I’m off! If I need more control over my audio its easy to connect my USB Pre 2.
Sometimes the simple things are the best and this little unassuming box is really the best. Previously I had a spaghetti-pile of cables running from the desk to my Macbook Pro. Each time I went there I had to plug and unplug various peripherals. Now my life is simpler and uncluttered, just one simple elegant cable is all I need. I’m a happy geek![/et_pb_text][/et_pb_column][/et_pb_row][/et_pb_section]
See me demo Cinema 4D R14 and After Effects CC at IBC 2013 and also experience CINEMA 4D Release 15 Live!
From Sept. 13 – 17, 2013, exhibition hall 6, booth C19, RAI convention center, Amsterdam I’ll be showing CINEMA 4D R14 and After effects CC integrations at the MAXON booth at IBC 2013.
I’m proud to be included in a list of internationally renowned experts who will also be appearing at the MAXON booth every day with very interesting presentations and demonstrations covering a wide range of topics. An agenda and information about the speakers can be found here.
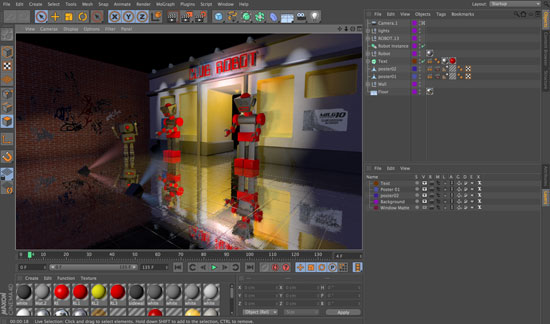
I’ll be showing tips and techniques from my Lynda.com training workshop “Up and Running with Cinema 4D Lite” where she builds a robotic animation, inspired by Beeple and uses the After Effects Cineware plugin to perform post production tasks on isolated layers from the Cinema 4D scene.
Each day we will be giving away fantastic prizes with a total value of more than €10,000. The main prize is an NVIDIA Quadro K5000 high-end graphics card worth more than €2,300 and a commercial CINEMA 4D Broadcast license, which will be given away to one lucky winner*.
Everyone wants to recreate the looks made famous by hit TV shows like Breaking Bad and Southcliffe. I’m creating a set of these looks right now, using several third-party plug-ins for After Effects and Premiere Pro.
I’m giving away a couple of these presets here for registered members of Effect Café. Registration is free to download these and other goodies.
The preset illustrated in the picture above is named MethLab and is based upon the color treatments used in the hit TV series, Breaking Bad. This image is taken from “Breaking Bad Contest Video” (Extended, Non-Color Corrected) Written and Directed by Taylor Perkins https://vimeo.com/72596888
Here’s a before and after image for my Southcliffe preset, inspired by the recent UK crime drama of the same name. Hop on over to Effect Café to download these free presets today.
You can now access most of my software training courses with Lynda.com. This link will take you to my author page where you can find out more about the courses I have on offer. Here’s a free taster of the kind of things I teach in my tutorials.
I recorded these courses with video2brain and they are now part of the Lynda.com library. If you prefer to buy individual courses then you still can for a limited time in my tutorials store.
Of course a Lynda.com subscription gives you access to the entire library of training by me and other authors including Trish and Chris Meyer, Rob Garrott, Deke McKlelland and more.
Free seven-day trial
I’m giving away a free 7-day trial subscription. If you have a quiet week, sign up here and pack as much training in as you can to get real value from this offer. Once you’ve benefitted from a week’s training I’m sure you’ll see the benefit of a full-time, no-holes-barred subscription!
If you subscribe now you’ll soon get access to my latest course which is coming soon. “Up and Running with Cinema 4D Lite” is a complete 2-day course in Cinema 4D Lite, aimed at After Effects users who have little knowledge of 3D applications. It will help you make the most of this free software that was bundled as part of After Effects CC.
Here’s my latest collection of After Effects Twitter Tips from my archive. Learn all sorts of useful tips and tricks in bite sized portions. Make sure to Follow me on Twitter to get these tips regularly as well as other goodies I like to share.
After Effects tip – To make a one node camera point at a layer, select the layer, then with the unified camera tool selected, hit the F key
AFTER EFFECTS TIP | Copy & Paste any mask shape into a position property to make layer move along the path. Click on property name to select
AFTER EFFECTS TIP | Give Adobe your feedback | Report Feature Requests & bugs here; http://t.co/s7f1NOPs @AdobeAE #AfterEffects
AFTER EFFECTS TIP | To stretch or squash an animation – select all keyframes – hold Alt key & drag first or last Keyframe in selected group
After Effects Tip | Video tutorial – Use the Stroke effect on Illustrator paths to make handwriting animate on screen http://t.co/0E6UHcKOsr
After Effects Tip of the day! How to make a layer follow a path copied from Adobe Illustrator artwork. http://fb.me/CEapjgCw
After Effects tip; add new Refine Matte effect to ANY matte in AE to refine edges or add motion blur. Not just for Rotobrush! Fabulous tool!
After Effects tip; Animating characters, use expression pickwhip 2 link body parts 2 cntrl layer. Expression control effect 4 each movement.
After Effects Tip; How to make a layer follow a path copied from Adobe Illustrator artwork; http://bit.ly/f8tP4w
After Effects tip; Lay down markers in time with audio by previewing the audio and hitting * on number pad when you want markers to appear.
After Effects tip; to edit the path of an effect’s positional property (e.g. Particles) got to Layer panel & choose effect in target menu.
After Effects tip; To use more than one layer as matte without precomping. Add multiple copies of Sett Matte effect to layer needing matted.
After Effects Tip: @butlerm_com Try combining transfer modes, use more than one layer with a different mode and opacity value on each! 🙂
After Effects tip: Add keyframes for hidden Transform properties by selecting layers & hitting alt & property letter (eg alt-p for position)
After Effects tip: Applied a preset & wanna find out how it’s made? Select layers then double-hit the U key to expose adjusted properties.
After Effects tip: Make 3D layers turn to face camera as it moves. Select layers, go to Layer>Transform>Auto Orient. choose Towards Camera
AFTER EFFECTS TIP: Right-click on a property value to open Edit Value dialog. Here u can access different measurement units & adjust ranges.
AFTER EFFECTS TIP: Rotate , scale, skew or move all layers by adding the Transform effect to Adjustment layer – keyframe to animate them
After Effects tip: Scaled a layer down, nested the comp, then scaled it up? Click Collapse Transformations switch to fix resolution issues.
AFTER EFFECTS TIP: Travis Wade presents his After Effects: Copy and Paste Shortcuts on Motionworks; http://t.co/nP2yA1nJ
After Effects tip! Make layer automatically turn to follow direction of path – select layer, go to Layer > Auto Orient. Choose ‘Along Path’
AfterEffects Tip | Isolate a property group from the Effect Control Panel in Timeline by double-clicking Property Group name in ECW
#AfterEffects TINY TIPS: Do you have trouble with slow render speeds? Here’s a video workshop by Todd Kopriva to help: http://t.co/Y45ucGEl
#AfterEffects TINY TIPS: Do you have trouble with slow render speeds? Here’s a video workshop by Todd Kopriva to… http://t.co/2fL7wE8l
#AfterEffects Tip – Scale layers in comp without messing up composition – Select layers – Go to File > Scripts > Scale Selected Layers
#AfterEffects Tip | @Doguib7 Create a Shape Layer, use Offset Paths & Trim Paths from Shape Layer ‘s “Add” menu to animate paths – lotsofun!
#AfterEffects Tip | Animate property randomly – Alt-click Stopwatch to add expression. Type Wiggle(10,50) to change value 10 p/sec within 50
#AfterEffects Tip | Audio file plays at different speed than recorded? Check that RAM preview settings match the frame rate of the audio.
#AfterEffects TIP | Custom Shape layers – 1 Layer > New Shape Layer 2 Draw path with pen 3 Select path property – paste custom path @Doguib7
#AfterEffects Tip | Drag comps directly to Adobe Media Encoder to render in background. Allows you to continue working on other comps in AE
#AfterEffects Tip | Loop Footage – select clip, go to Interpret Footage > Main > Other Options > Choose how many time you want to loop 🙂
#AfterEffects Tip | Quickly deselect selected items by hitting F2. On Mac make sure to use Fn key to override system shortcuts.
#AfterEffects Tip | Replace layer in Timeline with footage from Project panel (retaining fx + KFs) – Select both, hit Cmmd+Alt+/ Ctrl+Alt+/
#AFTEREFFECTS TIP | Rubbish at animating? Don’t worry! Use the Motion Sketch panel to record mouse or pen motion & apply it to your layer 🙂
#AfterEffects Tip | Video Tutorial – how to make your own “Old Film” effect using Turbulent Noise; http://t.co/IOn0bHVPuU @AdobeAE #Mograph
#AfterEffects Tip | Video tutorial – Use the Stroke effect on Illustrator paths to make handwriting animate on screen http://t.co/APabrfE9FT
#AFTEREFFECTS Tip 41: RT @i2cblog: In Project panel, search ‘unused’ or ‘missing’ to see what’s not used in any comp or source is missing
#AfterEffects tip; Moving project to other machine or archiving? File > Collect Files gathers all source footage & project maintaining links
#AfterEffects tip; Scale layers or comps without messing up composition. Go to File > Scripts > Demo palette. Use Scale Layers
#AfterEffects Tip; Use Premiere Pro to cut footage, add simple animation to layers in real time. Dynamic Link portions to AE for finessing
#AfterEffects Tip: @Franckmax If you want to do that, just Toggle hold the keyframe first, then right-click and choose “Easy Ease Out/In” 🙂
#AfterEffects tip: @jamesboorman To make the particles stay “alive” for longer, adjust the Lifespan property.
#AfterEffects Tip: @MarkToddWagon No need for Alt, Page Up & Down on their own works. Home & End key to move to 1st & last frames of comp.
#AfterEffects Tip: 3D layers have Material Options to control shadows. Cast Shadows & Accept Shadows can be switched on or off per layer.
#AFTEREFFECTS tip: Animate Source Text property 2 make words change over time in text layer. Font & character panel attributes also animated
#AfterEffects tip: Convert Text to Shape layers (Layer > Create shapes from Text) – Add cool Shape properties to get creative! Endless Fun!
#aftereffects tip: Create a keyframe for a property on selected layers by holding alt key & tapping property shortcut. P for Position etc
#AfterEffects Tip: Even out animation speed – select Keyframes in timeline (except 1st & last KF). Right-click & choose “Rove Across Time”
#AfterEffects Tip: Found a camera move or lighting setup you like? Remember you can save them as Animation Presets to use in other comps.
#AfterEffects Tip: Give footage instant punch & contrast – duplicate layer – make top layer Overlay Blend mode – adjust Opacity to taste 🙂
#AfterEffects Tip: Have layers in comp that you don’t want to render? Select Layer, go to Layer > Guide Layer to create non-rendering layer.
Great News! I’ll be one of the speakers at the very first After Effects World conference. Never before has an After Effects World Conference of this magnitude been available — Until now.
Uniquely designed with the needs of motion graphics and visual effects professionals in mind, it’s your opportunity to amp up your software aptitude, build professional connections and freely engage in creative exploration. www.AfterEffectsWorld.com
Trip To Adobe Headquarters
Attendees of this unique After Effects conference will visit Adobe headquarters in Seattle for a full day, meeting the developers & engineers of After Effects. We’ll have panel discussions, a mini expo, a special keynote presentation and collaborative workshops with the Adobe team, followed by a BBQ & networking — a perfect way to end the day.
Learn How to Model and Animate with Cinema 4D Lite
Have you ever wanted to learn how to model and animate with Cinema 4D Lite? Want to take advantage of the great free application that’s now bundled with After Effects CC?
I’m just putting the finishing touches to my brand new course “Up and Running with Cinema 4D Lite”. I wanted to write a training course specifically aimed at After Effects users with little or no experience with 3D applications. It’s an accessible and comprehensive course that covers all aspects of this application.
Real World Projects
You’ll learn how to build models from primitive objects, link objects and animate them. I’ll show you how to light your scenes and animate cameras changing in time with music. You’ll create your own custom materials as well as utilizing the amazing free presets that come with Cinema 4D Lite.
All this is applied to a single project so you’ll be able to understand how each of the features can be used in conjunction with each other on real-world projects. Here’s a taster of what you’ll be creating.
You’ll also discover how to use Cinema 4D Lite alongside After Effects, taking advantage of the new Cineware plug-in. We’ll also explore some third party scripts and plug-ins that’ll help you along the way.
Subscribe Now
So, if you want to know how to make best use of this new software that’s arrived on your doorstep, sign up for Lynda.com and be one of the first to get the training when it’s released. If you want to try out a free trial to Lynda.com here’s a link for a week of free video training.
A brand new tool for After Effects CC was released today. CINEWARE proxy automates the process of making useful proxy files from your Cineware layers to help speed up your workflow immensely.
How can it help me
Cineware is a great addition to After Effects CC but it doesn’t really take advantage of the great built-in proxy system that After Effects offers. Cineware proxy fixes all that by making a placeholder proxy of your 3D layers.
If you need to make changes or update your Cineware layer it’s a case of flicking a simple switch to go back to the live C4D file.
Add the brilliant Background Renderer to the bundle and save even more money. This essential script allows you to render faster in the background while you continue working on your After Effects projects. Used in conjunction with Cineware Proxy you’ll own a lean, mean rendering machine! Use the coupon code bgcine to save an additional 20% on BG Renderer Pro when you checkout.
I used this amazing new script in conjunction with Background Render Pro to create this movie. “Club Robot” is my tribute to Beeple, as a thank you for all the great work he does. It was modelled and animated in Cinema 4D Lite. Compositing and Visual Effects were done with After Effects CC and Cineware.
This movie forms the basis of many of the tutorials from my forthcoming “Up and Running with Cinema 4D Lite” video training course which will be available soon at Lynda.com. It’s an entire two-day course in Cinema 4D Lite, aimed at After Effects users who may not be familiar with 3D software. It teaches modelling, animation, texturing, lighting, cameras and all other aspects of working with Cinema 4D Lite.
Product manager Steve Forde said today in his Adobe Blog about the new features in next version of After Effects After Effects;
“with what’s coming to the next version of After Effects – we set a new standard I don’t know that we can match again – EVER”
Announced today is the astounding next version of After Effects, along with the other professional video and audio applications such as Premiere Pro and Audition.
I’ve had my hands on the next version of After Effects and I’m hooked, I’m sure you will be too. Here’s a run down on my favourite features and improvements.
CINEMA 4D Lite
The inclusion of a lite version of CINEMA 4D application with After Effects is a fabulous thing. Now everyone can learn and use this amazing 3D application.
Although this is essentially a pared down version of the software it’s by no means limited for new users and it’s feature set is on a par with CINEMA 4D Prime R14 which normally retails for $995 so you are getting a lot of new 3D bang for your buck!
Live 3D pipeline between CINEMA 4D and After Effects
C4D files can now be imported directly into After Effects. Just import them like any other file and drop them into your comps without the need to render.
You can also create new Cinema 4D files directly from within After Effects by choosing
File > New > MAXON CINEMA 4D File. The Edit Original command can also be used on a selected C4D file to edit it in C4D and see it automatically update back in After Effects. Popular 3D formats such as OBJ, FBX, and Alembic are all supported and can now be integrated into your After Effects scene.
The background CineRender renderer takes care of business in terms of getting those pixels made. There are several choices for render modes. The Software render allows you to work quickly and displays your scene with the current viewport settings in C4D while the Standard render modes allow you to see detail that can be customised from the Cinema 4D Render Settings like anti-aliasing and reflections. There are also options for redisplaying scenes in wireframe mode to quickly check animation.
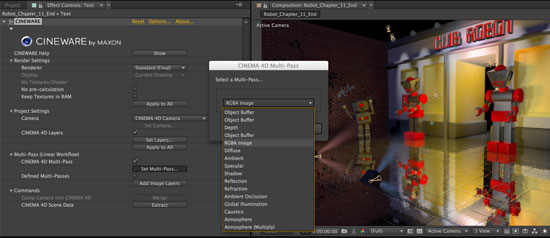
With the Cineware plugin you can extract 3D data such as cameras, lights and nulls from Cinema 4D so you can match up new elements into the scene. Cinema 4D layers are also supported, making it easy to treat different elements of the scene individually.
To top it all off you can also work with individual passes by selecting the Multipass options. These can include standard Multipasses like Reflection, Caustics and Shadows which can be tweaked and perfected in post. A depth matte can be combined with the Lens Blur filter in After Effects to adjust depth of field effects.
External Compositing and regular Compositing tags can be used to isolate individual objects by the way of Object Buffers (Mattes). It really is a flexible solution to what once was a complex and time-consuming workflow. Huge speed boost will be achieved from this massive new feature.
You can also modify a .c4d file to include the camera data from After Effects. This is especially useful for transferring camera data created by the 3D Camera Tracker effect.
I’m currently recording a four hour video workshop. This will be aimed at After Effects users who want to get into Cinema 4D but find 3D apps challenging. It will cover the entire After Effects and Cinema 4D workflow as well as getting you comfortable with Cinema 4D so that you love it just as much as already love AE.
Meanwhile, my good friend, John Dickinson has a great overview video of the new Cinema 4D Lite and the Cineware plugin here on Motionworks.
The Refine Edge tool allows you to improve an existing matte by creating semi-transparent areas for the fine detail commonly found at the edge of a matte. A typical example of where this is useful is in keying out hair.
Inspired by, and giving a nod to, the Refine Edge feature in Photoshop, the Refine Edge tool is also integrated in the Roto Brush & Refine Edge effect. To use Refine Edge you must already have an alpha channel defined for the layer. This could be created by Rotobrush, masking or by a keying effect.
Roto Brush & the Refine Edge effect only affect areas defined by the Refine Edge strokes. These strokes can vary in terms of width and can be confined to specific areas of the matte.
The new Refine Soft Matte effect is also excellent at edge refinement. Refine Soft Matte effect applies identical edge refinements as the Refine Edge tool but applies it to an entire matte.
Warp Stabilizer VFX, improvements to the Warp Stabilizer effect
I’m most excited by the fact that you can now also reverse any stabilization created with the Warp Stabilizer. This makes it doubly-useful. So for example you can remove camera movement, making it easier to apply an effect or remove an element from a shot. Then you can reintroduce the camera movement to the shot, making it seem as though your modifications existed when the footage was shot – brilliant!
The new Objective options for using Warp Stabilizer VFX also allow you to use the effect for compositing a new layer into a scene containing camera movement. Simply run the warp stabilizer on one layer and apply the data to another layer. the composited layer will appear naturally in the shot as if it has always been there.
The Preserve Scale option in Warp Stabilizer VFX effec doesn’t get confused by point-of-view shots like the previous one did in CS6. It will no longer attempt to correct for movement of the camera by changing the scale when you enable the Preserve Scale option. Underlying tracking points can now be revealed and if necessary, deleted, making it easier to select portions of the track you want to keep.
These’s a new overview movie, outlining this featurehere by Matthias Mohl.
Improvements to the 3D Camera Tracker effect
The Auto-delete Points Across Time feature in 3D Camera Tracker and Warp Stabilizer VFX effect allow you to delete corresponding track points when you delete track points in the Composition panel. This means you no longer have to delete the track points on a frame-by-frame basis, saving loads of time.
You can also now define a ground plane and origin in a scene using tracking points and the Camera Tracker target. This makes it a whole lot easier to define fixed points in the tracked scene and avoid errors.
These’s a new overview movie, outlining this feature here by Matthias Mohl.
Snapping to layer features, including anchor points and masks
Snapping is one of those unglamorous features that will seem irrelevant to some people but will simply improve all After Effects users lives immeasurably. Basically, layers will now snap to each other when they are placed in close proximity to each other. Edges, Anchor Points, Corners can be used as snap points. It also works with Masks to vertices and points can be snapped to make sure they are perfectly lined up. It works in 3D as well as 2D so finding the centre of a 3D object is now a whole lot easier.
Pixel Motion Blur effect
The new Pixel Motion Blur effect analyzes your video footage and creates a “fake” motion blur. It uses the same motion vector estimation as the Timewarp effect, and is great for adding realistic motion blur to anything that is animated and rendered elsewhere, then composited in After Effects. Of course this can include files that originated in Cinema 4D.
For illustrations, videos and more information about these top new features, check out the the “After Effects Preview” PDF document available here.
The Adobe websitefeatures videos from all the product managers as well as screenshots of the apps.
My good friends and mentors, Chris and Trish Meyer have a fantastic definitive article covering the new features of After Effects
If you’re keen to get hold of these new features as soon as they are available, Adobe are offering an NAB Show special to save 40% off Creative Cloud (valid till19th April 2013). Sadly this promotion is available through the US store only.
I’m presenting After Effects and Cinema 4D at FMX 2013 with Maxon in April.
You can purchase tickets for FMX here. It promises to be an exciting lineup of 3D art and visual effects. Confirmed FMX highlights include:
Cloud Atlas, Life of Pi, Skyfall, The Croods, Crysis 3. I hope to see some of you there.


 I’m proud to say I’ll be working the trade show floor on behalf of

 There are also other thunderbolt ports and a couplf of USB ports on the back fro connecting other devices. The box has power too so can be used to charge up your iPod or iPhone as well as powering bus-powered devices such as hard drives. There’s also a free utility that, when installed, provides your Mac support for high-powered USB.
At the front end is another USB port and Stereo audio in and out ports. These are useful for conference calls but I can alos use these to do some quick screen captures for my tutorials. Just attach a decent pair of headphones and my
There are also other thunderbolt ports and a couplf of USB ports on the back fro connecting other devices. The box has power too so can be used to charge up your iPod or iPhone as well as powering bus-powered devices such as hard drives. There’s also a free utility that, when installed, provides your Mac support for high-powered USB.
At the front end is another USB port and Stereo audio in and out ports. These are useful for conference calls but I can alos use these to do some quick screen captures for my tutorials. Just attach a decent pair of headphones and my