Tag: Tutorial

  • Typography Video Training

    Typography Video Training

    Creative Graphic Design: Essential Typography

    – a typography video-training workshop on the principles of designing text.

    Design Essentials for the Motion Media ArtistI’ve just finished recording my latest workshop with the fantastic team at video2brain. It’s a workshop with a difference.

    If you want the salient points delivered to you quickly so you can get on with your work, this product is perfect for you. It’s a series of short videos that form an educational and enjoyable workshop that you can sit back and enjoy – imbibing my knowledge as you go!

    It’s based upon the Typography chapter from my book, Design Essentials for the Motion Media Artist. Not everyone likes to read books or needs the level of detail covered in Design Essentials so this provides an alternative.

    It provides a quick-reference guide in the format of a video presentation. All the essential key principles of Typography that every designer needs are covered. And it won’t bog you down with too much detail (that’s what the book is for right?) it’s fast-paced and illustrated throughout with helpful animated diagrams and examples of work.

    Learn about the history and anatomy of type as well as the terminology used to describe the components of text. Discover the difference between typefaces and fonts, glyphs and characters, serifs and sans serifs, kerning and tracking, leading and baseline shift. Find out when and why you would use specific fonts based on  aesthetics, cultural associations and characteristics.

    The anatomy of type

    This workshop expands on the content of the book with additional software exercises to improve your typographic software skills. You’ll learn how to apply the principles of typography in practical ways to graphic design projects. Software exercises will show you how Adobe’s Character and Paragraph panels can help make the most of your text, creating unique and exciting effects.

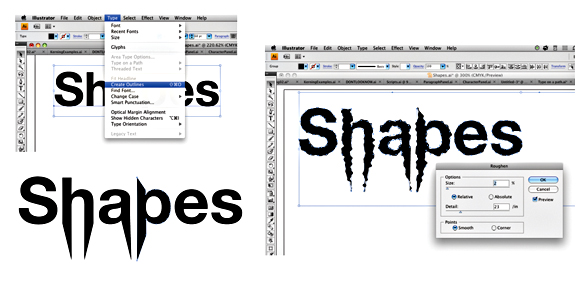
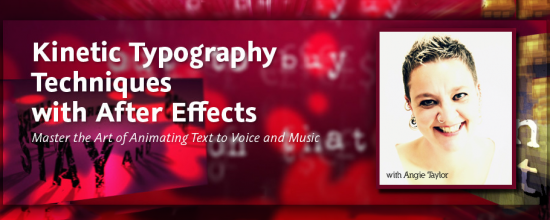
    I’ll also teach you lots of neat tricks like animating text along paths in After Effects and making text write on the screen. In Illustrator we’ll use operators to customize lettering, giving it a hand drawn look,. We’ll create 3D Text in Photoshop and add Layer Styles to brighten up our graphic designs. In InDesign you’ll make the most of its powerful Open Type features such as ligatures, glyphs and other special characters.


    With this comprehensive typography video training workshop you can simply sit back and watch as I present the principles for you. If you feel like following along, all the exercise files are provided. The videos are short and easily digested and you won’t get bogged down with technical jargon as I explain difficult concepts using easy-to-understand, real-world terminology.

    If you’d like to be notifies when this title becomes available please click on this link.


  • Font Links for Kinetic Typography

    Font Links for Kinetic Typography

    Kinetic Typography Techniques with After Effects

    I recently published my Kinetic Typography Techniques for After Effects course. In it I used a wide selection of fonts that are freely downloadable from various websites, just to make sure everyone following the tutorial could get access to the same fonts.

    Unfortunately one of the websites I recommended is no longer in operation. Below I’ve providing alternative links to all of the fonts used in these workshops. I cannot guarantee that these links will always be maintained as they are from third-party sites so I’ve also included the font names so that you can search for them using your favourite search engine, should the links expire.

    When downloading these shareware fonts please take a few minutes to click on the Donate button for each of them. Even if you only donate $5 it will help make sure that these hard-working font designers get rewarded for providing us all with very low priced fonts to experiment with. This is particularly important if you are going to be using any of the fonts in paid work. It’s good karma and will make you feel good that you’re helping out a fellow designer!

    If you’re interested in understanding more about the financial struggles that all designers are facing, please check out this entertaining graph by Jessica Hische which determines whether a designer should work for free! Jessica is a font designer and letterer who campaigns for fair pricing for fonts and other design work.

    Here are your font links;

    Usage Guidelines

    The fonts presented here are their authors’ property. They are either freeware, shareware, demo versions or public domain. The licence is usually positioned near the download button but please check the readme-files in the zipped packages or check the author’s website for details. You can contact him/her if in doubt. If no author/licence is indicated it means that information is not available. It doesn’t mean it’s free, it is your own responsibility to find out more if you want to use it commercially.


  • Kinetic Typography Techniques for After Effects

    Kinetic Typography Techniques for After Effects

    Kinetic Typography Techniques with After Effects

    I was asked to create a workshop on Kinetic Typography techniques for Adobe After Effects by several people including the lovely people from video2brain who produced this epic workshop for me. I’d like to thank them all for their patience and professionalism throughout this long project!

    I’m pleased to say that I have finally finished this epic workshop. It was originally planned as a one-hour tutorial but has developed into a full-on, eight-hour workshop covering all sorts of weird and wonderful techniques.

    I started off by covering essential kinetic typography techniques such as automatically creating text layers by importing content from a text file – using Variables and Data Sets in Photoshop and Scripts in After Effects. I demonstrated how to format text, making use of typographic controls like Kerning and Baseline Shift to get creative with negative space. In the latter stages I applied some of the free Animation Presets, created and adapted complex text animators to help you understand how to control them.

    "That Day" Music by Richard Walker


    While creating this piece I just couldn’t help but get creative and I slightly strayed away from the task in hand. As a result this workshop also includes techniques you may not immediately associate with traditional kinetic typography. In the included lessons we have fun animating and lighting layers in 3D space. We recreate an animated version of the Sgt. Pepper album cover using After Effects’ vector Shape Layers.

    Welcome Video
    Introduction to Kinetic Typography

    We even recreate an ancient stone circle from 3D text layers! You’ll also learn techniques for creating your own backgrounds, aged-film and dust and scratches effects by combining some of the built-in After Effects filters. Of course I also cover popular, requested techniques like animating handwriting on screen.

    I use typography in my every-day work as a motion graphic designer but the artform of kinetic typography is different. The purpose of text in motion graphic design is to deliver a message. Generally, the text needs to be legible and on screen for long enough for the viewer to read and there are several other “rules” that are sensible to apply to motion graphic design. Kinetic typography as an artform kicks those rules into touch.

    Editing and Looping Audio
    Variables and Data Sets in Photoshop

    My understanding of kinetic typography is that the words should be used to convey moods or feelings, they don’t need to be the message, they are just there to support it. My feeling is that the words should echo the spoken words rather than simply repeat what’s being said.

    In my interpretation of Richard Walkers “That Day” (a poem set to music) I wanted to portray what I took personally from the piece. I understood it to be about the dissatisfaction we have with the present moment and how we avoid enjoying it by always thinking about the past or the future. This avoidance leads to confusion, frustration and general unsettled feelings.

    In this workshop you get all my project files along with my creative musings about how these ideas developed. I hope that you can enjoy working on some of my own files and diving into my own personal creative project. Here are some sample movies from the workshop to give you an idea about what you can learn.

    Aged Film with Turbulent Noise


    Animate Handwriting with the Stroke effect


  • FREE After Effects Stereoscopic 3D Workshop

    FREE After Effects Stereoscopic 3D Workshop

    In this week’s newsletter I’ll be giving away a complete workshop about using the Stereoscopic 3D workflow in After Effects CS5.5 (offer ends 26/09/11). That’s four chapters – a total of 16 training movies absolutely free to subscribers of my software tips and tricks newsletter. Sign up today to make sure you don’t miss out. The lovely people at video2brain have created this workshop for me if full, fabulous HD quality for your viewing pleasure. You can find out more about their high quality productions here. Any the wonderful team at Artbeats have donated some fantastic Stereo 3D footage absolutely free so you can build this opening title graphic sequence is glorious Stereoscopic 3D.

    • In the “Introducing Stero 3D” chapter you’ll find out what stereoscopy is, why those funny glasses are used to view S3D and how After Effects re-creates the illusion of depth for 3D broadcasts.
    • In the “Faking 3D tracking” chapter you’ll discover how to combine 3d animated elements with Stereo 3D video footage from Artbeats.com. I’ll show you how to track the footage in 2D and then “fake” 3D tracking by cleverly combining the tracking data with additional 3D animation. Once the shot is designed you’ll add 3D cameras and lights that will help the text combine well within the shot and and add effects to bring it all together.
    • In Effects, Transparency and Style chapter we’ll add effects, blend modes, and layer styles to the graphic elements so that they appear to blend into the shot.
    • Finally in the Stereoscopic 3D workflow chapter you’ll build a Stereo 3D rig that automates the comp structure required to create an anaglyphic image for 3D broadcast. We’ll look at the effects you can use to adjust the settings so that they are just right for your individual needs. We’ll also look at ways of adding even more depth and realism to the scene with Depth of Field and Motion Blur effects.


  • Post Production Magic

    Post Production Magic

    Join Red Giant for an evening of inspiration

    I’ll be speaking at Red Giant’s FREE Post Production magic event in September. Here’s the blurb! Event Registration is available now on the Adobe website.

    When a group of amazing animators get hold of a projection system, you’re either going to get an evening of inspiration or a cheeky light bulb joke. Post Production Magic is your event for awe-inspiring work by After Effects gurus Angie Taylor, Simon Cam of SuperGlue, Ernesto Rogata of BSkyB and colourist and trainer Simon Walker.

     These artists show you how popular Red Giant tools like Magic Bullet Suite and Trapcode Particular and Trapcode Form open up big creativity on a small budget. Experience the best of design, animation, colour grading and visual effects created in After Effects and Premiere Pro, along with a networking and cocktail hour. Hosted by Red Giant and co-hosted by Adobe Systems, the event will be streamed live by Adobe and held at state-of-the-art Ravensbourne University in London (www.rave.ac.uk).

     Angie Taylor (www.localhost:8000)

    In her session Angie will share tips and tricks for creating cool and quirky motion graphics in Adobe After Effects and will show how she uses Red Giant Looks, Particular, and other Red Giant effects to give her animations a more distinctive style and pull her compositions together.

    Angie Taylor is an art director, motion graphic designer and author. She enjoyed a fourteen year career producing animation, visual effects and motion graphics for television, film, video and the web. During her career Angie worked with D-Fuse designing animation for cutting-edge Beck DVD ‘Guero’ and provided animation for the controversial Aphex Twin / Chris Cunningham collaboration ‘Rubber Johnny’. She also provided visual effects on the John Williams-directed “Hibernation”, winner of six awards at international film festivals, including ‘best short’ award at the 2005 Manhattan, Rhode Island, Edinburgh and Zagreb Film festivals. Examples of her work were regularly broadcast on the BBC and Channel 4 in the UK and across Europe.Angie also works in the software industry as a software specialist, regularly touring with companies including Adobe and Apple. Angie delivers software demonstrations and seminars on digital filmmaking and animation processes at international trade shows and conferences including NAB, IBC and Macworld. She also provides bespoke training and consultancy to a wide range companies including; BBC; Channel 4; Channel 5; Carlton; HTV; B Sky B; MTV.The author of three successful books. The “Creative After Effects” books (version 5 and 7), published by Focal Press, and a third book, “Design Essentials for the motion media artist” which is also published by Focal Press. Angie is also co-author of “After Effects CS5 Learn by Video”, published by Peachpitt in association with Adobe Press. Angie also produces high quality online training workshops with video2brain, Europe’s premier source for video training since 2002.

    Simon Cam, Superglue (www.wearesuperglue.com)

    Superglue’s projection mapping project for Toyota’s “Get Your Energy Back” campaign (http://www.vimeo.com/16466136) was a highly creative and technical challenge, utilising numerous different production techniques. The animation featured 2D, 3D, keyframed animation, dynamics, particle systems and more. Compositing, VFX and general pipeline management was performed in After Effects, whilst 3D work was created using Autodesk Maya and Maxon Cinema 4D. The team made extensive use of both Trapcode Form and Trapcode Particular in bringing to life the ‘hybrid energy’ that was the key part of the campaign’s message.

    Superglue is an award winning, London-based production company specialising in innovative digital projects. The team comprises a dynamic mix of production, post and digital brains working across live action, visual effects, 3D and motion graphics. Superglue operates across the modern media spectrum, creating moving image for everything from banners to broadcast.

    Ernesto Rogata, BSkyB

    Ernesto will talk about the daily challenge of integrating text and other graphic elements in exciting and innovative ways in sport pieces, stings and short title sequences – usually with little time to complete the job. He will share some simple techniques to create motion graphics using After Effects and Red Giant plug-ins.

    Ernesto Rogata is an award-winning senior video editor at BSkyB in London and has worked in post-production for 20 years. His professional role covers four areas: editing, grading, creating motion graphics and training.

    Simon Walker,  (www.simonwalkerfreelance.com)

    Simon will show the grading secrets of Plot Device, a new short film produced by Red Giant, and will demonstrate how Red Giant’s Magic Bullet Suite brought to life a varied series of genres… as well as a hoard of zombies!

    Simon is creative director of WiltshireVideo.com, makes online grading and editing tutorials at www.simonwalkerfreelance.com, and is an instructor for the International Colorist Academy, iColorist.com. He is an Adobe Certified Premiere Pro Instructor and trains industry professionals in editing, motion graphics, colour grading, audio sweetening, and (excitingly!) video compression. 

    Here’s a link to Event Registration on the Adobe website

    Ravensbourne

    6 Penrose Way
    Peninsula Square
    Greenwich
    London
    SE10 0EW
    Weds 7th September 2011
    6.30pm for drinks and networking
    Presentations from 7.00pm to 8.15pm
    Networking til 9pm
  • 20% off new Todd Kopriva After Effects workshop

    20% off new Todd Kopriva After Effects workshop

    This week I’m giving a 20% discount to anyone who wants to buy the fantastic new workshop on Motion Tracking & Stabilisation by Todd Kopriva which is now available to buy from my video training store. Just enter MOTION into the Coupon Code box when buying from my shop. It’s valid till July 15th 2011.

    If you want to check out some free samples before buying there are some links to free sample movies here, including; An Overview of the mocha-AE Interface and Workflow, Overview of Warp Stabilizer Effect and more details about the Warp Stabilizer controls and workflow

    This workshop covers all the tools and techniques used for motion tracking and image stabilization in After Effects, including the point tracker, the Warp Stabilizer Effects, and mocha-AE. The contents of this course include:

    Introduction
    This chapter introduces you to motion tracking and shows you frame-by-frame how manual motion tracking works.

    Motion Tracking with the Point Tracker
    Once you determine what kind of motion you want to track, you’ll need to decide what you will apply the tracking data to. This chapter explains your options and shows you how to remove tracking markers when you’re done.

    Motion Tracking with mocha-AE
    This chapter walks you through using mocha-AE, a standalone application that can export tracking data for use in After Effects.

    Stabilizing Motion
    Ever been frustrated working with shaky footage? This chapter shows you how to add stability to your projects by using the new Warp Stabilizer effect.

    The lessons are wrapped in a feature-rich interface that lets you jump to any topic and bookmark individual sections for later review. Full-Screen mode provides a hi-def, immersive experience, and Watch-and-Work mode shrinks the video into a small window so you can play the videos alongside your application. This course also includes project files so you can follow along and try out new techniques as you learn them.

  • 12 rules of animation

    Digital Arts has featured – 12 Rules of Animation – an excerpt from my “Design Essentials for the Motion Media Artist” as their feature article this month. The article is now FREELY AVAILABLE on the Digital Arts website.

    Animation as we know it has been around since Horner invented the zoetrope in 1834. Since then animators have developed rules of animation that help us to draw viewers into the world we have created. From Disney classics to the latest stereoscopic 3D productions, we’ve plundered them all to find the 12 key techniques you need to master to be a top-flight animator.

    Some of these rules are based on real-life physics, and others on observations and reactions. They provide a set of invaluable ‘tricks’ for animators that have been proven to work in almost every situation.

    In the article I delve into the world of animation to pick out the 12 rules of animation that every animator and motion graphics artist must know. Drawn from the forms 150 year history, you’ll learn a wealth of dos and don’ts that will help you produce more engaging projects, whether you’re working in 2D, 3D, graphics, stop-motion or a mixture of them all.

    You can pick up both printed copies and digital downloads from the Digital Arts website where you can also find some of my tutorials, tips and tricks.

    I’ll also be talking about some of these golden rules of animation in my “Dynamic Text Animation for Motion Graphicswith After Effects” presentation at the Production Fiesta in London on May 6th.

    In this session, I will share an in-depth look at the options for working with text in Adobe After Effects. I’ll show examples of successful motion graphic designs and will discuss the components of design that make them work. In this session you’ll earn about the rules of typography and how to apply the rules of typography to your designs to make them easier to read and more dynamic. I’ll also take an in-depth look at the typographic controls available in After Effects and will also show you how you can use hand-drawn text to bring a unique aspect to your designs.

    I’ll also be presenting four other sessions at this event which you can find out about here. If you want to register for a full day of valuable creative sessions by me and all the other speakers you can do so here on the Eventbrite page. I hope to see some of you there, please make sure to say hello if you can make it along.


  • Animated Character Design in Adobe Illustrator

    Animated Character Design in Adobe Illustrator

    This workshop from author and animator Angie Taylor will teach you how to use Illustrator’s tools and features to prepare 2D files for animation in Adobe After Effects. You’ll learn how to make the most of Illustrator’s drawing tools and Autotrace feature, and to how use Live Paint and Kuler to recolor artwork. You’ll also get tons of tips and tricks for giving artwork a hand-drawn look and find out how to set up layers, aspect ratios, and transparency options for importing into After Effects. The lessons are focused and solution-oriented, and all the project files are included. Topics covered include:

    • Setting up your workspace for video and animation
    • Working with Autotrace, Live Paint, and Kuler
    • Using multiple artboards for creating storyboards
    • Taking advantage of views and workspaces

    Drawing freehand in Illustrator using a variety of tools including the new improved Eraser tool and the Blob Brush tool

    Buy   Reviews   Resources

  • Free video training & discounted classes

    Free video training & discounted classes


    I’m giving away lots of goodies this week. In this blog I’m offering you some free sample movies from my ‘2D Character Animation in After Effects’ workshop from video2brain. I’m also pleased to announce some fantastic discounts on my training courses in London in March.

    A one-off funding offer means that there’s currently a massive 80% off my Photoshop and After Effects courses at the Bridge Training. You can find out about these offers here. Just to give you an idea of the sort of savings on offer, my After Effects training 2 day training courses (Fundamentals, Intermediate and Advanced) have been discounted from the usual price of ÂŁ504 to the incredible price of ÂŁ108 for anyone based in the London Westminster area. Please contact The Bridge Training here to book a place.

    I’m so excited to be able to introduce a set of video training products specifically aimed at character animation in Adobe After Effects CS5. I’ve included a link to a free sample from this workshop here, just click on this link to watch it in HD. There are also some other free videos available here.

    As a freelance illustrator and motion graphics designer, I use After Effects every day to create artwork and animations of various styles. As a result, I’ve developed some powerful techniques for creating quick but compelling 2D animation, and in this workshop I share them with you. You’ll learn how to import layered files and paths from Illustrator into After Effects and how to animate flat vector artwork in both 2D and 3D space.

    Topics covered include:

    • Setting up After Effects for creating 2D character animation
    • Using input devices to capture motion and apply it to your characters
    • Creating animation and lip-syncing with audio files, using expressions and scripting to make the process easier
    • Applying grouping techniques and using parenting to create hierarchical animations
    • Following the best working practices for outputting your animations for the web, TV, and mobile devices

    All this is presented in a series of short, focused, and solution-oriented videos that steer clear of technical jargon. Whether you’re a motion graphic designer, animator, storyboard artist, video editor, or illustrator, if you want to create 2D animation from flat, vector-based artwork, this is the workshop for you.

    The lessons are wrapped in a feature-rich interface that lets you jump to any topic and bookmark individual sections for later review. Full-Screen mode provides a hi-def, immersive experience, and Watch-and-Work mode shrinks the video into a small window so you can play the videos alongside your application. This course also includes project files so you can follow along and try out new techniques as you learn them.

  • A busy After Effects week

    A busy After Effects week


    Wow, what a busy week. I’ve just finished the first day of Broadcast Video Expo 2011 where I’ve been presenting After Effects and the Production Premium workflow on the Adobe booth. It’s been great being back with the Adobe UK team again and seeing lots of friendly faces.

    I’ve also got a brand new product released today. My new Character Animation with Adobe After Effects workshops with video2brain are now on sale. You can check out some free sample movies here by clicking the link. Enjoy and please let me know what you think.

    Happy Keyframing!

    Angie

  • Uprezzing Comps

    Uprezzing Comps

    A question appeared on the Video Copilot website today about uprezzing old projects which can be a bit of a nightmare in AE. You can often find that layers positions get messed up and effects change appearance when you scale your comp.

    Some of the issues that you’ll come across are hard to avoid but you can make the process a little easier by using some of the scripts that come free with After Effects CS5.

    Incidentally, making projects bigger is a massive headache so always good (if you have the opportunity of course) to create your projects at the biggest size you think may be required. If there’s ANY chance of HD requirements then use HD, even if the immediate requirement is only for SD.

    Having said all that, there are always times when you need to up-rez. Updating old projects for showreels; adapating other old projects for new jobs etc. So, if you simply HAVE to do it, there’s a couple of scipts that will work. In the Demo Palette (can be opened by going to File > Scripts > Demo Palette) there are two gems, one is called ‘Scale Comp’ and can be used to scale your entire composition, keeping all layers in the correct position. The other is called ‘Scale Selected Layers’ which will work on a selection within a comp, again, maintaining their position relative to each other.

    You need to make sure your preferences are setup correctly to use scripts in order to use these. to do so, go to Preferences >General > Allow Scripts to Write Files and Access Network.

    You will still need to go through the somewhat painful process of editing effects but this will save you a lot of work with layers etc.

    To find out more about After Effects and download some FREE movies, check out my After Effects CS5 Learn by Video page where you can watch excerpts and learn more tips.

  • Animating a line drawn on a map – Indiana Jones Style

    Animating a line drawn on a map – Indiana Jones Style

    My recommended workspace setup for this kind of 'Rostrum-style' work. You need to have the Layer panel and Comp panel visible.

    I contribute to the Creative Cow Basic After Effects forum (amongst others) where this question was posted recently;

    “Hi I am newish to after effects and I have created a old map effect that pans from the UK to africa now I want to add a red line that reveals like in the Indiana Jones graphic.”

    There’s definitely a trick to getting this right but once you know the trick, it’s easy, so, here are the rough steps for getting it right.

    BTW, a movie demonstrating this technique is available in my After Effects CS5 Learn by Video DVD if you are interested in that here’s a link to it.

    1. Place the map in a new comp, it’s best if the Map is bigger than the comp if you want to pan around it. In the Timeline, set a keyframe for the Anchor Point property as it’s this property you will animate to pan around the map. NB: Don’t animate the Position property as you’ll just run into problems.

    2. Alt-double-click the layer to open up the Layer panel, this is where you’ll do the animation. It’s great as you’ll be able to see an overview of the whole image without having to faff around in the Comp panel. Make sure that the Target menu is set to Anchor Point Path.

    3. In the timeline, move to where you want the next change in direction of the path to happen, and in the Layer panel, click and drag the anchor point to the landmark that you want to be central in the comp panel at that time. You’ll notice that, in the Comp panel, the point that the anchor point is on (in the Layer panel) is always central in the Comp panel, which is what you want exactly!

    4. Keep repeating this till you have completed the journey you want the ‘camera’ to follow and so have completed the positional aspect of the animation.

    5. If you want to smooth out the timing of the animation so that it maintains an even speed throughout, select all the keyframes except the first and last one, right-click on them and choose Rove Across Time. Once you’ve done that you can pull or push the first or last keyframes to speed up, or slow down the whole animation.

    6. Now apply the Write On effect to the layer. Choose a color and style by adjusting the settings.

    7. To make the Write on effect follow the path you can either use and expression to link the Brush Position property to the Anchor Point property of the layer (my preferred option) or, if you’re not keen on using expressions you can simply select all the keyframes from the Anchor Point property, copy them, then paste them into the Brush Position property.

    8. In the Write On effect, make sure that the Paint Style property is set to On Original Image.

    The nice thing about this technique is that it’s now easy to make it into a 3D map pan. All you need to do is add a camera and some lights, adjust the camera angle and animate the zoom property and that’s it! The camera and lights will automatically follow the anchor point so no further animation will be necessary unless you want to animate the angle, zoom, or depth of field.

    To find out more details of this technique and others, check out my After Effects CS5 Learn by Video DVD that I created alongside the wonderful Todd Kopriva from Adobe.