Here’s my latest collection of After Effects Twitter Tips from my archive. Learn all sorts of useful tips and tricks in bite sized portions. Make sure to Follow me on Twitter to get these tips regularly as well as other goodies I like to share.

| After Effects tip – To make a one node camera point at a layer, select the layer, then with the unified camera tool selected, hit the F key |
| AFTER EFFECTS TIP | Copy & Paste any mask shape into a position property to make layer move along the path. Click on property name to select |
| AFTER EFFECTS TIP | Give Adobe your feedback | Report Feature Requests & bugs here; http://t.co/s7f1NOPs @AdobeAE #AfterEffects |
| AFTER EFFECTS TIP | To stretch or squash an animation – select all keyframes – hold Alt key & drag first or last Keyframe in selected group |
| After Effects Tip | Video tutorial – Use the Stroke effect on Illustrator paths to make handwriting animate on screen http://t.co/0E6UHcKOsr |
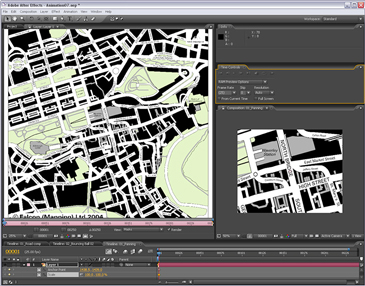
| After Effects Tip of the day! How to make a layer follow a path copied from Adobe Illustrator artwork. http://fb.me/CEapjgCw |
| After Effects tip; add new Refine Matte effect to ANY matte in AE to refine edges or add motion blur. Not just for Rotobrush! Fabulous tool! |
| After Effects tip; Animating characters, use expression pickwhip 2 link body parts 2 cntrl layer. Expression control effect 4 each movement. |
| After Effects Tip; How to make a layer follow a path copied from Adobe Illustrator artwork; http://bit.ly/f8tP4w |
| After Effects tip; Lay down markers in time with audio by previewing the audio and hitting * on number pad when you want markers to appear. |
| After Effects tip; to edit the path of an effect’s positional property (e.g. Particles) got to Layer panel & choose effect in target menu. |
| After Effects tip; To use more than one layer as matte without precomping. Add multiple copies of Sett Matte effect to layer needing matted. |
| After Effects Tip: @butlerm_com Try combining transfer modes, use more than one layer with a different mode and opacity value on each! 🙂 |
| After Effects tip: Add keyframes for hidden Transform properties by selecting layers & hitting alt & property letter (eg alt-p for position) |
| After Effects tip: Applied a preset & wanna find out how it’s made? Select layers then double-hit the U key to expose adjusted properties. |
| After Effects tip: Make 3D layers turn to face camera as it moves. Select layers, go to Layer>Transform>Auto Orient. choose Towards Camera |
| AFTER EFFECTS TIP: Right-click on a property value to open Edit Value dialog. Here u can access different measurement units & adjust ranges. |
| AFTER EFFECTS TIP: Rotate , scale, skew or move all layers by adding the Transform effect to Adjustment layer – keyframe to animate them |
| After Effects tip: Scaled a layer down, nested the comp, then scaled it up? Click Collapse Transformations switch to fix resolution issues. |
| AFTER EFFECTS TIP: Travis Wade presents his After Effects: Copy and Paste Shortcuts on Motionworks; http://t.co/nP2yA1nJ |
| After Effects tip! Make layer automatically turn to follow direction of path – select layer, go to Layer > Auto Orient. Choose ‘Along Path’ |
AfterEffects Tip | Isolate a property group from the Effect Control Panel in Timeline by double-clicking Property Group name in ECW
| #AfterEffects TINY TIPS: Do you have trouble with slow render speeds? Here’s a video workshop by Todd Kopriva to help: http://t.co/Y45ucGEl |
| #AfterEffects TINY TIPS: Do you have trouble with slow render speeds? Here’s a video workshop by Todd Kopriva to… http://t.co/2fL7wE8l |
| #AfterEffects Tip – Scale layers in comp without messing up composition – Select layers – Go to File > Scripts > Scale Selected Layers |
| #AfterEffects Tip | @Doguib7 Create a Shape Layer, use Offset Paths & Trim Paths from Shape Layer ‘s “Add” menu to animate paths – lotsofun! |
| #AfterEffects Tip | Animate property randomly – Alt-click Stopwatch to add expression. Type Wiggle(10,50) to change value 10 p/sec within 50 |
| #AfterEffects Tip | Audio file plays at different speed than recorded? Check that RAM preview settings match the frame rate of the audio. |
| #AfterEffects TIP | Custom Shape layers – 1 Layer > New Shape Layer 2 Draw path with pen 3 Select path property – paste custom path @Doguib7 |
| #AfterEffects Tip | Drag comps directly to Adobe Media Encoder to render in background. Allows you to continue working on other comps in AE |
| #AfterEffects Tip | Loop Footage – select clip, go to Interpret Footage > Main > Other Options > Choose how many time you want to loop 🙂 |
| #AfterEffects Tip | Quickly deselect selected items by hitting F2. On Mac make sure to use Fn key to override system shortcuts. |
| #AfterEffects Tip | Replace layer in Timeline with footage from Project panel (retaining fx + KFs) – Select both, hit Cmmd+Alt+/ Ctrl+Alt+/ |
| #AFTEREFFECTS TIP | Rubbish at animating? Don’t worry! Use the Motion Sketch panel to record mouse or pen motion & apply it to your layer 🙂 |
| #AfterEffects Tip | Video Tutorial – how to make your own “Old Film” effect using Turbulent Noise; http://t.co/IOn0bHVPuU @AdobeAE #Mograph |
| #AfterEffects Tip | Video tutorial – Use the Stroke effect on Illustrator paths to make handwriting animate on screen http://t.co/APabrfE9FT |
| #AFTEREFFECTS Tip 41: RT @i2cblog: In Project panel, search ‘unused’ or ‘missing’ to see what’s not used in any comp or source is missing |
| #AfterEffects tip; Moving project to other machine or archiving? File > Collect Files gathers all source footage & project maintaining links |
| #AfterEffects tip; Scale layers or comps without messing up composition. Go to File > Scripts > Demo palette. Use Scale Layers |
| #AfterEffects Tip; Use Premiere Pro to cut footage, add simple animation to layers in real time. Dynamic Link portions to AE for finessing |
| #AfterEffects Tip: @Franckmax If you want to do that, just Toggle hold the keyframe first, then right-click and choose “Easy Ease Out/In” 🙂 |
| #AfterEffects tip: @jamesboorman To make the particles stay “alive” for longer, adjust the Lifespan property. |
| #AfterEffects Tip: @MarkToddWagon No need for Alt, Page Up & Down on their own works. Home & End key to move to 1st & last frames of comp. |
| #AfterEffects Tip: 3D layers have Material Options to control shadows. Cast Shadows & Accept Shadows can be switched on or off per layer. |
| #AFTEREFFECTS tip: Animate Source Text property 2 make words change over time in text layer. Font & character panel attributes also animated |
| #AfterEffects tip: Convert Text to Shape layers (Layer > Create shapes from Text) – Add cool Shape properties to get creative! Endless Fun! |
| #aftereffects tip: Create a keyframe for a property on selected layers by holding alt key & tapping property shortcut. P for Position etc |
| #AfterEffects Tip: Even out animation speed – select Keyframes in timeline (except 1st & last KF). Right-click & choose “Rove Across Time” |
| #AfterEffects Tip: Found a camera move or lighting setup you like? Remember you can save them as Animation Presets to use in other comps. |
| #AfterEffects Tip: Give footage instant punch & contrast – duplicate layer – make top layer Overlay Blend mode – adjust Opacity to taste 🙂 |
| #AfterEffects Tip: Have layers in comp that you don’t want to render? Select Layer, go to Layer > Guide Layer to create non-rendering layer. |
| #AfterEffects tip: Help with custom shatter maps. Re: Is this done with shatter effect? http://cr8v.co/wCe [Like it? http://bit.ly/lRPIGH ] |
| #aftereffects tip: Huge files? Slow render times? Select layer in Project, go 2 File > Create Proxy. Makes linked low res version of file! |
| #AfterEffects tip: Jump back & forth between visible keyframes & layer markers by hitting J & K. Trouble remembering? Think JUMP KEYFRAMES! |
| #AfterEffects Tip: Learn Cinema 4D – soon – you won’t regret it! 🙂 @maxon3d @AdobeAE #Mograph @c4dtips |
| #AfterEffects Tip: Locate missing footage by typing ‘missing’ in2 search field in Project panel. Relink by double-clicking it & relocating |
| #AfterEffects Tip: Metric Kerning looks good on well-designed, classic fonts for broadcast – it includes a little more space than Optical |
| #AfterEffects tip: Painting in Layer panel. Go to View > New View. Place comp & layer panels side by side. Lock them for nice ETLAT workflow |
| #AfterEffects Tip: Pt 2. Select Camera, double-hit U key to expose adjusted properties, drag select them, drop into Effects & Presets panel |
| #aftereffects tip: Remember the shortcuts for properties with the word ‘STRAP’. (S)cale, Opaci(T)y, (R)otation, (A)nchor Point, (P)osition |
| #AfterEffects tip: Rendering more than one format? Select Render Item, go to Composition > Add Output Module to render once & format twice |
| #AfterEffects Tip: Rendering movie for web? Choose poster frame displayed in thumbnail – Go to Composition > Set Poster Time before render. |
| #AFTEREFFECTS Tip: Retime animation – select keyframes – hold Alt key & drag 1st or last keyframe. Keeps relative timing intact. |
| #AfterEffects Tip: RT @theangietaylor: Re: After Effects Key Light – Some Spilling Occuring – How Do I Get Rid of it? http://t.co/azVs5mxn |
| #AfterEffects Tip: RT @theangietaylor: Re: Moving Layers by n Pixels http://t.co/qtde4cIk |
| #AfterEffects Tip: Select a layer, double-hit U key to expose properties adjusted from default state. Great way to understand effect presets |
| #aftereffects tip: To auto-animate brush strokes as they’re drawn. Choose Paint tool & select ‘Write On’ in Duration Menu in Paint panel. |
| #AfterEffects Tip: To create a template project simply save the project with .aet instead of .aep. Prevents u from accidentally over-writing |
| #AfterEffects tip: To reduce the amount of motion blur in a comp go 2 Composition Settings > Advanced Tab & reduce the Shutter Angle value. |
| #AfterEffects tip: To use included scripts enable General > Preference to ‘Allow scripts . . .’ and then restart… http://fb.me/BQbXk95K |
| #AfterEffects Tip: Use Motion Sketch panel to capture motion from Wacom tablet & apply it to layers. Good way to record gestural animation. |
| #AfterEffects Tip: Use the J & K keys to jump between visible keyframes |
| #AfterEffects Tip: Use the “continue” Loop expression 2 continue an existing animation, maintaining speed &… http://t.co/u21TqofD |
| #AfterEffects Tip: When overnight rendering, render out an image sequence, at least then if it crashes you can save frames already rendered. |
| #AfterEffects tips from @AngieTaylor – Software Tips & Tricks Newsletter – http://t.co/kEF6ry0p [Like it? http://t.co/IzVYju0W ] |