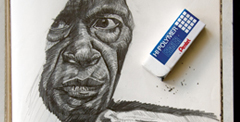
Speaking at Flash on the Beach 2011

Speaking at Flash on the Beach 2011

I was very pleased to get a call from John Davey, the organiser of the amazingly successful and entertaining “Flash on the Beach 2011” conference, asking me to speak at his event.

It’s an annual conference, held in my home town of Brighton. Bringing together the best designers, developers and minds in the Flash, design and web community, it’s a conference with a difference. It attracts an interesting and diverse mix of people and is focussed on the work that we do as well as the tools that we use.

I’ll be doing a session on creating Kinetic Typography animation in Adobe After Effects CS5.5. I’ll be featuring a breakdown of a real-life art project that I worked on in collaboration with Artist Richard Walker titled “That Day”. In this session I want to focus on the design process and demonstrate how After Effects allows creative flexibility throughout a project. For my more geeky attendees, don’t worry! I’ll also share plenty of my software tips and tricks as well as important techniques for structuring projects and optimising workflow in Adobe After Effects.

I’ll also feature some extracts from my book “Design Essentials for the Motion Media Artist” and will be giving away a copy of it, plus a copy of my “After Effects CS5 Learn by Video” training DVD. There are always lots of great parties, dinners and other networking events structured around Flash on the Beach and you’re guaranteed to meet and interesting and eclectic mix of creatives and geeky types. So why not book a place now, it sells out fast every year!

Understanding Axis Modes

Understanding Axis Modes


After Effects can be a difficult application to learn simply because it offers you so may options. Many of these options are not immediately apparent to users so they muddle through using default settings when a better solution may be available to them. My job is to point you in the direction of these hidden helpers!

When working in 3D, have you ever experienced difficulty when positioning or rotating layers, cameras or lights within 3D space? If the answer is yes, then understanding the 3D axis modes may help to you.

Click on this image to enlarge it

In this example (taken from my After Effects CS5 Learn by Video DVD) you can see a Square layer inside a 3D comp. Notice in the Active camera view (top left) you can see the three-way-axes attached to the layer. It consists of three arrows, each representing one of the three dimensions of 3D space. The red axis (representing the horizontal ‘left-to-right’ X axis) is an arrow facing left to right. The green axis is pointing upwards and represents the vertical ‘top-to-bottom’ Y axis. Finally, it’s a bit tricky to see in this view but the blue arrow, representing the ‘near-to-far’ Z axis is pointing towards the viewer.


It’s a bit easier to see this if you look at the layer in the Right view. Notice in this view that we see the axes (and the layer) from a different angle. We can imagine that we are now standing to the left of the layer, looking towards the right. therefore, the blue arrow, representing the Z axis is pointing to our right, towards our imaginary viewer, who is standing in front of the layer.

Local Axis Mod is the default behavior for these axes in After Effects. In this mode the axes are attached to the layer. So, wherever the layer moves, the axes will follow as if attached to it. Let’s see what happens if I rotate the layer.

Click on this image to enlarge it

In this second example I’ve rotated the layer by 90 degrees on the X axis. When I rotate the layer, its 3D axes rotates with it. Notice in the Right view, the Green Y axis is now pointing towards the viewer.

Local Axis Mode may seem logical, when you rotate a layer, the axes rotate with it. But confusion occurs when you then start using the axes to move or rotate the layer in the Composition panel as the axes may not actually affect the values you think you’re adjusting.


Notice in this movie, if I grab the Y axis to move the layer in Right view, I’m actually  adjusting the Z value of the layer. axismodesThis can be seen refelcted in Z position value in the timeline, notice it changing as I drag. If I adjust the position by dragging on the Z axis, I’m actually adjusting the Y value in the Timeline. At times this can be very confusing!

The good news is, if this causes you difficulty, there are two other axis modes to choose from. You can change the Axis mode by clicking on the Axis Mode buttons in the Tools panel that runs along the top of the application.

If I switch to World Axis Mode notice what happens to the axes on the layer as I do so, it changes so that the axes is fixed to the coordinates of the Composition (or world) rather than to the layer itself. If I rotate the layer again on the X axis, the axes do not move with the layer, they remain relative to the composition.

For new users to After Effects, this mode is perhaps more logical as dragging on the individual axes in the Comp panel will always adjust the corresponding values in the Timeline as they would expect. Adjusting the position by dragging on the Y axis will always adjust the Y value, adjusting X axis always affects X and adjusting the Z axis always affects the Z value. Regardless which view I select, or how much I rotate my view or my layers the axes will always be aligned to the edges of the Comp.

The final axis mode, View Axis Mode can be a little tricky to get your head round so beware! View Axis mode will align the axes to whatever view you are in. It allows you to rotate around the geometric center of your scene as it is currently being viewed as opposed to the comp itself.

I hope this has helped you understand the different axis modes available in After Effects and how they can help you when moving or rotating layers within 3D space. If you want to learn more about 3D in After Effects why not pop along to my session, ‘Introduction to 3D in After Effects’ at the NAB 2011 Post Production World Conference. Please say hello if you do! Happy Keyframing!

Uprezzing Comps

Uprezzing Comps

A question appeared on the Video Copilot website today about uprezzing old projects which can be a bit of a nightmare in AE. You can often find that layers positions get messed up and effects change appearance when you scale your comp.

Some of the issues that you’ll come across are hard to avoid but you can make the process a little easier by using some of the scripts that come free with After Effects CS5.

Incidentally, making projects bigger is a massive headache so always good (if you have the opportunity of course) to create your projects at the biggest size you think may be required. If there’s ANY chance of HD requirements then use HD, even if the immediate requirement is only for SD.

Having said all that, there are always times when you need to up-rez. Updating old projects for showreels; adapating other old projects for new jobs etc. So, if you simply HAVE to do it, there’s a couple of scipts that will work. In the Demo Palette (can be opened by going to File > Scripts > Demo Palette) there are two gems, one is called ‘Scale Comp’ and can be used to scale your entire composition, keeping all layers in the correct position. The other is called ‘Scale Selected Layers’ which will work on a selection within a comp, again, maintaining their position relative to each other.

You need to make sure your preferences are setup correctly to use scripts in order to use these. to do so, go to Preferences >General > Allow Scripts to Write Files and Access Network.

You will still need to go through the somewhat painful process of editing effects but this will save you a lot of work with layers etc.

To find out more about After Effects and download some FREE movies, check out my After Effects CS5 Learn by Video page where you can watch excerpts and learn more tips.

Basics on Solids in Adobe After Effects

Basics on Solids in Adobe After Effects

When designing motion graphics in Adobe After Effects there are times you just need to create a plain old layer to apply effects to. Solids are just right for this purpose, and for lots of other uses in After Effects.

This video is aimed at a basic level. It shows you how to create solid-color layers and walks you through some of their uses.

You can find more free videos like these from our After Effects CS5 Learn by Video product on the video2brain website. Please enjoy them – happy keyframing!

Lip Sync in After Effects

Lip Sync in After Effects

Lip-syncing is something that all animators will be asked to do at some point in their career. The following technique automates the process of lip sync in After Effects and uses only built-in features of Adobe After Effects – no extra software is required! This video tutorial is an updated version for Adobe CS5. Tutorial files and a text-based version of the tutorial for older versions of After Effects are available here if you want to follow along.


This project
was a test project for a job for the BBC. They contacted me and asked if it was possible to create a minute of lip-synced animation on a cartoon character. The budget was really tight, as was the deadline, so I had only one day to create a character that lip-synced to a provided sound track for a full minute.

Of course it was the BBC so I could hardly say no! So I said “Yes, no problem, I’ll take the job!” The minute I put the phone down I thought, “Oh Blimey! What have I got myself into?” I went to bed that night worrying about how I’d manage to get the job done. I tossed and turned, having nightmares about failing in my first job with the BBC. Then suddenly I sat bolt upright in bed and thought, “hang on a minute, what if I use Time Remapping with the Convert Audio To Keyframes Assistant, I’m sure that’ll work!” (That’s the kind of sad geek I really am!) 😉

Anyway, I leapt out of bed, ran over to my computer and put together a test project to see if it would work. This is the very project I put together as a test to see if the technique would work. Luckily, it did and I got the job done on time!

The audio used in this tutorial is contributed with kind permission. “Memories Of Your Own” – Words and Music by Jason A. Levine © Jason Levine 2007