Tag: 3d
-

Adding surface detail with Relief Object in Cinema 4D
This tutorial is about adding surface with a Relief Object in Cinema 4D in Cinema 4D
-
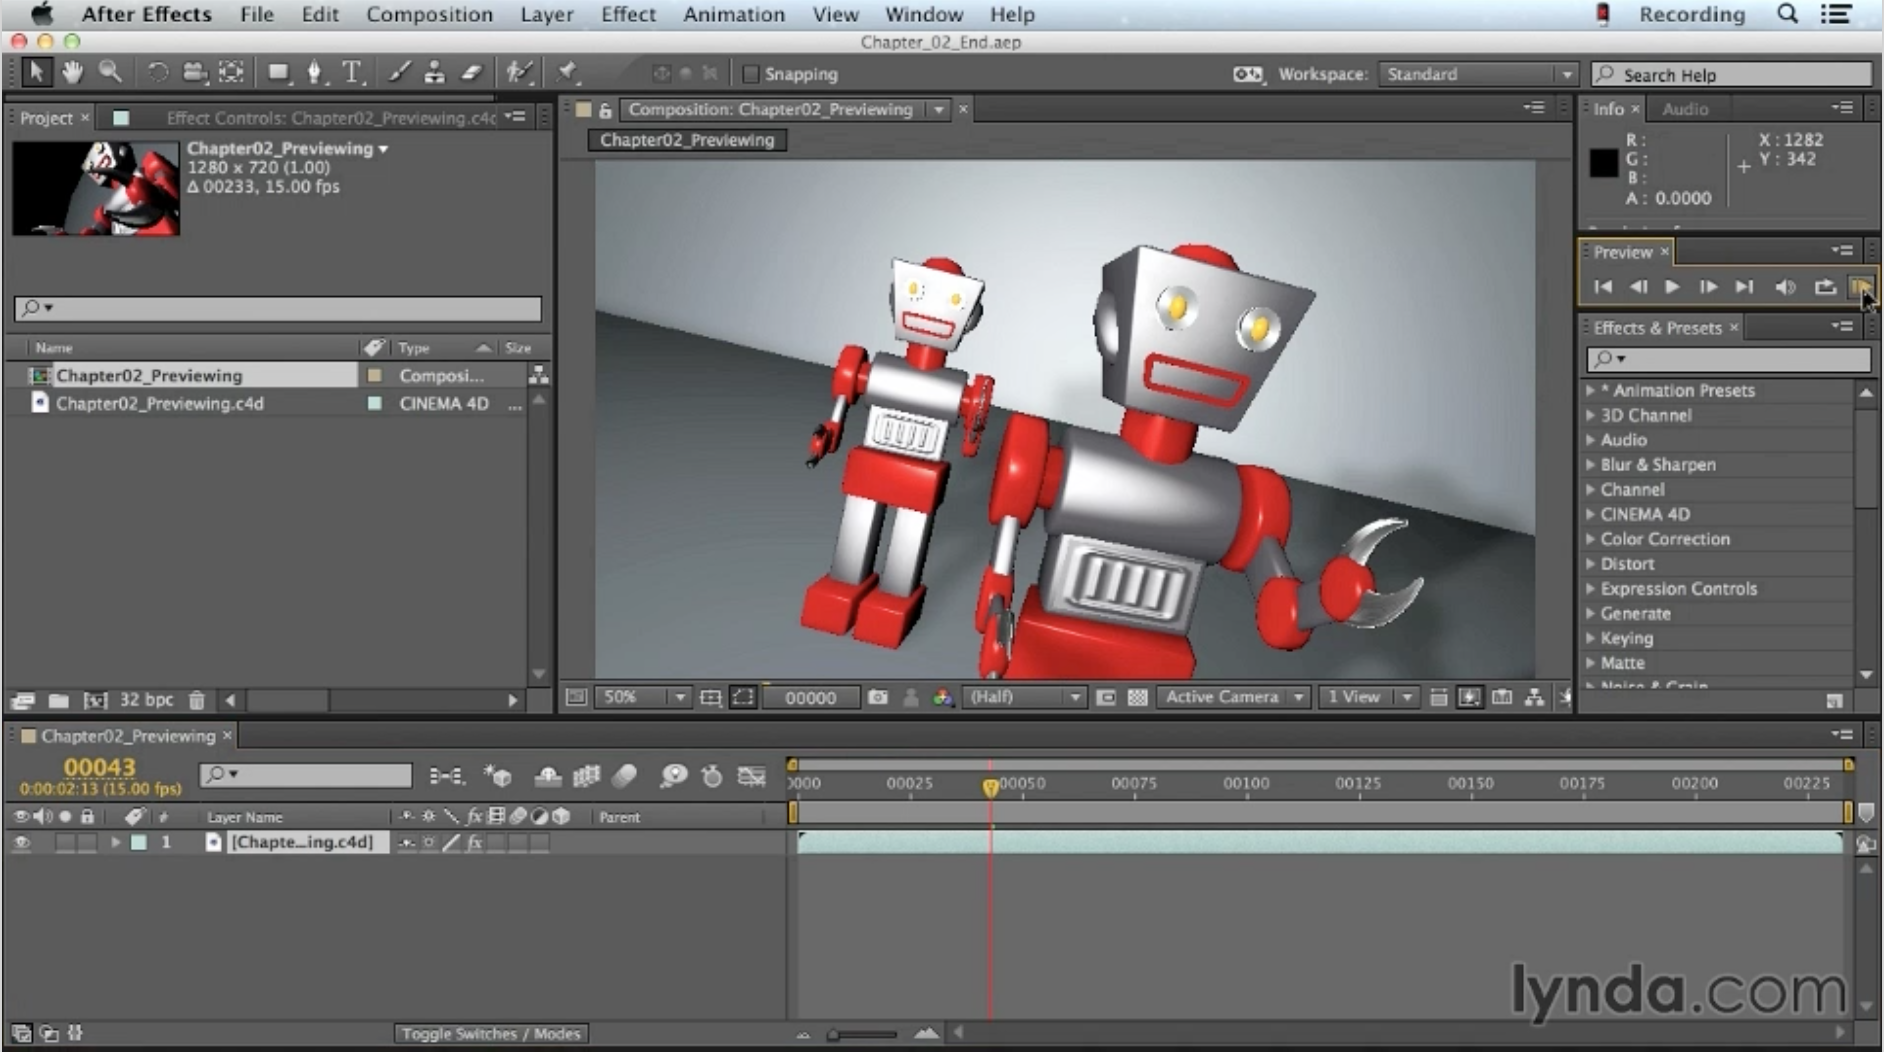
Using the Picture Viewer in CINEMA 4D
Using the Picture Viewer in CINEMA 4D
from Up and Running with CINEMA 4D Lite for After Effects
-
Cinema 4D Lite Tutorials
Cinema 4D Lite Tutorials from
Up and Running with CINEMA 4D Lite for After Effects
Intimidated by 3D modeling packages? Dip a toe in the water with CINEMA 4D (C4D) Lite, a slimmed down version of CINEMA 4D included with After Effects CC. Motion graphics designer Angie Taylor shows you how to build a complete sequence in C4D Lite, progressing from initial object modeling, to animation, lighting, camera rigging, texturing, and final render. Plus, learn to animate text, create random movement with wiggle expressions, track cameras in live-action footage to add new 3D elements, and light your scene. Angie also round-trips the project files to After Effects for visual effects and color correction. With over 100 videos, this course allows you to explore almost every aspect of 3D motion graphics creation, within this accessible introductory tool.
Topics include:
- What is CINEMA 4D Lite?
- Understanding the CINEMA 4D Lite and After Effects CC workflow
- Editing primitive objects
- Spline modeling with NURBS
- Animating with keyframes
- Using Xpresso to link properties
- Importing music and soundtracks
- Creating and animating cameras
- Working with text
- Scripting
- Creating and applying materials and textures
- 3D camera tracking
- Compositing layers
- Lighting with visible lights and ambient occlusion
- Adding visual effects in After Effects
- Rendering in After Effects and the Adobe Media Encoder
What is CINEMA 4D Lite?
Using the Picture Viewer in CINEMA 4D
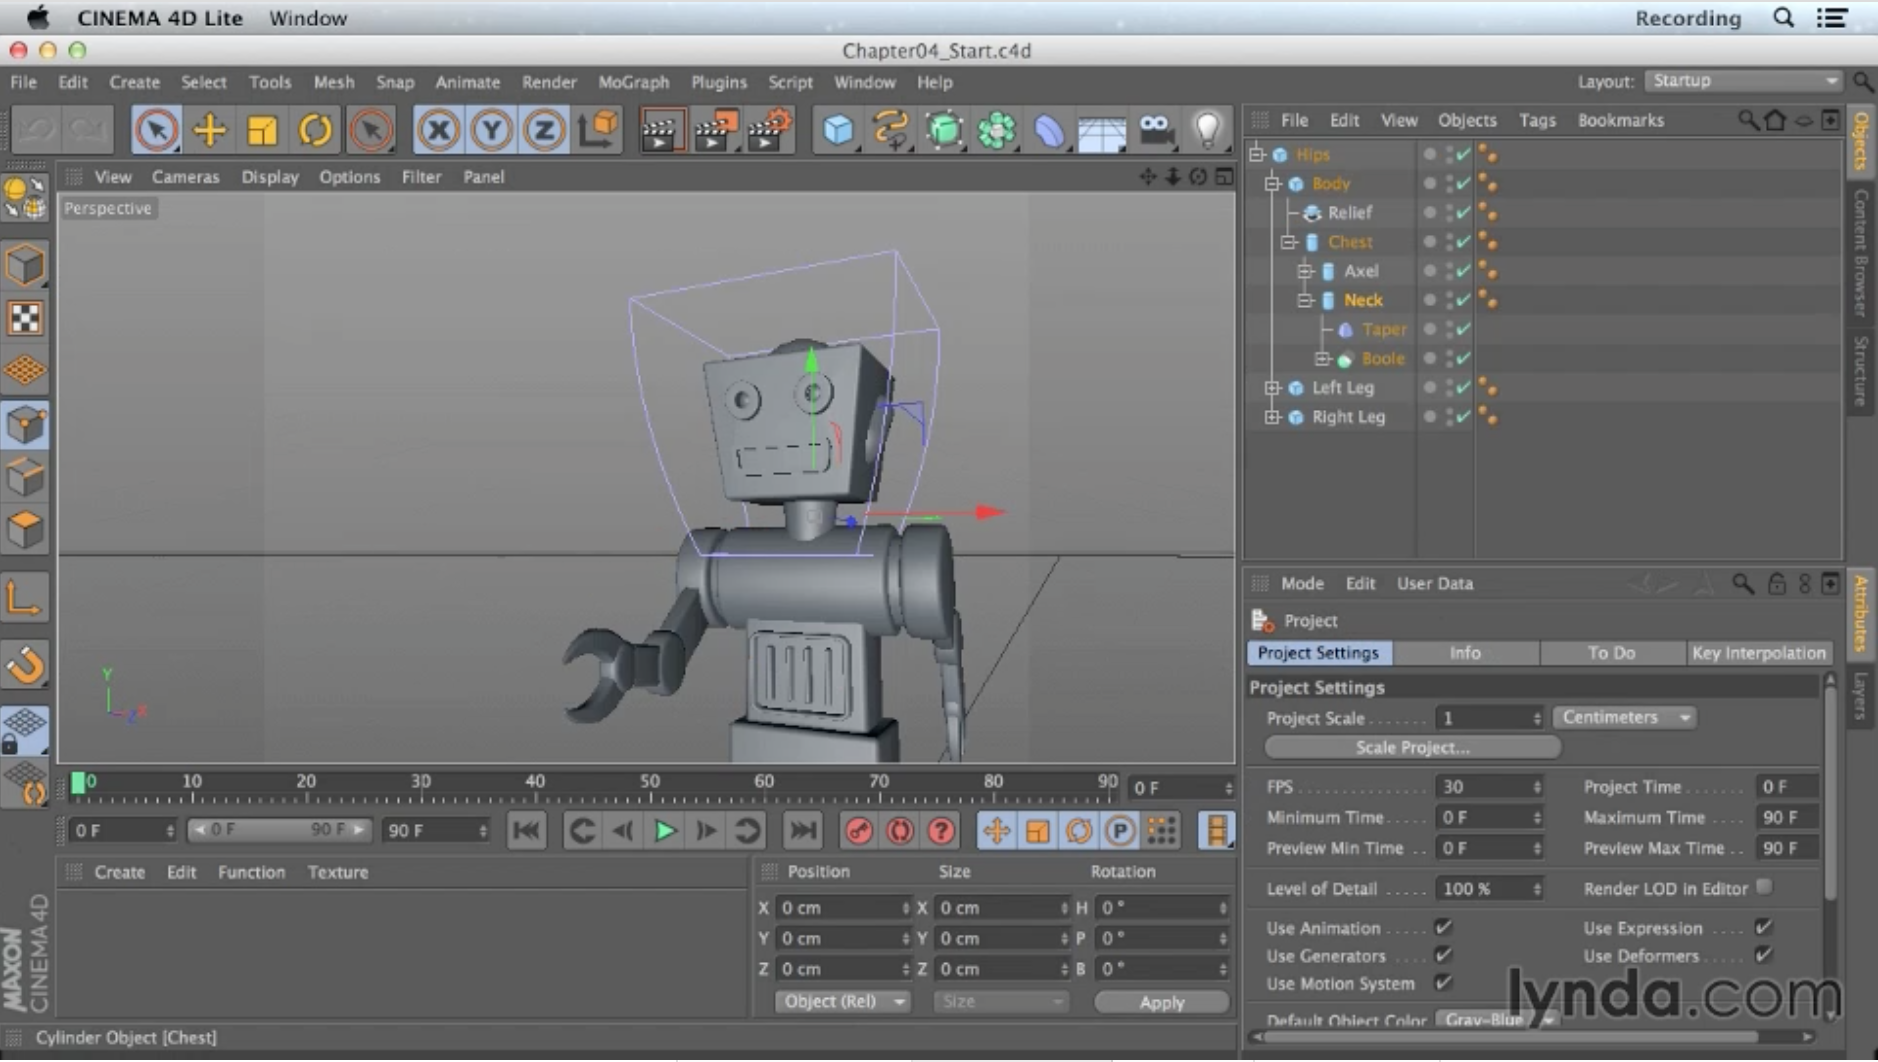
Linking body parts using object hierarchy
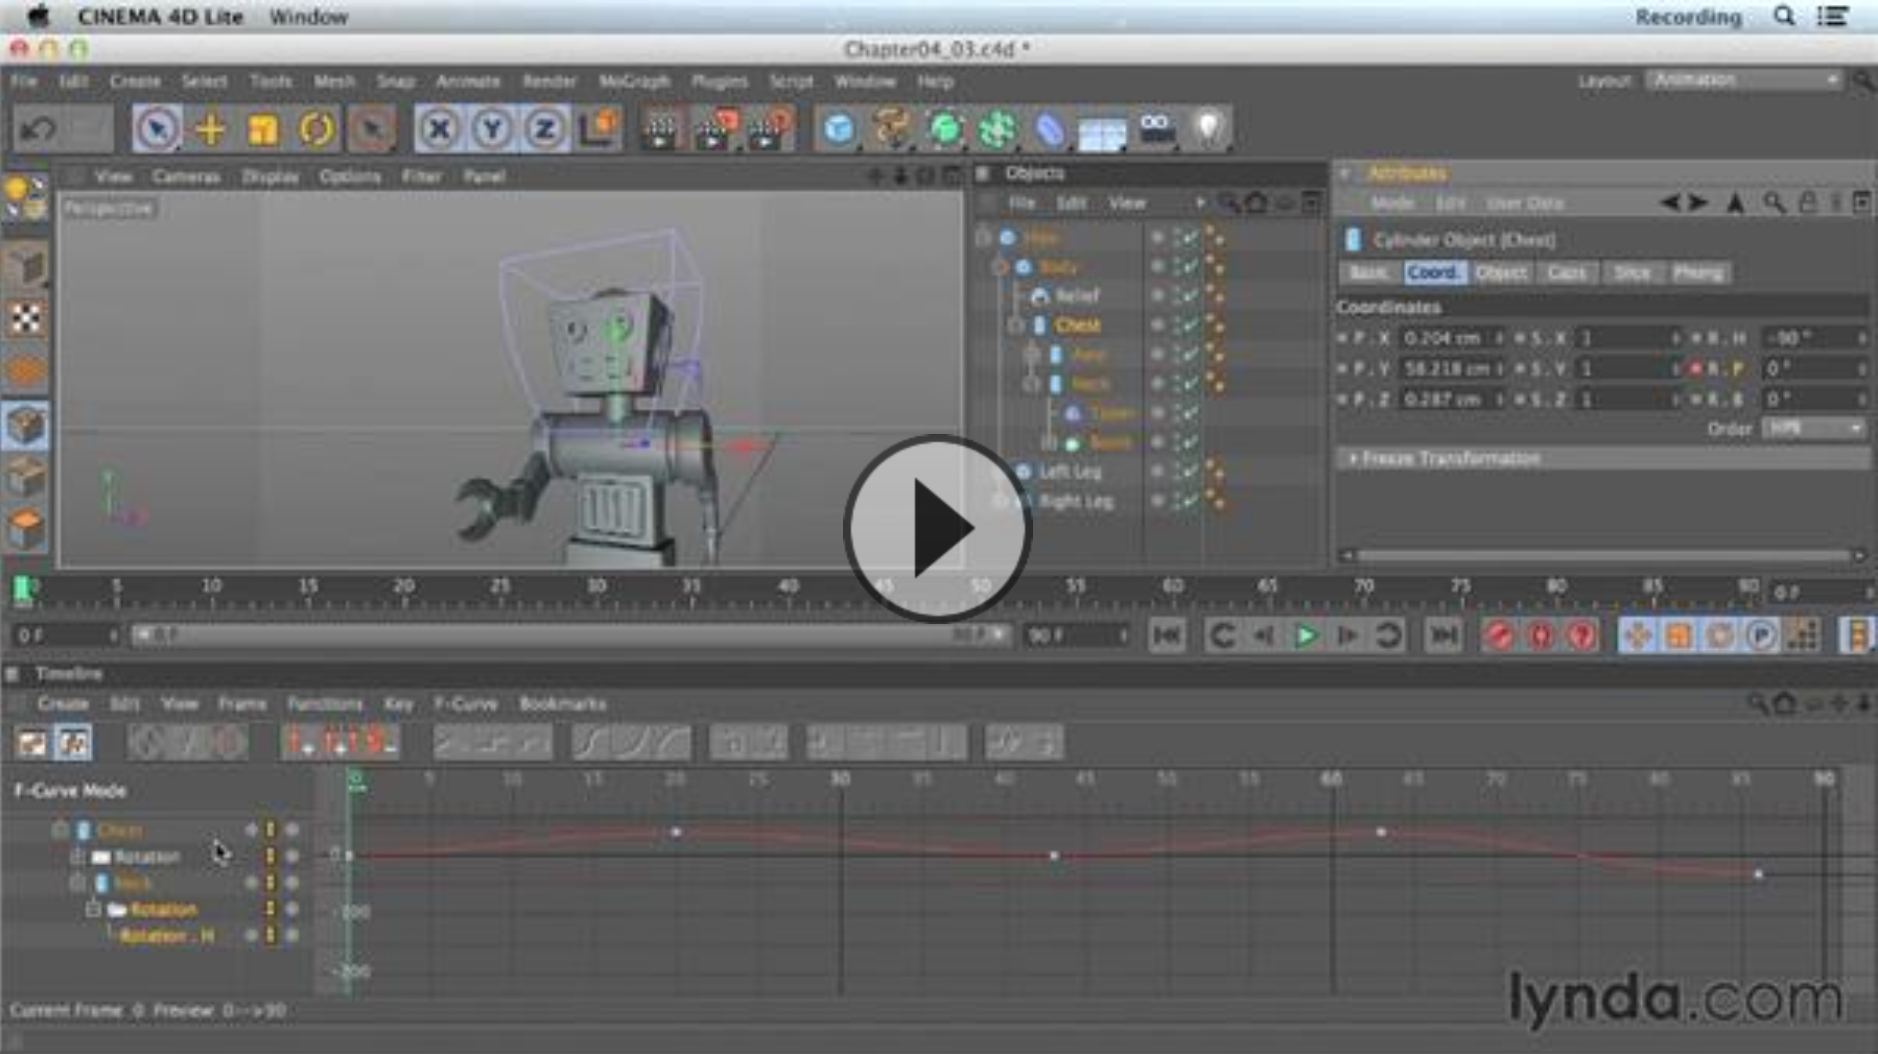
Adding surface detail with a Relief object
Understanding coordinates
Understanding rotation
Keyframe interpolation
Creating multiple cameras in CINEMA 4D Lite
Creating a wiggle expression
Casting shadows on layers in CINEWARE
Multipass compositing explained
Layer styles
-
Cineware Proxy Special Offer
 Cineware Proxy Special Offer
A brand new tool for After Effects CC was released today. CINEWARE proxy automates the process of making useful proxy files from your Cineware layers to help speed up your workflow immensely.
How can it help me
Cineware is a great addition to After Effects CC but it doesn’t really take advantage of the great built-in proxy system that After Effects offers. Cineware proxy fixes all that by making a placeholder proxy of your 3D layers.
If you need to make changes or update your Cineware layer it’s a case of flicking a simple switch to go back to the live C4D file.
What’s on offer?
I’m pleased to say I can offer my readers a healthy discount on this fantastic script today and tomorrow only ($59.99 instead of $79.99 regular price).
Add the brilliant Background Renderer to the bundle and save even more money. This essential script allows you to render faster in the background while you continue working on your After Effects projects. Used in conjunction with Cineware Proxy you’ll own a lean, mean rendering machine! Use the coupon code bgcine to save an additional 20% on BG Renderer Pro when you checkout.
CINEWARE proxy in 1 minute from Mathias Möhl on Vimeo.
See it used here
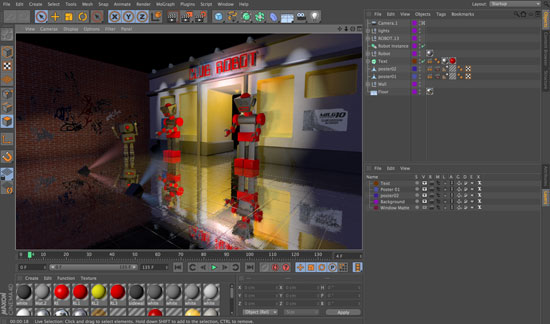
I used this amazing new script in conjunction with Background Render Pro to create this movie. “Club Robot” is my tribute to Beeple, as a thank you for all the great work he does. It was modelled and animated in Cinema 4D Lite. Compositing and Visual Effects were done with After Effects CC and Cineware.
[vimeo]
Club Robot – Beeple Tribute from Angie Taylor on Vimeo.
This movie forms the basis of many of the tutorials from my forthcoming “Up and Running with Cinema 4D Lite” video training course which will be available soon at Lynda.com. It’s an entire two-day course in Cinema 4D Lite, aimed at After Effects users who may not be familiar with 3D software. It teaches modelling, animation, texturing, lighting, cameras and all other aspects of working with Cinema 4D Lite.
-

New Features in next version of After Effects
Product manager Steve Forde said today in his Adobe Blog about the new features in next version of After Effects After Effects;
“with what’s coming to the next version of After Effects – we set a new standard I don’t know that we can match again – EVER”
Announced today is the astounding next version of After Effects, along with the other professional video and audio applications such as Premiere Pro and Audition.
I’ve had my hands on the next version of After Effects and I’m hooked, I’m sure you will be too. Here’s a run down on my favourite features and improvements.
CINEMA 4D Lite
The inclusion of a lite version of CINEMA 4D application with After Effects is a fabulous thing. Now everyone can learn and use this amazing 3D application.
Although this is essentially a pared down version of the software it’s by no means limited for new users and it’s feature set is on a par with CINEMA 4D Prime R14 which normally retails for $995 so you are getting a lot of new 3D bang for your buck!
Live 3D pipeline between CINEMA 4D and After Effects
C4D files can now be imported directly into After Effects. Just import them like any other file and drop them into your comps without the need to render.
You can also create new Cinema 4D files directly from within After Effects by choosing
File > New > MAXON CINEMA 4D File. The Edit Original command can also be used on a selected C4D file to edit it in C4D and see it automatically update back in After Effects. Popular 3D formats such as OBJ, FBX, and Alembic are all supported and can now be integrated into your After Effects scene.The background CineRender renderer takes care of business in terms of getting those pixels made. There are several choices for render modes. The Software render allows you to work quickly and displays your scene with the current viewport settings in C4D while the Standard render modes allow you to see detail that can be customised from the Cinema 4D Render Settings like anti-aliasing and reflections. There are also options for redisplaying scenes in wireframe mode to quickly check animation.

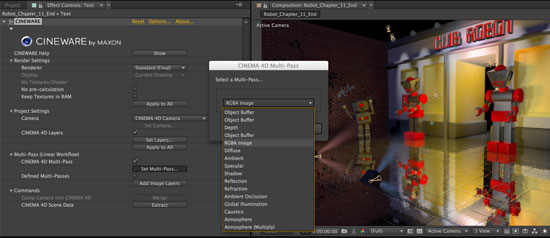
With the Cineware plugin you can extract 3D data such as cameras, lights and nulls from Cinema 4D so you can match up new elements into the scene. Cinema 4D layers are also supported, making it easy to treat different elements of the scene individually.
To top it all off you can also work with individual passes by selecting the Multipass options. These can include standard Multipasses like Reflection, Caustics and Shadows which can be tweaked and perfected in post. A depth matte can be combined with the Lens Blur filter in After Effects to adjust depth of field effects.
External Compositing and regular Compositing tags can be used to isolate individual objects by the way of Object Buffers (Mattes). It really is a flexible solution to what once was a complex and time-consuming workflow. Huge speed boost will be achieved from this massive new feature.
You can also modify a .c4d file to include the camera data from After Effects. This is especially useful for transferring camera data created by the 3D Camera Tracker effect.
I’m currently recording a four hour video workshop. This will be aimed at After Effects users who want to get into Cinema 4D but find 3D apps challenging. It will cover the entire After Effects and Cinema 4D workflow as well as getting you comfortable with Cinema 4D so that you love it just as much as already love AE.
Meanwhile, my good friend, John Dickinson has a great overview video of the new Cinema 4D Lite and the Cineware plugin here on Motionworks.
After Effects: Cineware & Cinema 4D Lite from Motionworks on Vimeo.
Refine Edge tool, Roto Brush & Refine Edge effect & Refine Soft Matte effect
The Refine Edge tool allows you to improve an existing matte by creating semi-transparent areas for the fine detail commonly found at the edge of a matte. A typical example of where this is useful is in keying out hair.
Inspired by, and giving a nod to, the Refine Edge feature in Photoshop, the Refine Edge tool is also integrated in the Roto Brush & Refine Edge effect. To use Refine Edge you must already have an alpha channel defined for the layer. This could be created by Rotobrush, masking or by a keying effect.
Roto Brush & the Refine Edge effect only affect areas defined by the Refine Edge strokes. These strokes can vary in terms of width and can be confined to specific areas of the matte.
The new Refine Soft Matte effect is also excellent at edge refinement. Refine Soft Matte effect applies identical edge refinements as the Refine Edge tool but applies it to an entire matte.
These’s a new overview movie, outlining this feature here by Matthias Mohl.
Warp Stabilizer VFX, improvements to the Warp Stabilizer effect
I’m most excited by the fact that you can now also reverse any stabilization created with the Warp Stabilizer. This makes it doubly-useful. So for example you can remove camera movement, making it easier to apply an effect or remove an element from a shot. Then you can reintroduce the camera movement to the shot, making it seem as though your modifications existed when the footage was shot – brilliant!
The new Objective options for using Warp Stabilizer VFX also allow you to use the effect for compositing a new layer into a scene containing camera movement. Simply run the warp stabilizer on one layer and apply the data to another layer. the composited layer will appear naturally in the shot as if it has always been there.
The Preserve Scale option in Warp Stabilizer VFX effec doesn’t get confused by point-of-view shots like the previous one did in CS6. It will no longer attempt to correct for movement of the camera by changing the scale when you enable the Preserve Scale option. Underlying tracking points can now be revealed and if necessary, deleted, making it easier to select portions of the track you want to keep.
These’s a new overview movie, outlining this feature here by Matthias Mohl.
Improvements to the 3D Camera Tracker effect
The Auto-delete Points Across Time feature in 3D Camera Tracker and Warp Stabilizer VFX effect allow you to delete corresponding track points when you delete track points in the Composition panel. This means you no longer have to delete the track points on a frame-by-frame basis, saving loads of time.
You can also now define a ground plane and origin in a scene using tracking points and the Camera Tracker target. This makes it a whole lot easier to define fixed points in the tracked scene and avoid errors.
These’s a new overview movie, outlining this feature here by Matthias Mohl.
Snapping to layer features, including anchor points and masks
Snapping is one of those unglamorous features that will seem irrelevant to some people but will simply improve all After Effects users lives immeasurably. Basically, layers will now snap to each other when they are placed in close proximity to each other. Edges, Anchor Points, Corners can be used as snap points. It also works with Masks to vertices and points can be snapped to make sure they are perfectly lined up. It works in 3D as well as 2D so finding the centre of a 3D object is now a whole lot easier.
Pixel Motion Blur effect
The new Pixel Motion Blur effect analyzes your video footage and creates a “fake” motion blur. It uses the same motion vector estimation as the Timewarp effect, and is great for adding realistic motion blur to anything that is animated and rendered elsewhere, then composited in After Effects. Of course this can include files that originated in Cinema 4D.
- For illustrations, videos and more information about these top new features, check out the the “After Effects Preview” PDF document available here.
- The Adobe website features videos from all the product managers as well as screenshots of the apps.
- My good friends and mentors, Chris and Trish Meyer have a fantastic definitive article covering the new features of After Effects
- If you’re keen to get hold of these new features as soon as they are available, Adobe are offering an NAB Show special to save 40% off Creative Cloud (valid till19th April 2013). Sadly this promotion is available through the US store only.
-
After Effects and Cinema 4D at FMX

FMX Stuttgart Germany
I’m presenting After Effects and Cinema 4D at FMX 2013 with Maxon in April.
You can purchase tickets for FMX here. It promises to be an exciting lineup of 3D art and visual effects. Confirmed FMX highlights include:
Cloud Atlas, Life of Pi, Skyfall, The Croods, Crysis 3. I hope to see some of you there. -

Adobe After Effects CS6 – Learn by Video
 It’s finally here, my brand new After Effects CS6 – Learn by Video course. I worked on this course with Adobe’s Todd Kopriva who I just love working with. Together we teamed up to provide a good mix of technical and creative training in our favorite software application. We hope you enjoy it. Here’s an intro to the course from us both.
This Learn by Video course offers in-depth training on the interface, workflow, and features of Adobe After Effects CS6. If you subscribe to my newsletter you can get 20% off this course with a discount code. The contents of this course include:
Introducing After Effects CS6
In this chapter you’ll get an overview of how After Effects works, what it does, and what the main controls are.Interface Tour
Before you start following along with the instructions in this training, it will help to learn what the controls are called and where things are located. You’ll learn about the basic controls and the most commonly used panels in this chapter.Creating Compositions and Layers
In After Effects we work in projects. Every project contains compositions, each of which is the framework of a movie; layers are assembled within the framework of these compositions. In this chapter you’ll learn how to create compositions and bring layers into them from the Project panel. You’ll also learn how to create layers from scratch.Importing Footage
In this chapter you’ll learn how to bring various types of files into After Effects. You’ll also see how to make sure After Effects interprets these files correctly and how to manage them once you get them in.Interpreting and Managing Footage
Sometimes you need to tell After Effects how to use source files. This chapter shows you how to set various parameters for how files are interpreted and used.Animation Basics
The most important aspect of learning to fully understand After Effects is getting to grips with how After Effects handles animation. Once you have mastered the topics covered in this chapter, you can really do anything in this powerful application.Fine-Tuning Animation
This chapter will take your animation skills further by showing you how to understand timing. You’ll learn how to work in the Layer panel and the Graph Editor for more precise control over layers and animation.Animating Text Layers
Text layers can be animated in a variety of different ways to create exciting and compelling motion graphics. In this chapter you’ll learn about the properties and methods used to control these layers. Text layer properties use a slightly different animation system than standard layer properties, so we’ll also discuss the idiosyncrasies involved in animating these wonderfully flexible design elements.Fun with Shape Layers
Shape layers are pretty unique but can be confusing to new users. This chapter will help demystify shape layers and give you the confidence to push them in all sorts of creative directions.Basic Compositing
Compositing is about stacking layers on top of one another and making parts of each layer show through others in specific ways. You’ll learn about many of the ways to composite layers together in this chapter.Effects
After Effects provides you with scores of effects that you can apply to your layers, allowing you to create virtually any look or style you like. Imagine being able to animate all of these over time and you get a real sense of the creative flexibility that After Effects can offer you. This chapter tells you everything you need to know to create amazing effects.Time
A movie is a series of images that plays over time, and After Effects provides many powerful controls for controlling exactly how this happens. This chapter will teach you about tools like frame blending, slow motion, freeze-frame, and more.Grouping and Linking
There are times when it makes sense to group layers together into a single item, either to simplify complicated comps or to make editing, moving, or applying effects a whole lot easier. In this chapter we’ll look at several methods for grouping layers together.Introduction to 3D
After Effects allows you to transform and animate your layers within a 3D environment. This adds some complexity to your compositions. After Effects CS6 also lets you work in ray-traced 3D, where you can extrude and bevel shapes and text and even bend video layers. In this chapter you’ll see how After Effects deals with mixing 2D and 3D in the same composition.Memory and Performance
Every person, project, and computer system is different. In this chapter you’ll learn how to configure After Effects to match your needs, the capabilities of your computer system, and the needs of your projects.Render Order and Collapsing Transformations
Layers and their components are processed in a specific order. In this chapter you’ll learn about that order and how to use special features to control itOutput Options
When you’re finished with your project, you need to get your data out of After Effects, usually as a finished movie. In this chapter, you’ll learn the basics of rendering and exporting movies.Project Explorations and Recap
This chapter contains some examples of animations created in After Effects along with explanations of how they were made. You’ll also get some tips on integrating After Effects with Cinema 4D, as well as some final thoughts on the course and suggestions for further learning.The lessons are wrapped in a feature-rich interface that lets you jump to any topic and bookmark individual sections for later review. Full-Screen mode provides a hi-def, immersive experience, and Watch-and-Work mode shrinks the video into a small window so you can play the videos alongside your application. Also included are exercise files that give you an easy way to try out the techniques you learn and a 48-page guide containing supplemental material.
-
After Effects CS6 New Feature Highlights
Well, it’s finally been announced and I can talk about it, my After Effects CS6 new feature highlights. My dear friends at Adobe have once again pulled it off and produced a great update to my favorite software application – After Effects CS6! Rather than bombard you with loads of text I’ve created a movie to highlight my favorite new features, you can watch that movie here.

 If you want more information about After Effects CS6 features not covered here Todd Kopriva has produced two great free training workshops in conjunction with the lovely people at video2brain.
After Effects CS6 New Features Workshop includes one hour & forty-five minutes of free movies covering the new features in more detail.
There’s also a fantastic new version of Premiere Pro on the horizon. If you want to find out about the new features, check out Todd’s two hours of free training movies here.
-

Wacom Masterclasses

 I’m pleased to announce the release last week of the new Wacom Masterclass series of workshops. I’ve worked with Wacom tablets for years and love the creative flexibility they provide to my work. In these tutorials I share some of the techniques I’ve learned over the years.
If you want to check out some free lessons from these workshops please use the highlighted links listed below. Subscribers to my newsletter qualify for a 20% discount on this course through to the end of December. You can sign up for my newsletter here.
 Wacom MasterClass Vol. 1: Photography & Image Editing
Join Angie Taylor and Steve Caplin for this multifaceted collection that includes a basic course covering the tablet’s tools and settings as well as lessons on beauty retouching, optimizing your architectural and landscape images, and image retouching with Photoshop’s healing and cloning tools. You’ll also get crash courses on Adobe Photoshop Lightroom and Apple Aperture, designed to get you working right away. Each class features lessons with picture-in-picture live footage of the artist working with their pen and tablet, enabling you to see and learn from their techniques up close.

Wacom MasterClass Vol. 2: Digital Drawing, Painting & Illustration
Join Angie Taylor, Daniel Lieske, and Uli Staiger for this information-rich collection that includes a basic course covering the tablet’s tools and settings as well as lessons on drawing and painting in Photoshop, photo illustration, and drawing in Illustrator. You’ll also get a crash course on Painter, designed to get you working right away. Each class features lessons with picture-in-picture live footage of the artist working with their pen and tablet, enabling you to see and learn from their techniques up close.
 Wacom MasterClass Vol. 3: 3D & Motion Design
Join Angie Taylor, Uli Staiger, and Daniel Lieske for this unique collection that includes a basic course covering the tablet’s tools and settings, an extensive video tutorial on motion design with After Effects, and crash courses on 3D with Photoshop, SketchBook Pro, and ZBrush, designed to get you working right away. Each class features lessons with picture-in-picture live footage of the artist working with their pen and tablet, enabling you to see and learn from their techniques up close.
 Wacom MasterClass Complete Collection
This exceptional value includes all of Volumes 1–3 of the Wacom MasterClass collection, including lessons from artists Angie Taylor, Steve Caplin, Daniel Lieske, and Uli Staiger. In addition to a basic course covering the tablet’s tools and settings, you get training on everything from beauty retouching and painting in Photoshop to drawing in Illustrator and motion design with After Effects. The package also includes crash courses on Adobe Photoshop Lightroom, Aperture, Painter, SketchBook Pro, ZBrush, and 3D with Photoshop, all designed to get you working right away. Each class features lessons with picture-in-picture live footage of the artist working with their pen and tablet, enabling you to see and learn from their techniques up close.
Free Movies to watch:
Pressure Sensitivity
ExpressKeys Overview
Drawing with Sketcbook Pro’s Brushes
Hiding the Veins with a Color Layer
Lens Correction
Cloning in Perspective with the Clone Tool
Drawing the Mushrooms in Photoshop
Distorting the Lens View
Working with the Blob Brush Tool
Creating a Complex Object from a Grayscale Image
Rotoscoping
Polysculpting -
Understanding Axis Modes
After Effects can be a difficult application to learn simply because it offers you so may options. Many of these options are not immediately apparent to users so they muddle through using default settings when a better solution may be available to them. My job is to point you in the direction of these hidden helpers!When working in 3D, have you ever experienced difficulty when positioning or rotating layers, cameras or lights within 3D space? If the answer is yes, then understanding the 3D axis modes may help to you.

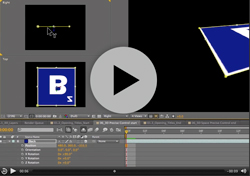
Click on this image to enlarge it In this example (taken from my After Effects CS5 Learn by Video DVD) you can see a Square layer inside a 3D comp. Notice in the Active camera view (top left) you can see the three-way-axes attached to the layer. It consists of three arrows, each representing one of the three dimensions of 3D space. The red axis (representing the horizontal ‘left-to-right’ X axis) is an arrow facing left to right. The green axis is pointing upwards and represents the vertical ‘top-to-bottom’ Y axis. Finally, it’s a bit tricky to see in this view but the blue arrow, representing the ‘near-to-far’ Z axis is pointing towards the viewer.
It’s a bit easier to see this if you look at the layer in the Right view. Notice in this view that we see the axes (and the layer) from a different angle. We can imagine that we are now standing to the left of the layer, looking towards the right. therefore, the blue arrow, representing the Z axis is pointing to our right, towards our imaginary viewer, who is standing in front of the layer.
Local Axis Mod is the default behavior for these axes in After Effects. In this mode the axes are attached to the layer. So, wherever the layer moves, the axes will follow as if attached to it. Let’s see what happens if I rotate the layer.

Click on this image to enlarge it In this second example I’ve rotated the layer by 90 degrees on the X axis. When I rotate the layer, its 3D axes rotates with it. Notice in the Right view, the Green Y axis is now pointing towards the viewer.
Local Axis Mode may seem logical, when you rotate a layer, the axes rotate with it. But confusion occurs when you then start using the axes to move or rotate the layer in the Composition panel as the axes may not actually affect the values you think you’re adjusting.

Notice in this movie, if I grab the Y axis to move the layer in Right view, I’m actually adjusting the Z value of the layer. axismodesThis can be seen refelcted in Z position value in the timeline, notice it changing as I drag. If I adjust the position by dragging on the Z axis, I’m actually adjusting the Y value in the Timeline. At times this can be very confusing!
The good news is, if this causes you difficulty, there are two other axis modes to choose from. You can change the Axis mode by clicking on the Axis Mode buttons in the Tools panel that runs along the top of the application.
If I switch to World Axis Mode notice what happens to the axes on the layer as I do so, it changes so that the axes is fixed to the coordinates of the Composition (or world) rather than to the layer itself. If I rotate the layer again on the X axis, the axes do not move with the layer, they remain relative to the composition.
For new users to After Effects, this mode is perhaps more logical as dragging on the individual axes in the Comp panel will always adjust the corresponding values in the Timeline as they would expect. Adjusting the position by dragging on the Y axis will always adjust the Y value, adjusting X axis always affects X and adjusting the Z axis always affects the Z value. Regardless which view I select, or how much I rotate my view or my layers the axes will always be aligned to the edges of the Comp.
The final axis mode, View Axis Mode can be a little tricky to get your head round so beware! View Axis mode will align the axes to whatever view you are in. It allows you to rotate around the geometric center of your scene as it is currently being viewed as opposed to the comp itself.
I hope this has helped you understand the different axis modes available in After Effects and how they can help you when moving or rotating layers within 3D space. If you want to learn more about 3D in After Effects why not pop along to my session, ‘Introduction to 3D in After Effects’ at the NAB 2011 Post Production World Conference. Please say hello if you do! Happy Keyframing!