Kinetic Typography Techniques with After Effects

I was asked to create a workshop on Kinetic Typography techniques for Adobe After Effects by several people including the lovely people from video2brain who produced this epic workshop for me. I’d like to thank them all for their patience and professionalism throughout this long project!
I’m pleased to say that I have finally finished this epic workshop. It was originally planned as a one-hour tutorial but has developed into a full-on, eight-hour workshop covering all sorts of weird and wonderful techniques.
I started off by covering essential kinetic typography techniques such as automatically creating text layers by importing content from a text file – using Variables and Data Sets in Photoshop and Scripts in After Effects. I demonstrated how to format text, making use of typographic controls like Kerning and Baseline Shift to get creative with negative space. In the latter stages I applied some of the free Animation Presets, created and adapted complex text animators to help you understand how to control them.
"That Day" Music by Richard Walker
While creating this piece I just couldn’t help but get creative and I slightly strayed away from the task in hand. As a result this workshop also includes techniques you may not immediately associate with traditional kinetic typography. In the included lessons we have fun animating and lighting layers in 3D space. We recreate an animated version of the Sgt. Pepper album cover using After Effects’ vector Shape Layers.

Welcome Video
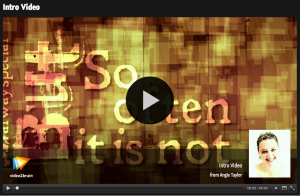
Introduction to Kinetic Typography
We even recreate an ancient stone circle from 3D text layers! You’ll also learn techniques for creating your own backgrounds, aged-film and dust and scratches effects by combining some of the built-in After Effects filters. Of course I also cover popular, requested techniques like animating handwriting on screen.
I use typography in my every-day work as a motion graphic designer but the artform of kinetic typography is different. The purpose of text in motion graphic design is to deliver a message. Generally, the text needs to be legible and on screen for long enough for the viewer to read and there are several other “rules” that are sensible to apply to motion graphic design. Kinetic typography as an artform kicks those rules into touch.
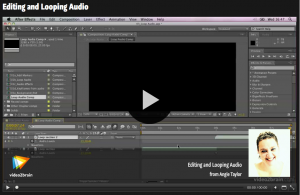
Editing and Looping Audio
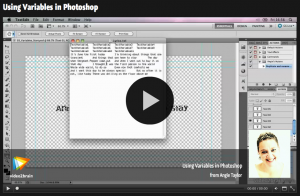
Variables and Data Sets in Photoshop
My understanding of kinetic typography is that the words should be used to convey moods or feelings, they don’t need to be the message, they are just there to support it. My feeling is that the words should echo the spoken words rather than simply repeat what’s being said.
In my interpretation of Richard Walkers “That Day” (a poem set to music) I wanted to portray what I took personally from the piece. I understood it to be about the dissatisfaction we have with the present moment and how we avoid enjoying it by always thinking about the past or the future. This avoidance leads to confusion, frustration and general unsettled feelings.
In this workshop you get all my project files along with my creative musings about how these ideas developed. I hope that you can enjoy working on some of my own files and diving into my own personal creative project. Here are some sample movies from the workshop to give you an idea about what you can learn.
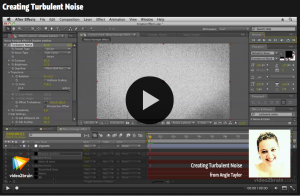
Aged Film with Turbulent Noise
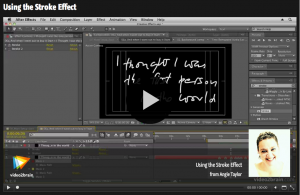
Animate Handwriting with the Stroke effect


 In this week’s newsletter I’ll be giving away a complete workshop about using the Stereoscopic 3D workflow in After Effects CS5.5 (offer ends 26/09/11). That’s four chapters – a total of 16 training movies absolutely free to subscribers of my software tips and tricks newsletter. Sign up today to make sure you don’t miss out. The lovely people at video2brain have created this workshop for me if full, fabulous HD quality for your viewing pleasure. You can find out more about their high quality productions here. Any the wonderful team at Artbeats have donated some fantastic Stereo 3D footage absolutely free so you can build this opening title graphic sequence is glorious Stereoscopic 3D.
- In the “Introducing Stero 3D” chapter you’ll find out what stereoscopy is, why those funny glasses are used to view S3D and how After Effects re-creates the illusion of depth for 3D broadcasts.
- In the “Faking 3D tracking” chapter you’ll discover how to combine 3d animated elements with Stereo 3D video footage from Artbeats.com. I’ll show you how to track the footage in 2D and then “fake” 3D tracking by cleverly combining the tracking data with additional 3D animation. Once the shot is designed you’ll add 3D cameras and lights that will help the text combine well within the shot and and add effects to bring it all together.
- In Effects, Transparency and Style chapter we’ll add effects, blend modes, and layer styles to the graphic elements so that they appear to blend into the shot.
- Finally in the Stereoscopic 3D workflow chapter you’ll build a Stereo 3D rig that automates the comp structure required to create an anaglyphic image for 3D broadcast. We’ll look at the effects you can use to adjust the settings so that they are just right for your individual needs. We’ll also look at ways of adding even more depth and realism to the scene with Depth of Field and Motion Blur effects.

Digital Arts has featured – 12 Rules of Animation – an excerpt from my “Design Essentials for the Motion Media Artist” as their feature article this month. The article is now FREELY AVAILABLE on the Digital Arts website.
Animation as we know it has been around since Horner invented the zoetrope in 1834. Since then animators have developed rules of animation that help us to draw viewers into the world we have created. From Disney classics to the latest stereoscopic 3D productions, we’ve plundered them all to find the 12 key techniques you need to master to be a top-flight animator.
Some of these rules are based on real-life physics, and others on observations and reactions. They provide a set of invaluable ‘tricks’ for animators that have been proven to work in almost every situation.
In the article I delve into the world of animation to pick out the 12 rules of animation that every animator and motion graphics artist must know. Drawn from the forms 150 year history, you’ll learn a wealth of dos and don’ts that will help you produce more engaging projects, whether you’re working in 2D, 3D, graphics, stop-motion or a mixture of them all.
You can pick up both printed copies and digital downloads from the Digital Arts website where you can also find some of my tutorials, tips and tricks.
I’ll also be talking about some of these golden rules of animation in my “Dynamic Text Animation for Motion Graphicswith After Effects” presentation at the Production Fiesta in London on May 6th.
In this session, I will share an in-depth look at the options for working with text in Adobe After Effects. I’ll show examples of successful motion graphic designs and will discuss the components of design that make them work. In this session you’ll earn about the rules of typography and how to apply the rules of typography to your designs to make them easier to read and more dynamic. I’ll also take an in-depth look at the typographic controls available in After Effects and will also show you how you can use hand-drawn text to bring a unique aspect to your designs.
I’ll also be presenting four other sessions at this event which you can find out about here. If you want to register for a full day of valuable creative sessions by me and all the other speakers you can do so here on the Eventbrite page. I hope to see some of you there, please make sure to say hello if you can make it along.

After Effects can be a difficult application to learn simply because it offers you so may options. Many of these options are not immediately apparent to users so they muddle through using default settings when a better solution may be available to them. My job is to point you in the direction of these hidden helpers!
When working in 3D, have you ever experienced difficulty when positioning or rotating layers, cameras or lights within 3D space? If the answer is yes, then understanding the 3D axis modes may help to you.
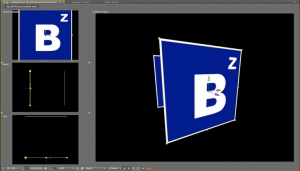
Click on this image to enlarge it
In this example (taken from my After Effects CS5 Learn by Video DVD) you can see a Square layer inside a 3D comp. Notice in the Active camera view (top left) you can see the three-way-axes attached to the layer. It consists of three arrows, each representing one of the three dimensions of 3D space. The red axis (representing the horizontal ‘left-to-right’ X axis) is an arrow facing left to right. The green axis is pointing upwards and represents the vertical ‘top-to-bottom’ Y axis. Finally, it’s a bit tricky to see in this view but the blue arrow, representing the ‘near-to-far’ Z axis is pointing towards the viewer.
It’s a bit easier to see this if you look at the layer in the Right view. Notice in this view that we see the axes (and the layer) from a different angle. We can imagine that we are now standing to the left of the layer, looking towards the right. therefore, the blue arrow, representing the Z axis is pointing to our right, towards our imaginary viewer, who is standing in front of the layer.
Local Axis Mod is the default behavior for these axes in After Effects. In this mode the axes are attached to the layer. So, wherever the layer moves, the axes will follow as if attached to it. Let’s see what happens if I rotate the layer.
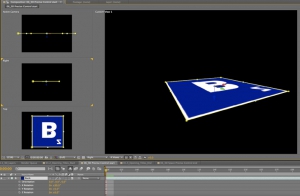
Click on this image to enlarge it
In this second example I’ve rotated the layer by 90 degrees on the X axis. When I rotate the layer, its 3D axes rotates with it. Notice in the Right view, the Green Y axis is now pointing towards the viewer.
Local Axis Mode may seem logical, when you rotate a layer, the axes rotate with it. But confusion occurs when you then start using the axes to move or rotate the layer in the Composition panel as the axes may not actually affect the values you think you’re adjusting.
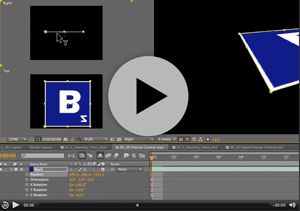
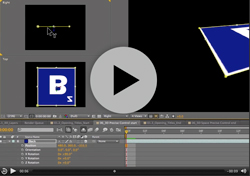
Notice in this movie, if I grab the Y axis to move the layer in Right view, I’m actually adjusting the Z value of the layer. axismodesThis can be seen refelcted in Z position value in the timeline, notice it changing as I drag. If I adjust the position by dragging on the Z axis, I’m actually adjusting the Y value in the Timeline. At times this can be very confusing!
The good news is, if this causes you difficulty, there are two other axis modes to choose from. You can change the Axis mode by clicking on the Axis Mode buttons in the Tools panel that runs along the top of the application.
If I switch to World Axis Mode notice what happens to the axes on the layer as I do so, it changes so that the axes is fixed to the coordinates of the Composition (or world) rather than to the layer itself. If I rotate the layer again on the X axis, the axes do not move with the layer, they remain relative to the composition.
For new users to After Effects, this mode is perhaps more logical as dragging on the individual axes in the Comp panel will always adjust the corresponding values in the Timeline as they would expect. Adjusting the position by dragging on the Y axis will always adjust the Y value, adjusting X axis always affects X and adjusting the Z axis always affects the Z value. Regardless which view I select, or how much I rotate my view or my layers the axes will always be aligned to the edges of the Comp.
The final axis mode, View Axis Mode can be a little tricky to get your head round so beware! View Axis mode will align the axes to whatever view you are in. It allows you to rotate around the geometric center of your scene as it is currently being viewed as opposed to the comp itself.
I hope this has helped you understand the different axis modes available in After Effects and how they can help you when moving or rotating layers within 3D space. If you want to learn more about 3D in After Effects why not pop along to my session, ‘Introduction to 3D in After Effects’ at the NAB 2011 Post Production World Conference. Please say hello if you do! Happy Keyframing!
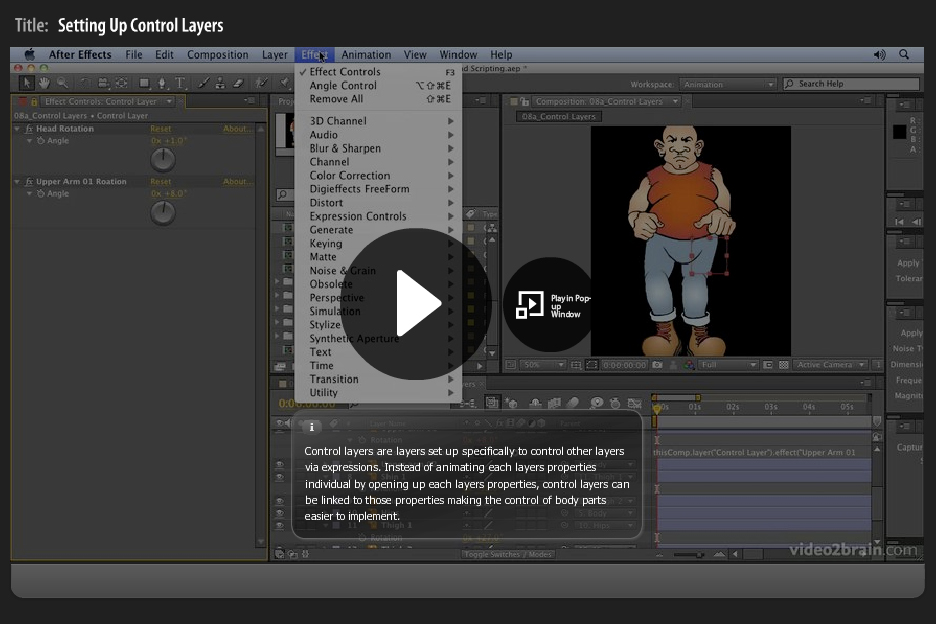

I was asked a question during my After Effects Fundamentals course at The Bridge this wek. I was about how to use control layers in After Effects to adjust animation, using expressions. Funnily enough I’ve recently recorded a movie covering this exact technique so I just asked the guys at video2brain if they could unlock it for me to give to the readers of my blog-posts. So here it is darling readers, enjoy!
By the way, if any of you live, or work in the Westminster region of London you could qualify for 80% discount on my After Effects and Illustrator courses. If you want to book a place on these courses (an incredible £108.00 for a two day course in London) please contact Natalie at the Bridge. There are still a few places available for my After Effects Intermediate and After Effects Advanced courses and some places available for my Illustrator Fundamentals course.
 A question appeared on the Video Copilot website today about uprezzing old projects which can be a bit of a nightmare in AE. You can often find that layers positions get messed up and effects change appearance when you scale your comp.
Some of the issues that you’ll come across are hard to avoid but you can make the process a little easier by using some of the scripts that come free with After Effects CS5.
Incidentally, making projects bigger is a massive headache so always good (if you have the opportunity of course) to create your projects at the biggest size you think may be required. If there’s ANY chance of HD requirements then use HD, even if the immediate requirement is only for SD.
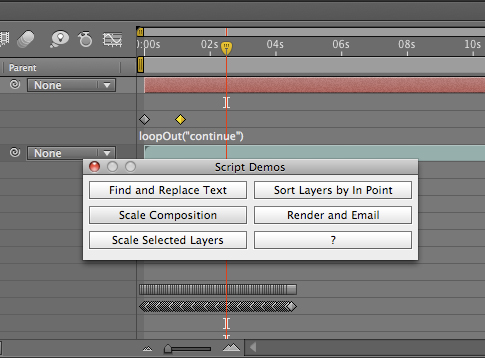
Having said all that, there are always times when you need to up-rez. Updating old projects for showreels; adapating other old projects for new jobs etc. So, if you simply HAVE to do it, there’s a couple of scipts that will work. In the Demo Palette (can be opened by going to File > Scripts > Demo Palette) there are two gems, one is called ‘Scale Comp’ and can be used to scale your entire composition, keeping all layers in the correct position. The other is called ‘Scale Selected Layers’ which will work on a selection within a comp, again, maintaining their position relative to each other.
You need to make sure your preferences are setup correctly to use scripts in order to use these. to do so, go to Preferences >General > Allow Scripts to Write Files and Access Network.
You will still need to go through the somewhat painful process of editing effects but this will save you a lot of work with layers etc.
To find out more about After Effects and download some FREE movies, check out my After Effects CS5 Learn by Video page where you can watch excerpts and learn more tips.


