 Did you know tat you can read the first chapter of my “Design Essentials for the Motion Media Artist” free on Amazon Kindle?
Just click here and then follow the link on the right hand side of the page under “Kindle”.
Latest news from Angie Taylor
Did you know tat you can read the first chapter of my “Design Essentials for the Motion Media Artist” free on Amazon Kindle?
Just click here and then follow the link on the right hand side of the page under “Kindle”.

It’s not like me to be subtle but here ‘s my Subtle Blurs Collection for Sapphire Edge V2.
Sometimes you don’t want to overwhelm a shot and you just need a subtle effect. This month my collection provides you with more gentle blurs, some combined with motion.
These presets are free to download at FX Central for anyone who owns Sapphire Edge software.


I’ve created a new set of Halloween presets for After Effects. These presets are for native After Effects plug-ins and include particle effects, vector shape layers and expressions.

You can download these presets free of charge by registering at my new website Effect Cafe – a resource for creative people like you. It’s free to join and my aim is to provide as much free content as possible for my members.
I’d love to see what you do with these presets so please post your results to me on Twitter.
Here are some examples of movies I created using these presets;
07 Skull Trace 1 from Angie Taylor on Vimeo.
Dripping Blood from Angie Taylor on Vimeo.
Skullduggery with Particles from Angie Taylor on Vimeo.
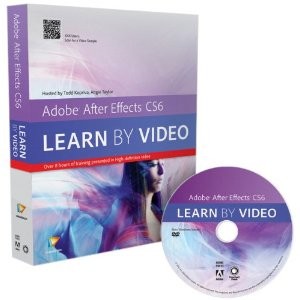
 I was very excited to read this very in-depth review of After Effects CS6: Learn by Video on Amazon today;
5.0 out of 5 stars | August 20, 2012
I get many emails asking for the best way to begin learning a new software such as After Effects. My first suggestion is to start with a training video for the software of your choice. This is especially true for a robust and complex software such as After Effects CS6.
I found After Effects to be intimidating in spite of my strong Adobe Flash background but the Adobe After Effects CS6 Learn by Video training course from video2brain gave me a good solid base upon which to build. The authors Todd Kopriva and Angie Taylor share the instruction with Kopriva covering the technical aspects of the software and Taylor covering the creative.
The authors start with a short history of the After Effects software leading to what’s new in version CS6. With a panel-by-panel tour of the user interface, you are introduced to the basic project workflow and terminology.
Next, you learn what makes up a basic composition and how to build your own comps from scratch. You first learn how to create a line of text with the Character panel and a block of text with the Paragraph panel and then move on to using shape layers for creating simple and complex vector shapes.
The fun really starts with the Effects and Presets panel. You will learn how to apply a Keylight effect to turn the original background transparent. Then you create a new solid which will be your new background to which you can add effects such as the CC Mr. Mercury effect.
Not all comps are built from scratch. You learn how to import assets such as movies, stills, image sequences and audio. Also introduced is how to manage and organize the various assets for your comp. Of course, you will need to know the options for importing Photoshop, Illustrator, After Effects, Premiere Pro and Final Cut Pro files. You will also learn about interlacing, pixel aspect ratio, and trimming basics.
Halfway through the course, we get to the part I enjoy the most which is animation. First, you cover the basics including how to use keyframes and tweens to control the transformation of various properties. Next, you cover motion paths and how to use Motion Sketch to draw freehand paths. Delving deeper into animation, you learn about the various types of keyframes in After Effects and how to use the Keyframe Assistants and Graph Editor to refine your animations.
The next section covers text animations. Taylor covers options for importing text created in Photoshop and how to edit the text in After Effects. She then demonstrates an easy and fast way to animate each letter individually with the Text Animators. She shows you how to combine animators to create more complex animations and how to save your custom animators as presets. Next we see how shape layers can be used to create many effects, as well as using the Repeater to emulate a particle-like effect.
Switching back to Kopriva, we learn the basics of compositing and how many effects can be created using Blending Modes, Alpha Channels and Masks. Next he discusses common problems and how to correct them with Color Keying, Motion Tracking and Rotoscoping.
The next section concentrates more closely on how to create custom effects. Beginning with a discussion of the Effect Controls panel and categories. Taylor also covers how to use keyframes to animate properties and how to apply easing. One nice feature is the Brainstorm viewer that lets you preview variations of effects and save them as presets. She also discusses what she calls fixer effects for solving common problems such as rolling shutter. She ends this section by covering how to edit layer styles and adjustment layers imported from Photoshop to create effects.
When working with video, you can manipulate the frame rate to achieve various effects. Kopriva first discusses frame rate in general and then covers common retiming tasks such as Time Stretching, Time Remapping, Freeze Frame, Slow Motion and Reverse Frame.
The next section concentrates on your workflow and ways to use grouped and linked layers as well as nesting and pre-composing. One example of character animation demonstrates parenting hierarchy and IK. You also learn about expressions and how easy it is to write your own for complex animation.
Animating 3D effects can add realism to your projects and this section of the course begins by discussing how to use the 3D wireframe and other views needed to work in 3d space. Once you are familiar with working in 3d space, Taylor moves on to how to animate by bending layers. She also covers the basics of using camera presets and controls for depth of field and point of interest. Next, she adds lighting to the 3D scene and walks you through the various types of lighting such as Environmental, Point and Spotlight and how to work with cast shadows and reflections. Reflections can be very important to the realism of your scene and Taylor discusses the various controls such as Reflection Intensity, Sharpness and RollOff, as well as Specular Intensity and Shininess and Environmental Layer maps.
Switching back to Kopriva, we discuss optimizing software performance by adjusting the default preferences and taking advantage of Ram and Disk Catching. Next, he covers After Effects default render order and how this order determines the final render, much like the hierarchy in Cascading Style Sheets determines the final HTML document.
After Effects has several options for exporting your projects and in this section Kopriva discusses how to use the Render Queue. Much like other video exporting, he shows you how to set the various format options. He discusses how to use preset output templates and how to save your own custom settings as a template. He demonstrates how After Effects can save time by rendering several formats simultaneously. Next, he does a walk through of how to use the Adobe Media Encoder to choose output presets for Vimeo, Apple and Android.
The final section is a wrap up and final thoughts. It examines several projects and discusses how they were made. It also covers how to integrate After Effects with Cinema 4D.
The course includes 10+ hours of the video2brain Learn by Video series and supporting files for following along for a hands-on, watch-and-work teaching approach. Also included with the DVD is a small booklet with additional information. As with all the Learn by Video series, you have an easy-to-use control panel for viewing the videos.
Todd Kopriva has been with Adobe and After Effects since version 7.0. He creates Adobe documentation and training materials. Angie Taylor has worked 14 years in motion graphics and animation. Examples of her work have been featured on the BBC.
*Peachpit Press provided a copy to me for review purposes.


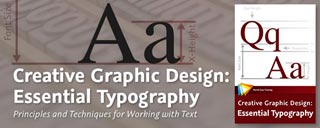
Making good decisions in typography — choosing the right typefaces, fonts, sizes, spacing and so on — can have a major impact on the quality of your designs. In this one-of-a-kind workshop, art director, illustrator, and motion graphic designer Angie Taylor introduces you to the essential principles of typography.
After exploring the terminology, history, and anatomy of traditional and computer-based fonts, she brings you all the way up to the present day by looking at how text is formatted in today’s creative applications.
You’ll also learn specific software techniques for creating your own lettering from hand-drawn text, animating text on a path, using operators and effects to customize existing fonts, working with 3D text, and more.
Check out some free movies from this workshop here. Click on the unlocked links to watch a movie.

Here are some Inspirational motion graphic designs I include in my seminars on “Typography and Dynamic Text animation”. These are inspirational examples of opening title sequences that I have been inspired by throughout the years.
Big thanks especially to the “Art of the Title” website for providing such lovely, high-quality clips for us all to enjoy. They also have some great articles on the inspiration and processes used to create some of these stunning pieces of work. Enjoy!
Anemic Cinema – Marcel Duchamp & Man Ray
Saul Bass:
It’s a Mad, Mad, Mad, Mad World
Pablo Ferro:
Kuntzel and Deygas – Catch me if you Can
De Patie – Freleng – The Pink Panther
Kurtz & Friends – The Pink Panther
Arcady & Maurice Binder – Barbarella
Daniel Kleinman – Casino Royale
Saul Bass – North by Northwest
Danny Yount:
Matt Mulder & Rama Allen – True Blood
Jamie Caliri – Lemony Snickett
Karin Fong & Steve Fuller – the Mummy Tomb of the Dragon Emporer
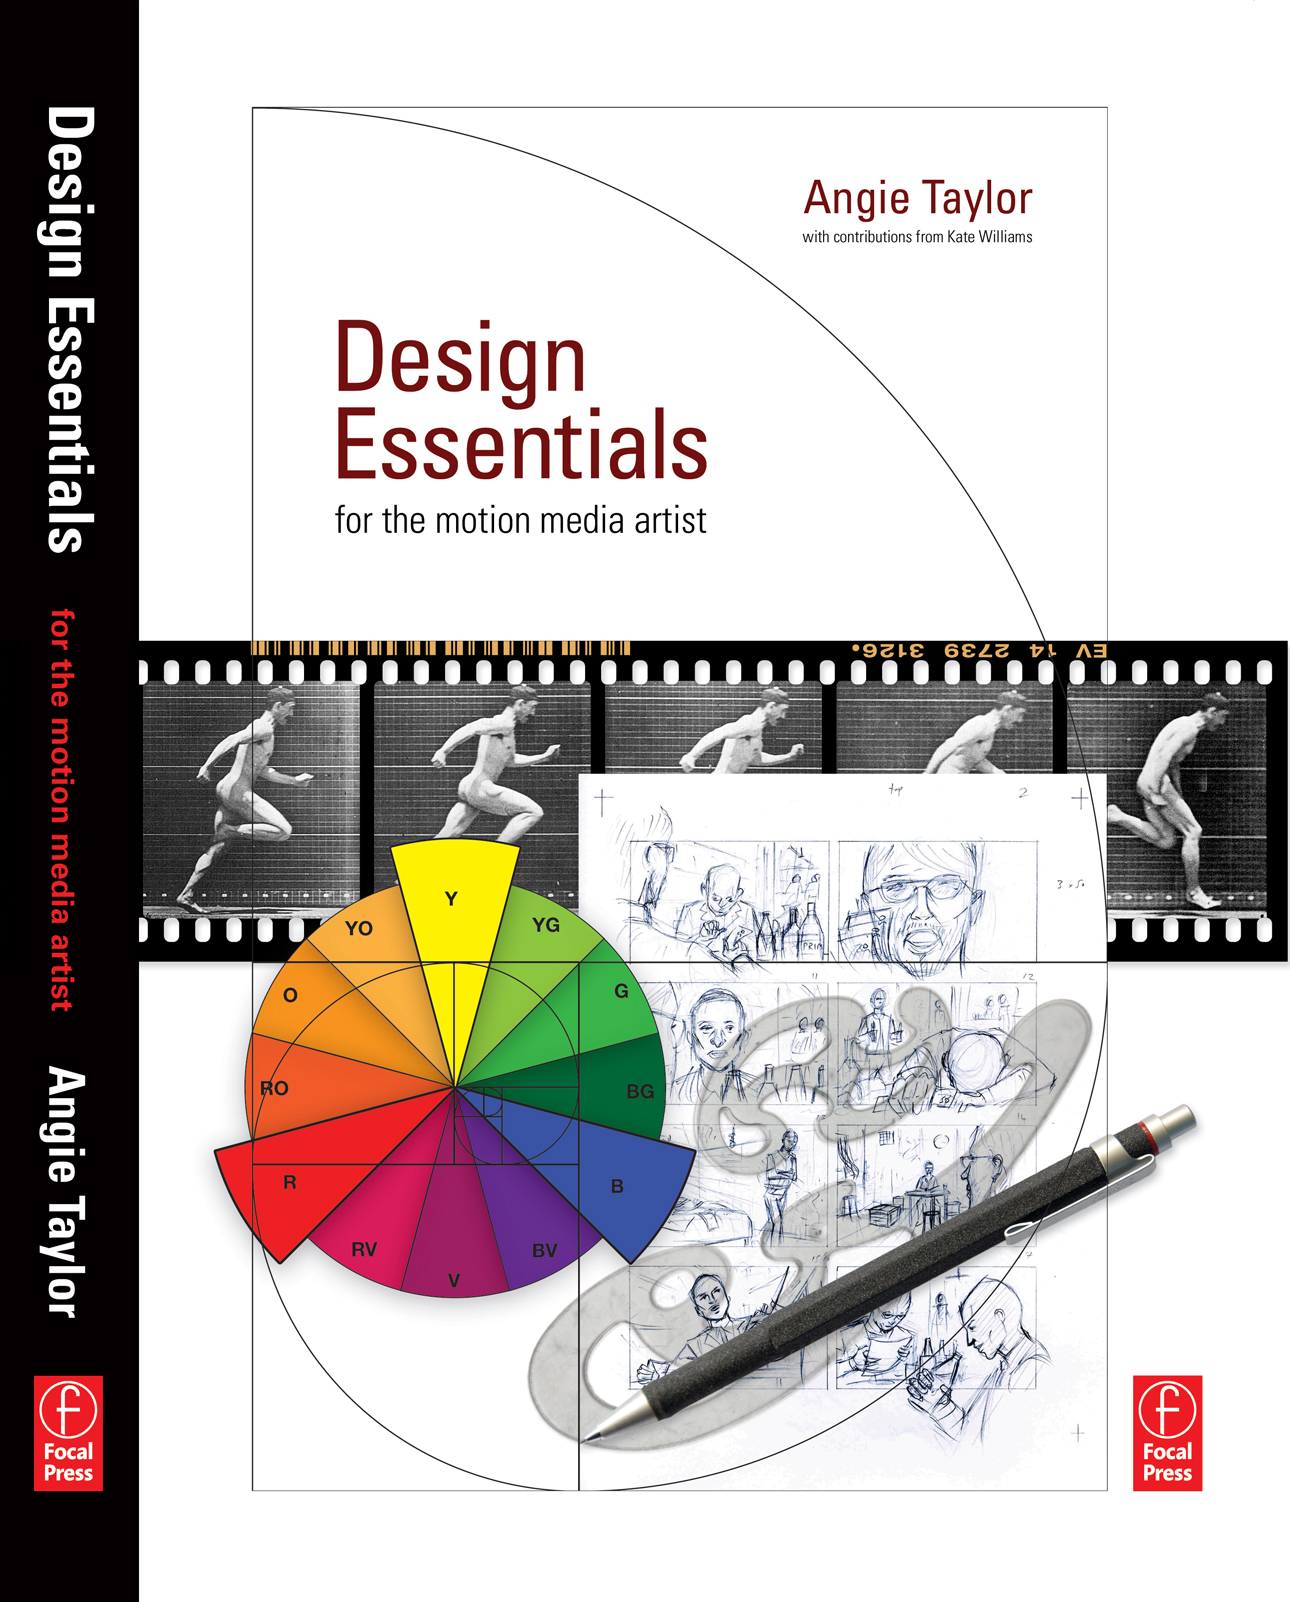
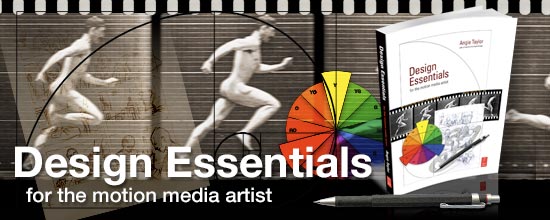
Design Essentials for the Motion Media Artist – who is this book for?
This book was written for people I meet at trade shows and seminars who say “I’ve learned the software but my designs still look terrible. What am I doing wrong?”
This book is also for you if you’re a student or are new to motion graphic design. While teaching design students I found it frustrating recommending ten books to each student to cover the basic design principles for the foundation year of their degree course in Graphic Design. The university library never had enough books. The students couldn’t afford to buy the books they needed. Ironically, they only really needed one chapter from each to provide what they needed to get started. If only all that information could be provided in one book!
The book is designed as a one-stop, getting-started guide for anyone new to motion graphic design who wants to get the basic principles under their belt so they can get started quickly, making better design decisions as they work through the chapters.
After reading this book you’ll feel comfortable with the basic concepts and principles of design, animation and editing. There’s a chapter on drawing that teaches you the importance of “learning to see” through fun drawing exercises. Among other things, you’ll learn how to choose color combinations that work and how to create convincing and compelling movement in your animations. It will also help you choose fonts that work and improve composition with balance and elegance.
At the end of each chapter, a well-respected creative professional will talk about how their work incorporates some of the principles taught in the book. This helps you see the importance of these principles and to understand how they eventually become second nature to artists and designers.
Learn from some of the top people in their respective industries. The book includes “Inspiration” sections written by graphic designer and creative director Malcolm Garrett and musician Joan Armatrading amongst others. The Foreword to the book is written by commercial director and photographer, Rob Chiu (AKA The Ronin).

“Design Essentials” confidently points you in the right direction on the road to becoming a better designer and animator. The book presents the principles of design in an engaging and inspiring way. Each principle is explained in plain English with illustration, and photography where necessary. As well as mastering the fundamental concepts and principles of motion graphic design, with my creative approach to teaching, you’ll learn how to manipulate and bend the rules to create something unique that will also achieve your communication goals.
Once you’ve finished reading this book you should have the confidence to implement what you’ve learned to your motion graphics projects. There’s also an extensive Recommended Reading List on this website that will help you decide where to go next so you can increase your knowledge of these basic principles even further. There’s also a page featuring links to all the external resources mentioned within the pages of my book.
Design Essentials Resources provides chapter links for Angie Taylor’s book, Design Essentials for the Motion Media Artist. There are several references made to influential work from other designers, file downloads and websites of interest in the chapters of my book. Here is a list of them broken down, chapter-by-chapter;
Here’s a summary of links quoted in the Drawing Chapter;
I usually use a propeller pencil for sketching when I’m on the move (sometimes known as a propelling pencil or a mechanical pencil). Rotring makes a great range of propeller pencils including their Tikky range.
I use a variety of pens but for disposable fiber-tips or roller-balls visit www.pilotpen.com.
Obviously you can’t easily erase pen marks in the same way that you can with pencil marks. A solution to this is to use correction fluid (or liquid paper) such as Tip-ex to cover over any errors. Once the correction fluid has dried, you can then draw on the surface www.liquidpaper.com.
Brushes are described by shapes and sizes. The shapes include round, flat, fan, and angled. Sizes range from negative values denoted by 4/0 (can also be written as 0000), to positive values indicated by single numbers such as 4. Here are the most common sizes; 4/0, 3/0, 2/0, 0, 1, 2, 4, 6, 8, 10, 11, 12, 14, 16, 18, 20, 22, 24You can refer to this web page for some free brush measurement charts www.dickblick.com/info/brushmeasurement.
Graphic tabelts provide you with much more freedom and versatility than a mouse. You might even find a new style that you wouldn’t achieve from traditional drawing. If you want to find out about Wacom tablets you can visit their website at www.wacom.com.
There are some great tutorials about the Vanishing Point tool and other Photoshop features to help you draw more successfully on Deke McClelland’s fantastically informative, yet compellingly entertaining website at www.deke.com. I’d recommend signing up to Deke.com for fabulous freebies, podcasts and tutorials.
The Alister Buss example seen here was inspired by the famous Saul Bass title sequences for “Anatomy of a Murder” www.saul-bass.com
The Roarke Pearce example seen here was inspired by Anni Albers; www.albersfoundation.org.
There are a few software applications that are good for brainstorming like the fantastic Omni Group applications (http://www.omnigroup.com/) or my personal favorite, Zengobi’s Curio http://www.zengobi.com/products/curio/
I have provided you with an A4 storyboard template to download from here. Just click on the link on the following page. This will enable you to download an Adobe PDF file that can be re-sized to your chosen dimensions without losing resolution. Print out a copy so that you can develop your own storyboard for your project.
In this movie I shamelessly used lot’s of influences from the 1960’s. Pop Art – opening title sequence – a series of documentaries about design and music from the swinging 1960s.
Here is a link to the example of a Bouncing Ball animation from the Animation page of the website.
The opening titles for Barbarella (by Arcady and Maurice Binder) feature text animation that dances weightlessly around Barbarella in her space ship. You can see this online at the wonderful “The Art of The Title Sequence” website.
One of the most inspiring projects I worked on was Aphex Twin’s infamous “Rubber Johnny” video. I worked alongside director, Chris Cunningham for a year on that project (it was a six-minute music video!). I learned a lot by watching Chris at work.
Another music video artist whose work is worth watching is Michelle Gondry who also has a knack for matching music to imaginative and innovative visuals.
An example of an animated sequence created by rotoscoping (drawing on top of footage or photographs).
In this chapter you can see drawings of a dog’s walk cycle. Here are two examples of the final animation, one where the drawing and animation was done with Corel Painter. Here’s the second animation where the character was redrawn in Adobe Illustrator and then and animated in Adobe After Effects.
A fairly common job that you may be asked to do as a motion graphic designer is to create moving footage by animating around a still image. Panning and Zooming is easily controlled in the Layer panel in Adobe After Effects, here is an Example of panning and zooming around a street map of Edinburgh.
One of the characters I designed for Children’s BBC series “See You, See Me – The Inventors”. John Logie Baird, the Scottish inventor of the television. This was drawn in liiustrator with each body part on a separate layer, ready to be animated in Adobe After Effects.
Design Essentials ResourcesA good practice exercise is to use an application like Adobe After Effects to animate some ordinary text. If you can use animation to convincingly bring life to an inanimate object then you know you’re doing a good job. In this example I’ve taken the word “Accelerate” and animated it as if it is a car being driven off the screen.
The opening title sequence for Midnight Cowboy is a great example of an establishing shot, both character and location are established during the opening title sequence. You can find out more about this title sequence in the Communication chapter.
A little forward planning goes a long way in video and film production and can save oodles of time and money further down the road. You can find out more about how to do this in the Technical chapter. Here’s a Chip Chart to download and print out to help you set up your cameras correctly before shooting footage.
The opening title sequence for Midnight Cowboy is also referred to in the Communication chapter.
Bob Kurtz’s wonderful sequence for the Pink Panther 2 Film is another good example where the opening titles are used to establish the main characters as well as the rough plot.
You can see “Anémic Cinéma” by Marcel Duchamp and Man Ray, as well as many other avante-garde films at a fantastic website named UBUWEB.
Save time by creating a single presentation template that you can use for all clients and pitches. Keep your presentation simple and concise. There’s more information about presentations in the Communication chapter and I’ve included a Design Essentials Presentation Template for you to get started with.
Lady Sovereign’s music video for her track, Hoodie (directed by Family) sees a gang of rough-looking kids, dressed in hoodies, chasing a woman through a shopping precinct. The audience (and the woman) assumes that the gang is planning to mug the woman but at the end of the video it turns out that they are chasing her in an effort to return her bag, which she dropped while shopping. The video is intended to turn stereotypes on their heads and makes the woman look foolish for thinking the worst of the young people.
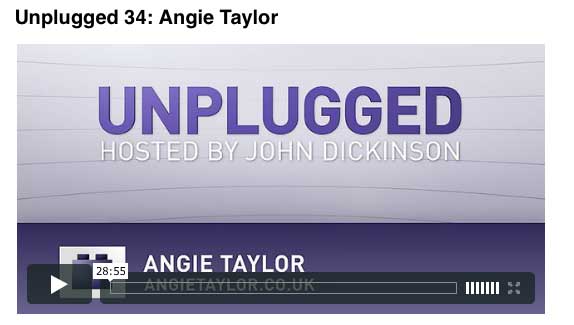
 In my life as a motion graphic designer I’ve learned a few important lessons. In this interview with John Dickinson from Motionworks, I share my experiences in my career as an artist, author and motion graphic designer.
I really enjoyed this interview. John is excellent at getting the best from his interviewees. I just felt like we were having a chat. I hope that my ramblings help to inspire anyone thinking of following a career in motion graphic design.
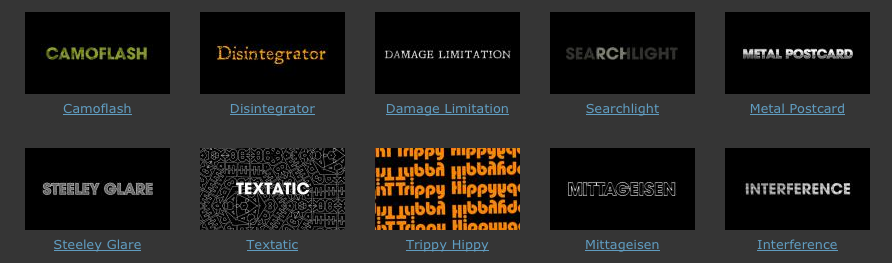
 My brand new Textonomy Presets for Sapphire Edge are now available from the Genarts FX Central Website.
OK, sometimes you need text, but no-one says it has to be boring. These ten effect presets, designed for text will have your viewers sitting up and taking notice.
|
Camoflash A Camouflage-style of pattern is applied to text to give it texture. The Jitter Frames value adjusts the sped of the flashing animation of the texture. Disintegrator Added to text this will have the effect of giving it a slight disintegrated quality. Great for adding a bit of damage to your motion graphics.
Damage Limitation Scratches, stains, dust and shake are added to text to give it a more organic appearance. Perfect for those “”Seven”” inspired film titles. Steeley Glare Adds a textured steel effect to layers. Specifically designed for use on text to add an interesting textured fill. Searchlight This grainy effect plunges your text into semi-darkness and highlights it by adding a searchlight to it. Vignette Centre property is keyframed in the preview movie to make the light move over the text. |
Textatic A groovy, tiling pattern that looks great applied to geometric text. In the preview movie animation is added by keyframing the Inside Rotation property. Trippy Hippy Tiled instances of your text move together in a fluid way to create a groovy movement reminiscent of 60’s dancing. In the preview movie the Zoom property has been keyframes to create additional movement. Mittageisen Designed to add a metallic look to outlined text. Interference Animated scan lines and a dodgy reception effect make your text look slightly damaged. Less than perfect and much more interesting as a result. Metal Postcard A great preset for adding a metallic sheen to your text layers. Who’d have thought you could use a half-tone effect for that! |

 Creative Motion Graphics Webinar with Adobe Production Premium CS6
Join Angie for an engaging Motion Graphics Webinar packed full of the best tips and tricks for Production Premium CS6. Production Premium CS6 offers a sleek, fresh editing environment in Adobe Premiere Pro; 3D tracking and extruded text and shapes in Adobe After Effects; new Content-Aware tools in Adobe Photoshop Extended; and faster editing in Adobe Audition. Learn all about the new features of CS6 as well as new additions, Adobe Prelude for logging and ingest and Adobe SpeedGrade for color grading and finishing.
Click to register for this Complimentary Webinar![]()