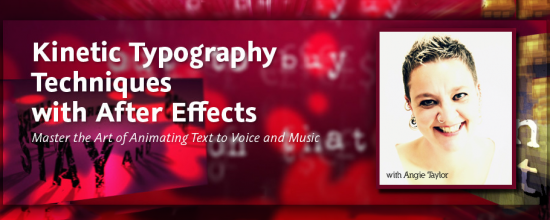

Kinetic Typography Techniques with After Effects

I was asked to create a workshop on Kinetic Typography techniques for Adobe After Effects by several people including the lovely people from video2brain who produced this epic workshop for me. I’d like to thank them all for their patience and professionalism throughout this long project!
I’m pleased to say that I have finally finished this epic workshop. It was originally planned as a one-hour tutorial but has developed into a full-on, eight-hour workshop covering all sorts of weird and wonderful techniques.
I started off by covering essential kinetic typography techniques such as automatically creating text layers by importing content from a text file – using Variables and Data Sets in Photoshop and Scripts in After Effects. I demonstrated how to format text, making use of typographic controls like Kerning and Baseline Shift to get creative with negative space. In the latter stages I applied some of the free Animation Presets, created and adapted complex text animators to help you understand how to control them.

"That Day" Music by Richard Walker
While creating this piece I just couldn’t help but get creative and I slightly strayed away from the task in hand. As a result this workshop also includes techniques you may not immediately associate with traditional kinetic typography. In the included lessons we have fun animating and lighting layers in 3D space. We recreate an animated version of the Sgt. Pepper album cover using After Effects’ vector Shape Layers.

Welcome Video

Introduction to Kinetic Typography
We even recreate an ancient stone circle from 3D text layers! You’ll also learn techniques for creating your own backgrounds, aged-film and dust and scratches effects by combining some of the built-in After Effects filters. Of course I also cover popular, requested techniques like animating handwriting on screen.
I use typography in my every-day work as a motion graphic designer but the artform of kinetic typography is different. The purpose of text in motion graphic design is to deliver a message. Generally, the text needs to be legible and on screen for long enough for the viewer to read and there are several other “rules” that are sensible to apply to motion graphic design. Kinetic typography as an artform kicks those rules into touch.

Editing and Looping Audio

Variables and Data Sets in Photoshop
My understanding of kinetic typography is that the words should be used to convey moods or feelings, they don’t need to be the message, they are just there to support it. My feeling is that the words should echo the spoken words rather than simply repeat what’s being said.
In my interpretation of Richard Walkers “That Day” (a poem set to music) I wanted to portray what I took personally from the piece. I understood it to be about the dissatisfaction we have with the present moment and how we avoid enjoying it by always thinking about the past or the future. This avoidance leads to confusion, frustration and general unsettled feelings.
In this workshop you get all my project files along with my creative musings about how these ideas developed. I hope that you can enjoy working on some of my own files and diving into my own personal creative project. Here are some sample movies from the workshop to give you an idea about what you can learn.

Aged Film with Turbulent Noise

Animate Handwriting with the Stroke effect
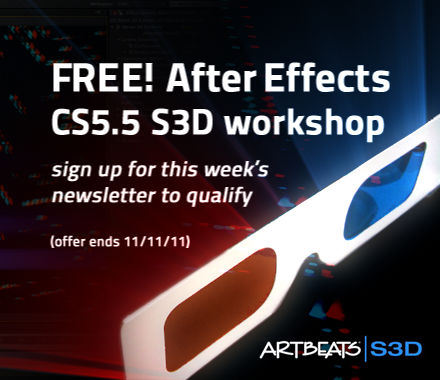

In this week’s newsletter I’ll be giving away a complete workshop about using the Stereoscopic 3D workflow in After Effects CS5.5 (offer ends 26/09/11). That’s four chapters – a total of 16 training movies absolutely free to subscribers of my software tips and tricks newsletter. Sign up today to make sure you don’t miss out. The lovely people at video2brain have created this workshop for me if full, fabulous HD quality for your viewing pleasure. You can find out more about their high quality productions here. Any the wonderful team at Artbeats have donated some fantastic Stereo 3D footage absolutely free so you can build this opening title graphic sequence is glorious Stereoscopic 3D.
- In the “Introducing Stero 3D” chapter you’ll find out what stereoscopy is, why those funny glasses are used to view S3D and how After Effects re-creates the illusion of depth for 3D broadcasts.
- In the “Faking 3D tracking” chapter you’ll discover how to combine 3d animated elements with Stereo 3D video footage from Artbeats.com. I’ll show you how to track the footage in 2D and then “fake” 3D tracking by cleverly combining the tracking data with additional 3D animation. Once the shot is designed you’ll add 3D cameras and lights that will help the text combine well within the shot and and add effects to bring it all together.
- In Effects, Transparency and Style chapter we’ll add effects, blend modes, and layer styles to the graphic elements so that they appear to blend into the shot.
- Finally in the Stereoscopic 3D workflow chapter you’ll build a Stereo 3D rig that automates the comp structure required to create an anaglyphic image for 3D broadcast. We’ll look at the effects you can use to adjust the settings so that they are just right for your individual needs. We’ll also look at ways of adding even more depth and realism to the scene with Depth of Field and Motion Blur effects.
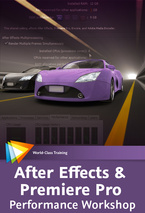

I’m excited to be able to offer a free top-up course on my website to all my lovely visitors. In this free course, Adobe Technical Support Lead Todd Kopriva offers dozens of tips for optimizing Premiere Pro, After Effects, your operating system, your computer, and your workflow for maximum speed and performance.
He makes recommendations for RAM, CPUs, graphics cards, and hard disks – both what to buy and how to set up your applications to make optimal use of these resources – and for setting preferences and other options in After Effects and Premiere Pro to minimize the amount of processing needed at each step of your workflow.
You’ll also learn what CUDA, OpenGL, and the Mercury Playback Engine are, and what each means to you in practical terms. After completing this workshop you’ll get more done in less time, both by making things work faster and by avoiding common causes of wasted time.
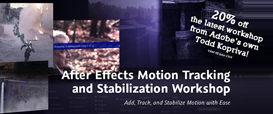

This week I’m giving a 20% discount to anyone who wants to buy the fantastic new workshop on Motion Tracking & Stabilisation by Todd Kopriva which is now available to buy from my video training store. Just enter MOTION into the Coupon Code box when buying from my shop. It’s valid till July 15th 2011.
If you want to check out some free samples before buying there are some links to free sample movies here, including; An Overview of the mocha-AE Interface and Workflow, Overview of Warp Stabilizer Effect and more details about the Warp Stabilizer controls and workflow
This workshop covers all the tools and techniques used for motion tracking and image stabilization in After Effects, including the point tracker, the Warp Stabilizer Effects, and mocha-AE. The contents of this course include:
Introduction
This chapter introduces you to motion tracking and shows you frame-by-frame how manual motion tracking works.
Motion Tracking with the Point Tracker
Once you determine what kind of motion you want to track, you’ll need to decide what you will apply the tracking data to. This chapter explains your options and shows you how to remove tracking markers when you’re done.
Motion Tracking with mocha-AE
This chapter walks you through using mocha-AE, a standalone application that can export tracking data for use in After Effects.
Stabilizing Motion
Ever been frustrated working with shaky footage? This chapter shows you how to add stability to your projects by using the new Warp Stabilizer effect.
The lessons are wrapped in a feature-rich interface that lets you jump to any topic and bookmark individual sections for later review. Full-Screen mode provides a hi-def, immersive experience, and Watch-and-Work mode shrinks the video into a small window so you can play the videos alongside your application. This course also includes project files so you can follow along and try out new techniques as you learn them.
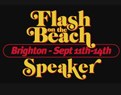

I was very pleased to get a call from John Davey, the organiser of the amazingly successful and entertaining “Flash on the Beach 2011” conference, asking me to speak at his event.
It’s an annual conference, held in my home town of Brighton. Bringing together the best designers, developers and minds in the Flash, design and web community, it’s a conference with a difference. It attracts an interesting and diverse mix of people and is focussed on the work that we do as well as the tools that we use.
I’ll be doing a session on creating Kinetic Typography animation in Adobe After Effects CS5.5. I’ll be featuring a breakdown of a real-life art project that I worked on in collaboration with Artist Richard Walker titled “That Day”. In this session I want to focus on the design process and demonstrate how After Effects allows creative flexibility throughout a project. For my more geeky attendees, don’t worry! I’ll also share plenty of my software tips and tricks as well as important techniques for structuring projects and optimising workflow in Adobe After Effects.
I’ll also feature some extracts from my book “Design Essentials for the Motion Media Artist” and will be giving away a copy of it, plus a copy of my “After Effects CS5 Learn by Video” training DVD. There are always lots of great parties, dinners and other networking events structured around Flash on the Beach and you’re guaranteed to meet and interesting and eclectic mix of creatives and geeky types. So why not book a place now, it sells out fast every year!


