
I’ve been speaking at events for a long time, in fact I can’t believe how long, after fifteen years now I’m classed as an industry veteran! (I’m not sure whether to be happy or sad about that one!). It’s been great to be in this position as I’ve seen the industry develop both technically and in terms of design. I’m happy to say that I’m beginning to notice a change. We are now entering a new age where technique is gradually becoming less prevalent – aesthetics and messaging are being rediscovered as the most important aspect of our work as designers. My friend, Birgitta Hosea (now a Doctor of animation!) has coined a new term to mark this era, “the post-digital aesthetic age”.

During most of my career as a motion graphic designer I’ve witnessed so many projects that are led by technique or by the latest “how cool is that” type-of-effect. “How did they do that?” is all fine and dandy for your average man in the street, or for those concerned with visual effects or the more technical aspects of production. But for artists, designers, philosophers thinkers and appreciators of fine art it and design, I’m afraid it just doesn’t cut it every time. We like substance as well as style. Why did they do that is just as important as how, please don’t let us forget the saying “just because you can, doesn’t mean you should!”
I’m going to be teaching on the Graphic Design and Illustration courses at Brighton University this year and am so excited to be going back into an academic environment. Of course I’ll be teaching digital software techniques, I’m there to provide guidance to the students from the perspective of a motion graphic designer. But I’m also looking forward to emphasising to them the importance of the core design skills they’ll need to set themselves apart as artists and communicators. I’d love to hear the views of others on this subject. How do you ensure that the technical aspects of your work as a designer/ illustrator/ artist don’t dictate the content or quality of your work? Answers on a well thought out and constructed postcard please! 🙂
 I’m very pleased to offer my readers a couple of free tutorials from my very first video2brain workshop on Adobe Illustrator. This workshop will teach you how to use Illustrator’s tools and features to prepare 2D files for animation in Adobe After Effects.
You’ll learn how to make the most of Illustrator’s drawing tools and Autotrace feature, and to how use Live Paint and Kuler to recolor artwork. You’ll also get tons of tips and tricks for giving artwork a hand-drawn look and find out how to set up layers, aspect ratios, and transparency options for importing into After Effects.
I’ll share many of my techniques for using Illutrator’s extensive drawing capabilities to create characters for animation. Topics covered include:
- Setting up your workspace for video and animation
- Working with Autotrace, Live Paint, and Kuler
- Using multiple artboards for creating storyboards
- Taking advantage of views and workspaces
- Drawing freehand in Illustrator using a variety of tools including the new improved Eraser tool and the Blob Brush tool
Whether you’re a motion graphic designer, animators, storyboard artists, video editors or illustrators, if you want to create 2D animation from flat, vector-based artwork, this workshop will be an invaluable resource.
The lessons are wrapped in a feature-rich interface that lets you jump to any topic and bookmark individual sections for later review. Full-Screen mode provides a hi-def, immersive experience, and Watch-and-Work mode shrinks the video into a small window so you can play the videos alongside your application. Also included are exercise files that give you an easy way to try out the techniques you learn.
Click here to get an overview of the workshop and download free tutorials using the following links;
Working with Live Paint
Working with the Brush Tool
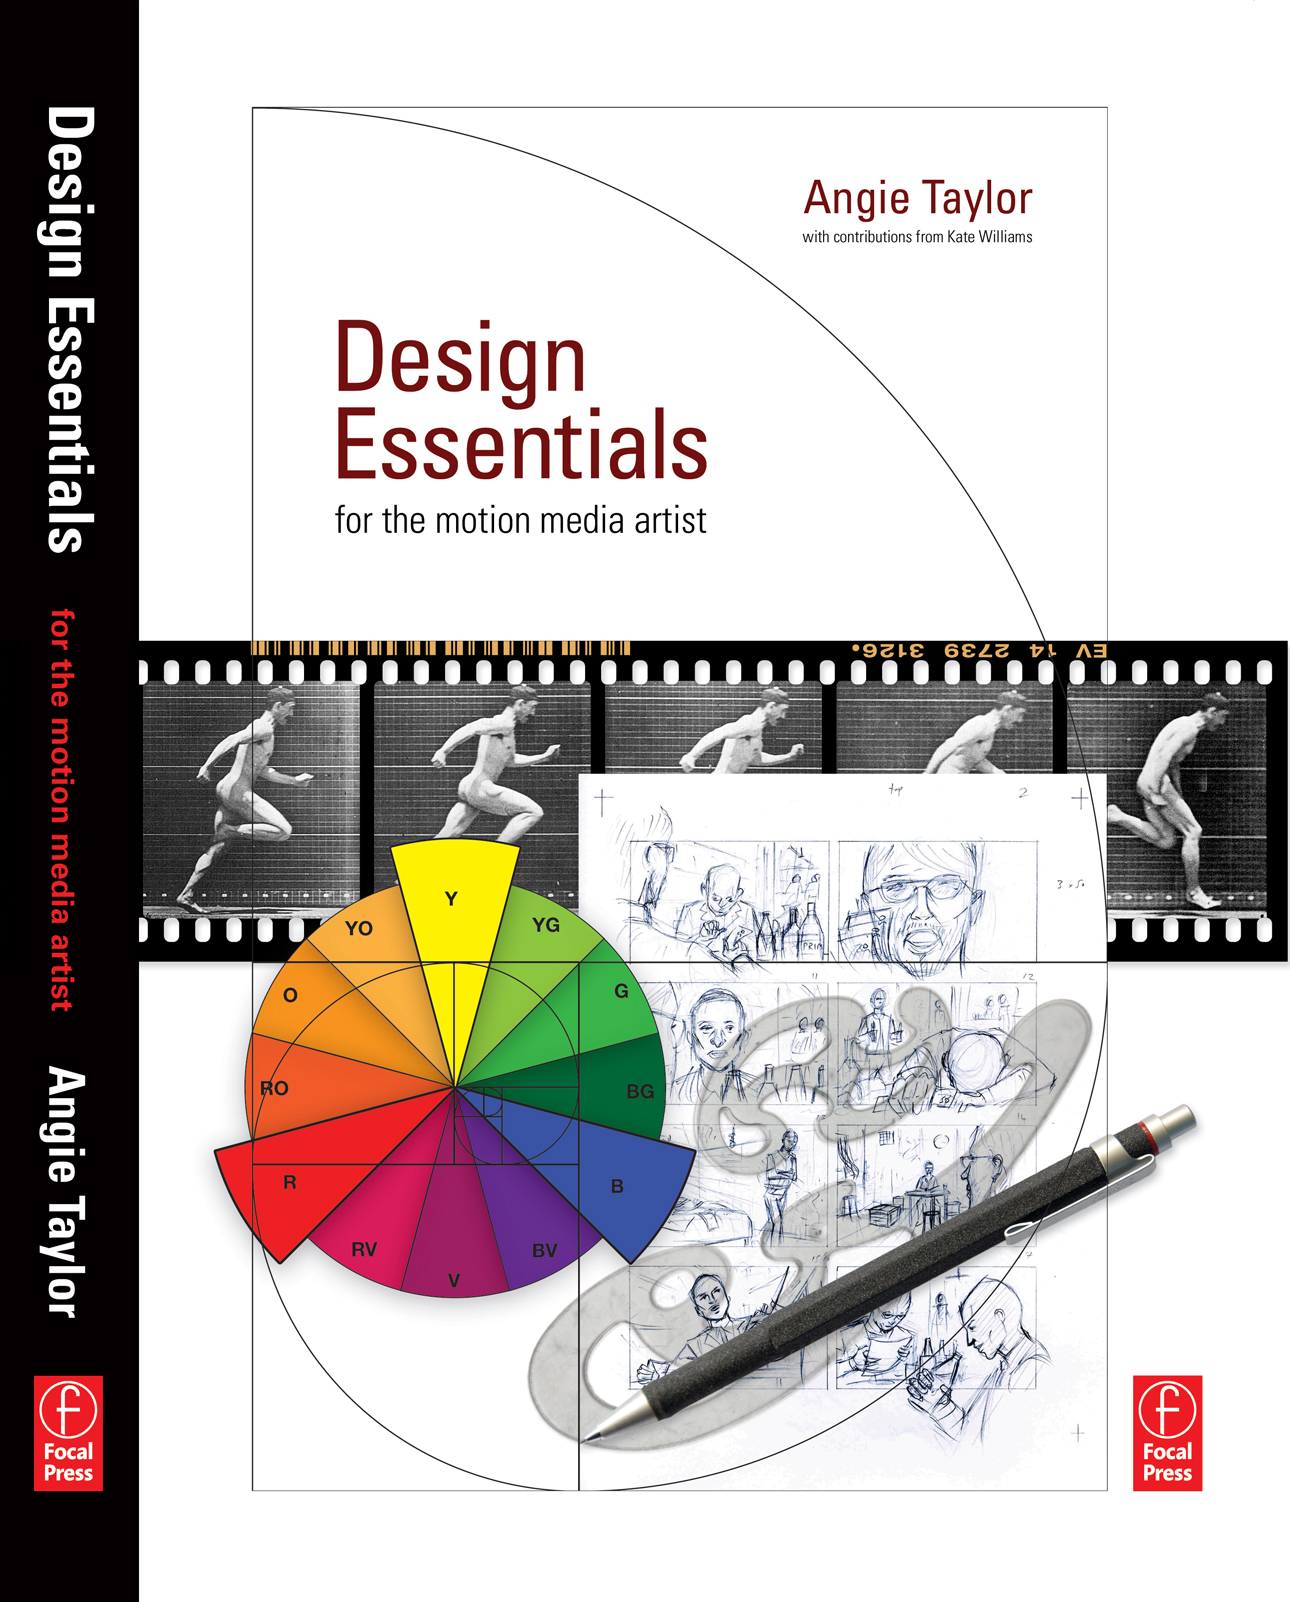

I found this to be a really great book and is suitable for anyone who works or has an interest in motion graphics or animation. It would help someone who is studying at college, but is also very useful for those that have been in the industry a long time. I fall into the later category and was formally trained at art school in the early 80’s but I found it very useful to revisit many of the fundamental ideas that I was taught in those days which give me a solid grounding. It also gave me many new ideas and covered areas that did not exist or were in their infancy when I was a student.
I really liked the sections on colour, typography and especially the section on composition which everyone in the industry should be familiar with but clearly are not. I’m sure this would fill in the gaps for people such as avid editors who have a purely technical background and would also inspire those who are creative technophobes to get stuck in with the computer packages today which frighten many with their complexity.
I have shown the book to my manager at Sky and he will be buying some copies for the post production dept to read. He was was also very impressed.
5.0 out of 5 stars on Amazon
Paul Mark Provencher “ppro” reviewed Design Essentials for the Motion Media Artist: A Practical Guide to Principles & Techniques,
Comprehensive, Wise, Pivotal…
I live in the corporate world of information technology. For the most part, this existence for me is based in an engineering mindset – plan, design, build, test, deliver.
In my IT world, artists are thought to be undisciplined in these areas. Angie Taylor’s book makes it clear that successful artists clearly execute in much the same way as the best scientists. While they bring a creative streak that may not appear…Read More
I live in the corporate world of information technology. For the most part, this existence for me is based in an engineering mindset – plan, design, build, test, deliver.
In my IT world, artists are thought to be undisciplined in these areas. Angie Taylor’s book makes it clear that successful artists clearly execute in much the same way as the best scientists. While they bring a creative streak that may not appear in engineering and science, they owe their success in business to their ability to plan, execute and deliver a satisfactory product on time, on budget.
The author takes the reader through a series of concepts, starting with sketching. At first I didn’t understand what this had to do with Motion Media. But it very quickly became obvious why this was important. The book gives a great primer and cites numerous references (including current online resources) that may be used to dig in deeper.
From there the book explores a number of concepts familiar to practicing artists – composition, story-boards, software packages (again with numerous references to some terrific resources), and all while developing the concepts in a way that follows the workflow of projects.
I am reading this book (and several others) to gain a better command of the concepts I hope to apply to the use of my HD-movie capability of my DSLR. I believe that making movies, even if they end up being glorified home movies of my family, will benefit from a basic understanding of what goes into good motion media.
This book has something to offer beginners like me as well as practicing professionals who need to update their understanding of motion media. I will probably read this book twice – the illustrations are wonderful, and perfectly on point, the explanations are very understandable, even for someone with little experience in this field (though I have been a photographer for a long time).
The many resources cited as places to dig deeper are all quality products and have clearly been vetted thoroughly by the author.
This is a solid book with much to offer. If you’re just getting into motion media like me, or perhaps you’d like to step into the latest tools and concepts, don’t hesitate to buy and read this book.
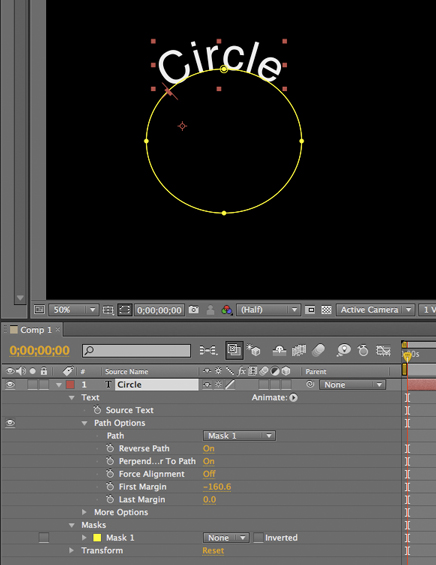
I saw a post on the After Effects mailing list today asking how to wrap text around a circle in After Effects. Here’s how it’s done;
 1) Create a text layer with the text you want.
2) Select the layer and then, with the Ellipse tool, draw a circular Mask on the Text layer.
3) Open the Layer in the Timeline by clicking it’s disclosure triangle and then open the ‘Text’ section too.
4) Open the ‘Path Options” and in there you’ll see a drop down menu under ‘Path’ where you can select your Mask, the text should now wrap around the circle.
5) You can use the controls under ‘Path’, and the controls on the selected path in the Composition panel to adjust it to suit.
Tip! Remember to save it as a preset for future jobs so you don’t have to continuously repeat the process each time you need a circular path text effect!
Tip! There are also a load of free Animation Presets that create text on paths in the Effects and Presets panel, or you can Browse them in Bridge to get a real preview of what they look like before applying them.
Well, what a busy old month I’ve had! I’ve crossed several time zones and been on more flights than I care to mention. But all for good reason.
Earlier this month I went to Graz, Austria to record an After Effects training DVD for the amazing folks at Video2Brain. It was really good to be back providing training for After Effects again. I’ve been looking for a new method of delivery since I stopped updating my “Creative After Effects” books and Video2Brain provide the perfect vehicle for it.
I’ll also be recording some more Video2Brain titles very soon and will keep you posted on those too. The DVD is available for pre-order now. 10 hours of me and Adobe’s own Todd Kopriva teaching you all we know about our favorite motion graphics application, Adobe After Effects CS5! Order it today and save 37% off!

GridIron Software have been very supportive too. It’s so refreshing to work for a company that actively encourages employees to keep real contact with the creative industry it services. I must say it’s too rare. There are so many occasions where I’ve seen creative people join software companies, only to be consumed totally by the business aspect of their job till eventually they struggle to use the products in a creative way or even understand the customers requirements. I’m very grateful to GridIron Software for having the foresight to avoid these problems and for allowing me to remain in touch with the creative aspects of my role.
I’m also happy to report that Adobe have also adopted a similar approach. I shared the training delivery with the amazing Todd Kopriva from Adobe. Together we recorded almost 18 hours of video based training in just over a week. It was intense but very rewarding. I really enjoyed working with Todd so thanks to Adobe too for allowing him to be involved in such a great project.
So I left Gratz, via Frankfurt, got home to Brighton and slept for a few hours and was then whisked off to Ottawa (via Halifax) the next day to meet with my new colleagues at GridIron Software. It was really great to meet the new team and have some face to face time with colleagues that I usually only meet remotely with.
On my way to the airport after four days of meetings I was then kidnapped by my friends and taken to a lovely cottage in the Canadian wilderness for a perfect wind-down weekend of swimming, fishing, eating and campfire singing. It felt very good to finally have some time off after four consecutive weeks of work.
I finally got home last Tuesday and it’s taken me a whole week to unpack and settle back into home life. It’s good to be home and be able to focus on my work again.
There are a few nice pieces of software around at the moment that I want to share with you. The first is Beauty Box from Digital Anarchy. An incredible plug-in for video applications (like After Effects, Premiere Pro and Final Cut Pro). If you shoot interviews or wedding videos and don’t have a good make up person on hand to fix their spotty complexions, you can simply do it in post with this plug-in, it works miracles! Here’s an example where I’ve used it on a particularly blemish-ridden shot of me! This was a one-click job but Beauty Box offers you a multitude of fine controls to really perfect results, and remember this works across frames too, it’s pretty damned amazing!

The next app I want to feature is Red Giant Software‘s amazing Plastic Bullet. It only costs a couple of dollars for your iPhone and does an amazing job of randomizing fantastic Holga-esque effects on your pictures. It’s addictive and makes nearly every photo a masterpiece in the click of a button. Those who want to apply similar looks in Photoshop or video applications can check out the more mature sibling applications, Magic Bullet Looks for Photoshop, After Effects and Final Cut Pro. Here you can see a range of effects that I applied to the pictures above.

Oh, and before I forget, just a note to remind my blog readers of our very own special software offer this month! We have recently released a new version of GridIron Flow 1.0.4, which is compatible with Adobe CS5 applications. To celebrate this release we’re having a very special launch offer on pricing till June 4th 2010. you can pick up a copy of Flow for the incredible price of $99.99 (MSRP $299.99).
I’d love to hear about your own apps of choice so please chime in with comments.