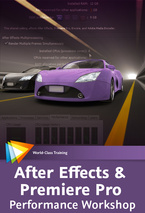


I’m excited to be able to offer a free top-up course on my website to all my lovely visitors. In this free course, Adobe Technical Support Lead Todd Kopriva offers dozens of tips for optimizing Premiere Pro, After Effects, your operating system, your computer, and your workflow for maximum speed and performance.
He makes recommendations for RAM, CPUs, graphics cards, and hard disks – both what to buy and how to set up your applications to make optimal use of these resources – and for setting preferences and other options in After Effects and Premiere Pro to minimize the amount of processing needed at each step of your workflow.
You’ll also learn what CUDA, OpenGL, and the Mercury Playback Engine are, and what each means to you in practical terms. After completing this workshop you’ll get more done in less time, both by making things work faster and by avoiding common causes of wasted time.
I’ve been speaking at events for a long time, in fact I can’t believe how long, after fifteen years now I’m classed as an industry veteran! (I’m not sure whether to be happy or sad about that one!). It’s been great to be in this position as I’ve seen the industry develop both technically and in terms of design. I’m happy to say that I’m beginning to notice a change. We are now entering a new age where technique is gradually becoming less prevalent – aesthetics and messaging are being rediscovered as the most important aspect of our work as designers. My friend, Birgitta Hosea (now a Doctor of animation!) has coined a new term to mark this era, “the post-digital aesthetic age”.

During most of my career as a motion graphic designer I’ve witnessed so many projects that are led by technique or by the latest “how cool is that” type-of-effect. “How did they do that?” is all fine and dandy for your average man in the street, or for those concerned with visual effects or the more technical aspects of production. But for artists, designers, philosophers thinkers and appreciators of fine art it and design, I’m afraid it just doesn’t cut it every time. We like substance as well as style. Why did they do that is just as important as how, please don’t let us forget the saying “just because you can, doesn’t mean you should!”
I’m going to be teaching on the Graphic Design and Illustration courses at Brighton University this year and am so excited to be going back into an academic environment. Of course I’ll be teaching digital software techniques, I’m there to provide guidance to the students from the perspective of a motion graphic designer. But I’m also looking forward to emphasising to them the importance of the core design skills they’ll need to set themselves apart as artists and communicators. I’d love to hear the views of others on this subject. How do you ensure that the technical aspects of your work as a designer/ illustrator/ artist don’t dictate the content or quality of your work? Answers on a well thought out and constructed postcard please! 🙂
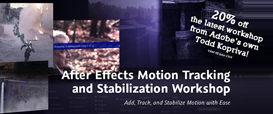

This week I’m giving a 20% discount to anyone who wants to buy the fantastic new workshop on Motion Tracking & Stabilisation by Todd Kopriva which is now available to buy from my video training store. Just enter MOTION into the Coupon Code box when buying from my shop. It’s valid till July 15th 2011.
If you want to check out some free samples before buying there are some links to free sample movies here, including; An Overview of the mocha-AE Interface and Workflow, Overview of Warp Stabilizer Effect and more details about the Warp Stabilizer controls and workflow
This workshop covers all the tools and techniques used for motion tracking and image stabilization in After Effects, including the point tracker, the Warp Stabilizer Effects, and mocha-AE. The contents of this course include:
Introduction
This chapter introduces you to motion tracking and shows you frame-by-frame how manual motion tracking works.
Motion Tracking with the Point Tracker
Once you determine what kind of motion you want to track, you’ll need to decide what you will apply the tracking data to. This chapter explains your options and shows you how to remove tracking markers when you’re done.
Motion Tracking with mocha-AE
This chapter walks you through using mocha-AE, a standalone application that can export tracking data for use in After Effects.
Stabilizing Motion
Ever been frustrated working with shaky footage? This chapter shows you how to add stability to your projects by using the new Warp Stabilizer effect.
The lessons are wrapped in a feature-rich interface that lets you jump to any topic and bookmark individual sections for later review. Full-Screen mode provides a hi-def, immersive experience, and Watch-and-Work mode shrinks the video into a small window so you can play the videos alongside your application. This course also includes project files so you can follow along and try out new techniques as you learn them.

Digital Arts has featured – 12 Rules of Animation – an excerpt from my “Design Essentials for the Motion Media Artist” as their feature article this month. The article is now FREELY AVAILABLE on the Digital Arts website.
Animation as we know it has been around since Horner invented the zoetrope in 1834. Since then animators have developed rules of animation that help us to draw viewers into the world we have created. From Disney classics to the latest stereoscopic 3D productions, we’ve plundered them all to find the 12 key techniques you need to master to be a top-flight animator.
Some of these rules are based on real-life physics, and others on observations and reactions. They provide a set of invaluable ‘tricks’ for animators that have been proven to work in almost every situation.
In the article I delve into the world of animation to pick out the 12 rules of animation that every animator and motion graphics artist must know. Drawn from the forms 150 year history, you’ll learn a wealth of dos and don’ts that will help you produce more engaging projects, whether you’re working in 2D, 3D, graphics, stop-motion or a mixture of them all.
You can pick up both printed copies and digital downloads from the Digital Arts website where you can also find some of my tutorials, tips and tricks.
I’ll also be talking about some of these golden rules of animation in my “Dynamic Text Animation for Motion Graphicswith After Effects” presentation at the Production Fiesta in London on May 6th.
In this session, I will share an in-depth look at the options for working with text in Adobe After Effects. I’ll show examples of successful motion graphic designs and will discuss the components of design that make them work. In this session you’ll earn about the rules of typography and how to apply the rules of typography to your designs to make them easier to read and more dynamic. I’ll also take an in-depth look at the typographic controls available in After Effects and will also show you how you can use hand-drawn text to bring a unique aspect to your designs.
I’ll also be presenting four other sessions at this event which you can find out about here. If you want to register for a full day of valuable creative sessions by me and all the other speakers you can do so here on the Eventbrite page. I hope to see some of you there, please make sure to say hello if you can make it along.

I was very pleased to get a call from John Davey, the organiser of the amazingly successful and entertaining “Flash on the Beach 2011” conference, asking me to speak at his event.
It’s an annual conference, held in my home town of Brighton. Bringing together the best designers, developers and minds in the Flash, design and web community, it’s a conference with a difference. It attracts an interesting and diverse mix of people and is focussed on the work that we do as well as the tools that we use.
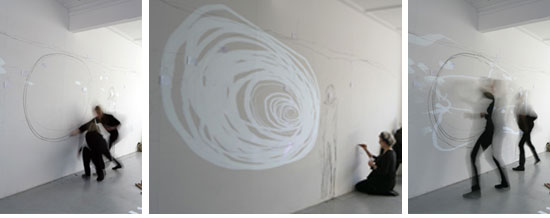
I’ll be doing a session on creating Kinetic Typography animation in Adobe After Effects CS5.5. I’ll be featuring a breakdown of a real-life art project that I worked on in collaboration with Artist Richard Walker titled “That Day”. In this session I want to focus on the design process and demonstrate how After Effects allows creative flexibility throughout a project. For my more geeky attendees, don’t worry! I’ll also share plenty of my software tips and tricks as well as important techniques for structuring projects and optimising workflow in Adobe After Effects.
I’ll also feature some extracts from my book “Design Essentials for the Motion Media Artist” and will be giving away a copy of it, plus a copy of my “After Effects CS5 Learn by Video” training DVD. There are always lots of great parties, dinners and other networking events structured around Flash on the Beach and you’re guaranteed to meet and interesting and eclectic mix of creatives and geeky types. So why not book a place now, it sells out fast every year!

The Las Vegas Convention Centre
Well, here I am, back in the UK after an exhausting trip to Las Vegas to attend NAB 2011. I was speaking at the Post Production World Conference which I’m pleased to say was busier than ever. My sessions were very well attended and I met some great new people who gave me the most generous feedback, thanks to all of you! Keep an eye on this space for a recorded version of one of my sessions, coming soon!

Me Presenting at NAB 2011, courtesy of @mediaguy777
I also got to catch up with lots of old friends and colleagues at the Media Motion Ball and the Adobe party. I’ve made many life-long friends through this industry and it’s great to see them all in one place, although it could be a bit overwhelming for me at times-all that love and talent in one room!
So, what did I see at the show that impressed me? Well, top of my list has to be the new version of After Effects CS5.5 and companion products in the Production Premium CS5.5 suite. The new Production Premium suite delivers improved performance, workflow improvements and new powerful audio editing capabilities via Audition which I’m happy to say is finally back on the Mac!
The powerful Mercury Playback Engine has better GPU hardware support for laptops and more graphics cards are now supported. All this makes the Production Premium more compelling than ever as a comprehensive studio containing everything needed from creating your source material and storyboards to transcoding and delivering your final product in multiple formats.

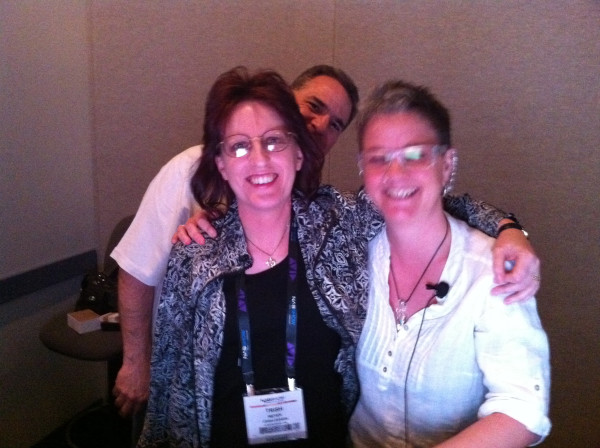
Me with Chris and Trish Meyer, courtesy of @mediaguy777
After Effects in particular is very exciting for me as it is my every-day application. The flag-ship feature is the is the ‘Warp Stabilizer’. Mainly aimed at folks shooting on DSLR and other hand held cameras, it tracks, stabilizes and scales your footage automatically. It also compensates for rolling shutter artefacts and can ‘heal’ the edges of the stabilized shot to minimize scaling.
The Camera Lens Blur effect is based on real-world lenses and offers more realistic depth of field blurs. The Light Falloff effect enables users to simulate natural illumination falloff to mimic how light behaves in a 3D scene and can be used to create other light intensity effects.
There are also dedicated tools for Stereoscopic 3D workflows too including a 3D camera rig, new 3D Glasses effect and controls for 3D Focus and Convergence.
On the down side I must say that I am ever-so-slightly underwhelmed with this upgrade from the perspective of an animator/ motion graphic designer. Don’t get me wrong, what’s in there is great if these are features you need. I don’t know if it’s just my built-in habit of going against current trends but none of them are features that really excite me personally as much as past ones like Expressions, 3D, Shape and Text layers.
I guess it’s not surprising as I’m not really a visual effects artist, I’m more interested in making things look surreal than real! I want tools that help me push new boundaries and inspire me creatively, I’m afraid these features just don’t inspire me as much as say the Puppet tool or Vanishing Point feature did.
In my opinion the last couple of releases have focussed a little too much on visual effects features. I’d love to see the next release concentrate on more Motion Graphics oriented features and let Nuke and the Discreet systems fight it out for VFX supremacy.
I’m also a little disappointed that the Warp Stabilizer doesn’t include the ability to reverse the process of stabilisation to reintroduce wanted camera movement. When compositing elements into a shot, painting rigs, rotoscoping etc. It’s often desirable to steady the shot before you work, this makes adding visual effects much easier. But in many situations you may want to reintroduce the movement, it may be intentional camera movement, like seen so often these days in films shot in a hand held style.
Traditionally VFX artists would stabilize the footage, add VFX and then reverse the stabilization process, adding the movement back to the comped footage. The Warp Stabilizer does an absolutely amazing job of removing ‘unwanted camera movement’ but it doesn’t allow us to reintroduce our ‘wanted camera movements’. Sad as this addition could have made a good feature truly great.

Me with the lovely Aharon Rabinowitz (courtesy of Michele Yamazaki)
Adobe also rolled out their new Subscription based system where you can effectively ‘hire’ the Creative Suite apps on a month by month basis. A great option for folks who only want to use apps on a project by project basis. Or may only want to use newer features now and then.
Red Giant Software had exciting new releases to showcase including great free tools. Colorista Free provides a simple yet comprehensive interface for After Effects and Final Cut Pro enabling creation and sharing of color profiles via CDLs. Color Decision Lists allow users to share color settings and metadata across a variety of systems.
LUT Buddy allows you to create, read and share LUT profiles directly from After Effects using any color correction effects you want. Color Lookup Tables are similar to CDLs (they do not include all metadata) in that they allow users to share color profiles between different systems, for example between desktop apps like After Effects and high-end DaVinci or Discreet systems. Previously the only way you could save LUTs from After Effects was via the full Color Finesse interface.

Charlie's Angels! 🙂 (courtesy of Michele Yamazaki)
Magic Bullet Grinder helps you get footage from your DSLR into Final Cut Pro timeline easily. They have also utilised their Magic Bullet technology to create some funky and exciting new tools for people who want to make movies on their iPhones and iPads.
Movie Looks allows you to add stylish pre-made “looks” to your iPhone movies, giving them a slick, professional look. Noir Photo provides and amazing level of control when creating cinematic black and white, monotone, or tinted images. It includes fun controls for adding dramatic lighting to your photos and developing them into professional-looking, polished images.
And of course, predictably, the expected unexpected was announced stop-press-style from Apple! The new Final Cut Pro X (Watch the videos, part one and part two) was finally announced at the Supermeet. This brand new version has been completely rewritten from the ground up. With a brand-new 64-bit architecture Final Cut Pro X can now take full advantage of all the RAM you can fit into your Mac, from Macbook Pro’s to high-end desktops, making performance significantly better. Grand Central Dispatch support also improves performance by optimizing the way your processors operate. Both of those features should result in significant speed and workflow enhancements.
Emphasis was put on ingest operations like auto-detection of footage content, for example, it can automatically detect how many people are in a shot, then label and manage the footage accordingly. This happens on ingest, in the background and creates data to help manage and organise footage without the need for manually adding keywords. It also auto-detects color balance irregularities and corrects them on ingest, using Color sync. Once you’ve got footage into the new Browser you can add keywords to clips or even to frame-ranges from within clips, this should make searching and managing content a whole lot easier.
Smart Bins can be created for clips, similar to the Smart Mailboxes from Apple Mail, or Smart Playlists from iTunes. Clips will be included into these smart bins as common data is detected. References to the clips can appear in multiple smart bins without having to create copies of the files. For example, you could have a clip of a person standing on the beach at night, this clip reference can be automatically placed both in the ‘Night shots” bin, the “beach shots” bin and the “One person” bin simultaneously without duplicating the item.
You can even edit your footage while it’s being ingested meaning there’s no need to wait while this is happening, you can get to work straight away . . . . as long as you’re working with disk-based media!
The star of the show for me though is the new Timeline. It looks and behaves like a sexy beast! The ‘Magnetic Timeline’ is so simple a concept that it’s brilliant. As you drag clips around the timeline, other clips automatically shift to accommodate the changes, there’s no need to add new tracks first to accommodate changes, Final Cut does this automatically as and when they are required. The Timeline is now fully native and resolution independent so you can get right into editing your footage straight away, mixing footage from different sources and formats without the need for transcoding,
You can now create Compound Clips which are kind of like After Effects precomposed comps. Select a few clips and group them into one single editable item. This has the benefit of simplifying the edit and making the editing process easier and more logical by reducing clutter in the timeline. I’ll be interested to see how it works practically, whether it renders the compound clips or keeps them live within the edit, very interesting though.
Keyframing motion properties of clips can be done directly in timeline now with a clear, easy to use graph editor. I’m not sure what level of control is available via the graph editor but it certainly looked pretty slick and easy to use. The application of retiming has also been simplified and improved with quick access to commonly-used speeds and the ability to easily create vari-speed effects by dragging on the edges of clips.
The new Auditioner allows yo to collect clips into ‘Audition groups’. These appear in the Timeline like little footage wells. You can sample clips within them using Cover-flow- style toggling of clips and compare results of them directly in the Viewer. This makes comparing clips and making edit decisions so much easier, great if you’re sitting with a client peering over your shoulder.
We didn’t see any plug-in-type effects used during the demo but color matching and balancing now appears to be integrated into the main application functionality. Color Board is a powerful primary and secondary color corrector which allows you to correct color based on channel selections or shapes.
Whats in there looks great but it’s hard to tell what it really operates like from a demo. Apple demo’s are always very slick and worked out to the nth degree. If it is as simple and brilliant as it looks then fantastic but I have some concerns about what’s missing from the list of features though. There was no mention of support for tape-based capturing or EDL support, making me wonder whether Apple are abandoning old technology altogether and relying on the fact that there are enough people using an exclusive disk-based workflow. I must say that most facilities I work in still use tape so I can see this being an issue if the rumours circulating are true.
There was no mention of third party plug-in support either which also concerns me. The third party plug-in developers are often the ones who push the big companies to continuously improve their apps by innovating and really listening to users. It would be a sad day if Apple was to turn it’s back on these pioneers.
So that’s a quick round up of NAB 2011. I must admit I didn’t get to see as much as I’d planned to this year. The jet lagged killed me and I was kept busy at the conference most of the time. But these are the highlights I saw on my travels. As a special NAB promotion I have a discount code for you to get money off my video training workshops here on my website. You can download free movies here and if you like them enough to buy a complete workshop, use this code on checkout. it’s good till the end of April 2011; ATV2B20. Until next year, goodbye Vegas and NAB.